


Adventure Rings is a combination of two rings that inform the wearer about time and place. One ring is a Sundial and the second a Compass. They can be worn on separate hands, or on the same hand. They allow freedom from electronic technology when going camping or on day hikes, keeping by your side in a convenient location... your fingers. You can even get lost in the urban jungle without your electronic devices for all you care. Truth is, you'll never truly be lost while wearing these rings. So go ahead, put these on and journey towards your next Adventure.
INTRODUCTION
Many of us have forgotten how life used to be without our digital counterparts: phones, watches, Fitbits and Fuelbands. In a world where the push for electronic wearables is seen in every corner of the tech market, I decided to bring back a technology as old ancient Egypt.
The Sundial goes as far back as 5,000 BC [1], a technology so revolutionary in its time that countless civilizations were shaped through its use. So much was its impact that its design resonates in many of the watches we wear today. Nowadays, although mostly regarded for its form rather than its function, the Sundial's original purpose still hold true to this day
...telling time.
THE IDEA
Ideation for a ring came in the form of an exploration into my personal likes. A ring is an intimate object, one which holds a meaning sometimes not so visible to others but the wearer. Because I began from this perspective, I started designing a ring only meant for one user, myself.
I listed some ideas for design formulated as questions in my head. Will it surround my passion for music or my love for mechanical engineering? Should it be stylish and reserved, or flashy and eccentric? Whatever it was to be, it needed to have a purpose far beyond aesthetics.
Originally, I began looking at music. But a ring was too small to display a meaningful audio wave or Lyrics so i quickly steeped away from considering it. So I continued on to mechanical Engineering and quickly thought about gears and mechanical components. I really enjoyed the idea of having moving gears on the top of a ring, similar to a skeleton mechanical watch. But the function was missing.
At this point I began considering the form, stylish or eccentric. As part of the iteration process, I would recognize the limitations of 3D printers and the ring would evolve into what came to be the Adventure Rings. A set of rings made not only for me but for every adventurer out there.
ITERATIONS
Iteration #1
My initial iteration centered itself around a gold wedding ring. Its pleasing aesthetics and meaning was a direction I wanted to explore and become the launchpad to successive iterations. I began by designing it in Solidworks. and although the rendered version looked quite appealing, the printed part was indicative of a toy.
Iteration #2
I had originally guess that the filament (ABS) would inform a rather thick ring design due to material stability considerations, but i began to design a distinct ring-body shape when the 3D printed part demonstrated that the filament would allow for a thiner design. The shiny material of a metal gives of a finer look to a similar shape ring printed in plastic. It became apparent that the visual appeal would suffer tremendously with a simplistic design such as a simple wedding band. So I began looking to design more intricate shapes.
While searching for an element of Mechanical Engineering online, I came along a few choices. One was to create a ring in the shape of a spring. and the second to create a rope circle ring reminiscent of cable wires, the third a nut. I decided to pursue the second for aesthetic reasons. One again I headed to Solidworks and then to the 3D Printer.
The printer tried to generating a part that looked like the CAD rendering. Unfortunately, in order to make it more appealing, the part would required a higher thickness, and due to the shape of the "rope", this would cause discomfort to the wearer. The part would have to be further refined. But the shape was promising to be carried onto a future iteration.
Iteration #3
As I continued to search for a mechanical component to inform my design, I began looking at mechanical watches. The idea of gears began to enter my mind once again, and I began thinking of designs, but before putting them into paper the designs needed a sort of practicality. I did not want to create a piece of art without a function.
While walking along the Berkeley Marina during Easter. I stumbled upon what would come to define my final design, a large sundial.
Thinking back at my search for purpose through mechanical watches, it occurred to me that the answer was in front of me all along. The function of the ring would be to tell time, but without the use of electronics. Only the help of the sun and a compass was needed.
Since knowing the location of "North" is a part of the equation when telling time via a sundial, the compass is an integral part of the design. I therefore started searching for small compasses online. I finally went to a hardware store and bought a small compass which I would use to mount on one of the rings. I also began designing different models for how the ring would look like if other models of compasses were available.
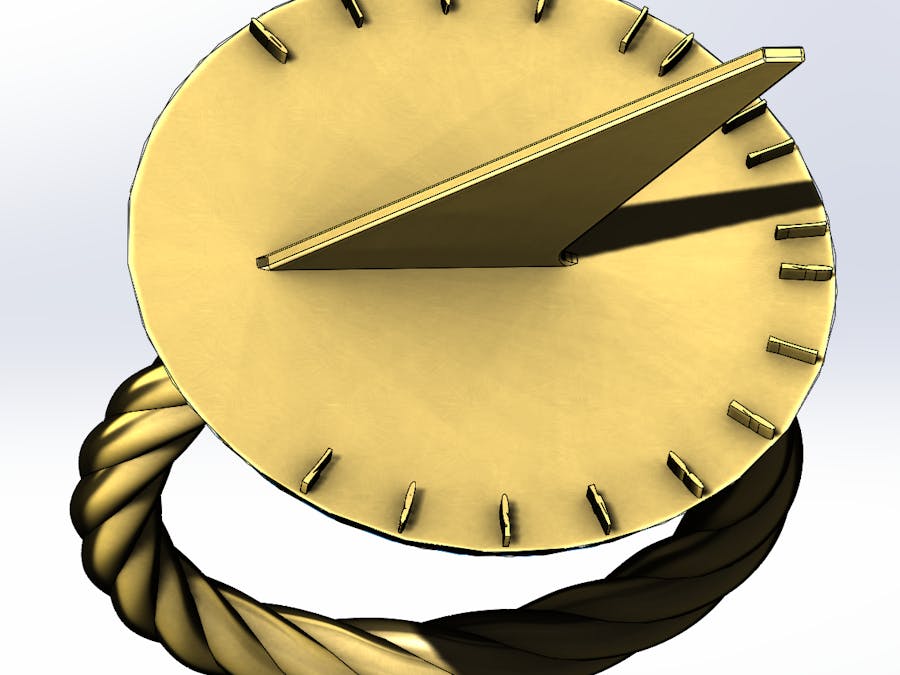
Sundial Ring Design
I dove into the web for help into building a sundial. I quickly learned the basics from pages with instructions on how to put one together [2][3].
The gnomon, also called the style, is the part that stands from the face and creates the shadow which points at the correct time. It should have an angle equal to that of the latitude where the sundial is located. In my case that is 37.5 degrees. This means that the ring will mostly work around this area. Further consideration will be made during future iterations to create a movable gnomon to account for a change in location.
Designing the actual ring in Solidworks was not so straight forward, as multiple features needed to be made in district planes. Maintaining the reference of the small dimensions was probably the most important aspect of the design. The final design looks pretty neat when rendered. I chose bronze as the color to give it a rustic look reminiscent of the bronze era.
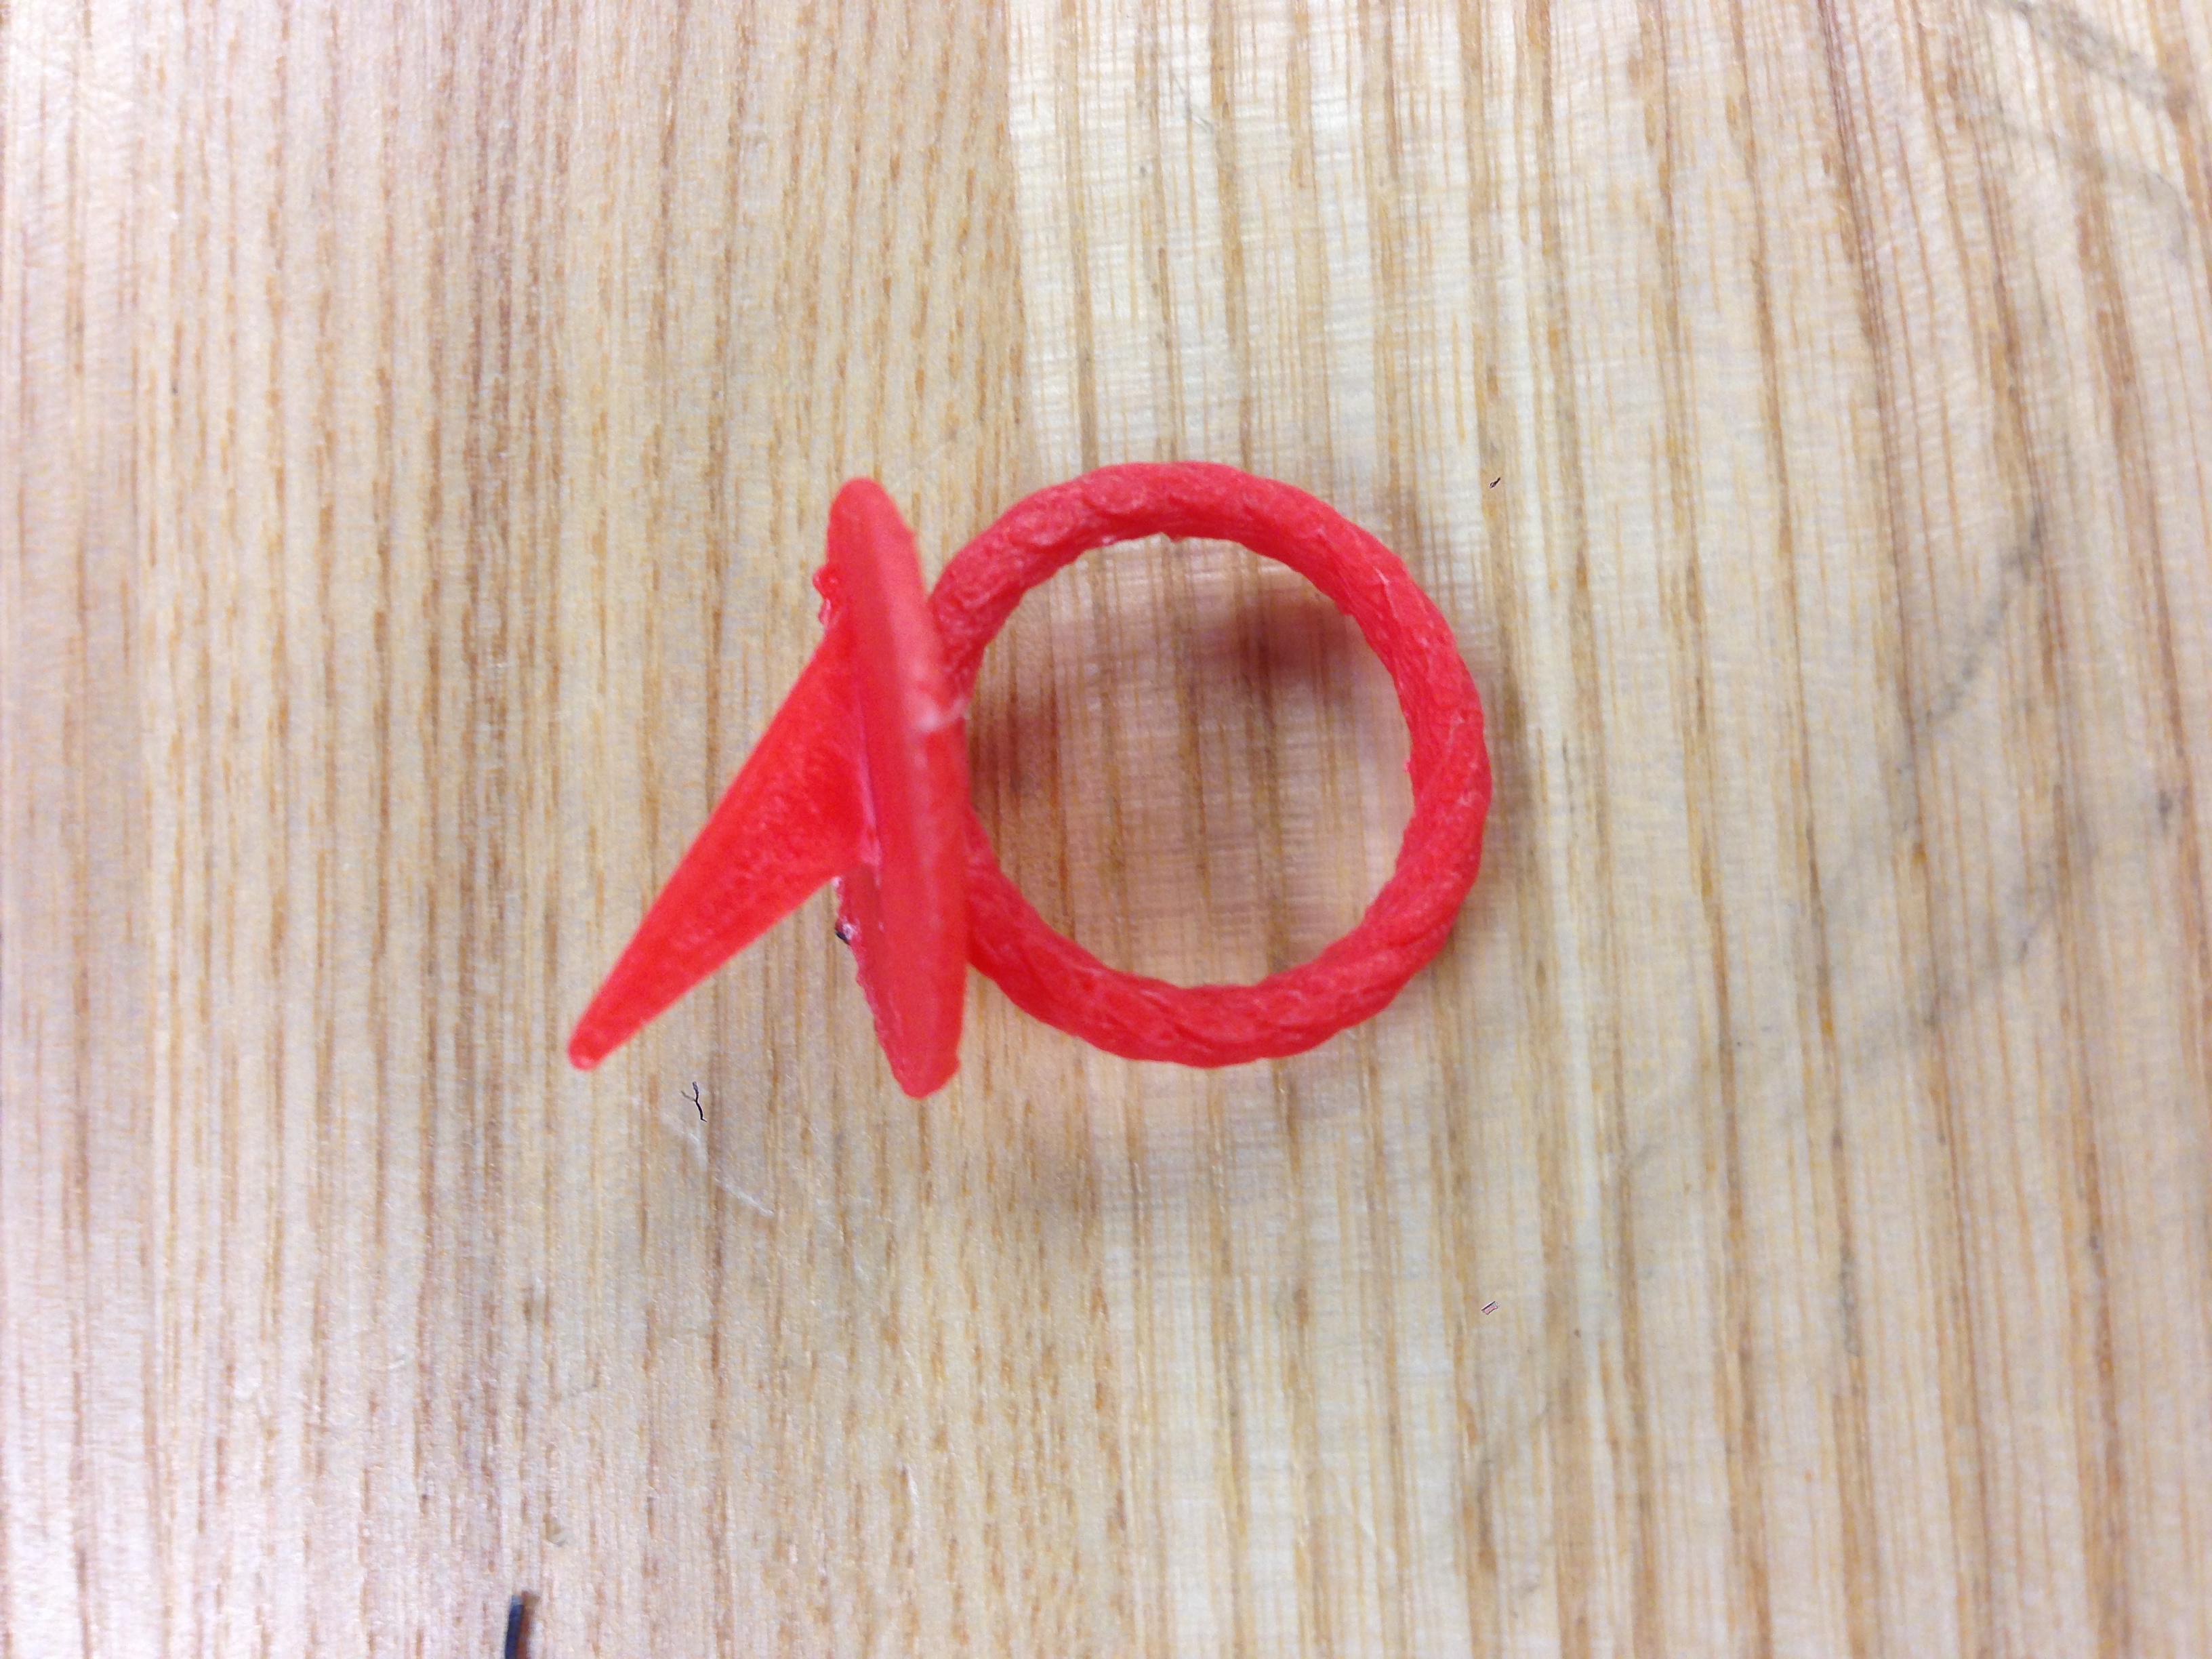
Compass Ring Design
The companion ring to the Sundial Ring is the Compass Ring. It is basically the same Rope cable ring with a plane face where a compass globe lies. It is glued with acetone. I bought the globe for a few bucks in a hardware store.
THE DUO!
The color for the rings are different but they are unified by the design of the rope look for the loop. The rings can be worn in different ways. On separate hands or on the same hand. Whereever the gnomon (dial) points that should be north. First find north on the compass and that should also be where the gnomon faces. So match up north and then look at the shade and where it falls on the dial.
User testing pointed the design of the gnomon towards the sides of the finger. From observation, it was an awkward movement for users to extend their hand out while retracting the arm. This is exactly what one would have to do if the gnomon alinged parallel to the finger. Instead, by designing the gnomon perpendicular to the length of the fingers, we are able to utilize the natural inclination of the body. Closing the hand and bringing it closer to the body (thumb facing user) creates for a motion where ultimately the gnomon points away from the user.
COMPLICATIONS
The small dimensions of the ring and the complexity of its features created a variety of problems for the printer. Any corners with small angles were the most problematic, often causing for the printer to reject the file. The solution...fail fast and fail often, until you fail no more. Printer Jams were common and created for a difficult and time consuming process. Issues with connectivity to the printer were also another time robber. If it is one thing that I have learned when prototyping in 3D printers, that is to keep the design as simple yet as interesting as possible. 3D printers, at least the ones we were using, Afina, were not able to handle the complexity of the design. Ultimaker was a bit better, but it failed to deliver with a blowing jam 3/4 into the print cycle. Repetition and patience was key in the entire printing process.
[1] http://www.accuratesundials.com/site/591582/page/143772
[2] http://hilaroad.com/camp/projects/sundial/sundial.html
[3] http://www.wsanford.com/~wsanford/exo/sundials/old_equat_sundial_setup.html

Comments
Please log in or sign up to comment.