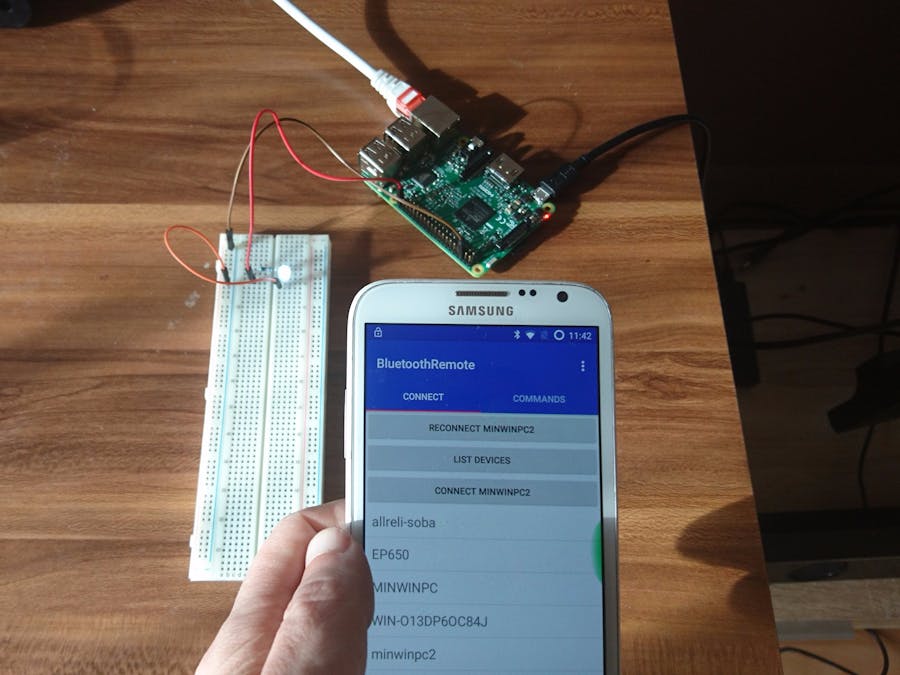
But this time God wants to use his smartphone.
Something I repeatedly need for my Windows IoT based devices is being able to control them directly over Bluetooth from my smartphone. In this example, I create a device endpoint for receiving commands and an Android app to connect and send commands to switch a LED. It represents our controlled goody.
PairingFirst, pair your phone with the Pi. If you are using Pi3, then it already has a Bluetooth radio on board. Select your phone in this list and confirm code here and on your phone. It's also possible pairing devices programatically, however, to keep things secure, it would require at least some kind of button to turn discovery on for a short time period (otherwise just anyone in Bluetooth range could pair with your device). This web interface is both, a convenient and secure way to pair.
For the device side, I used Microsoft's Bluetooth Chat example as a starting point. Sadly, Microsoft seems to be putting less effort in documentation than it did in the past. Instead they provide a lot samples.
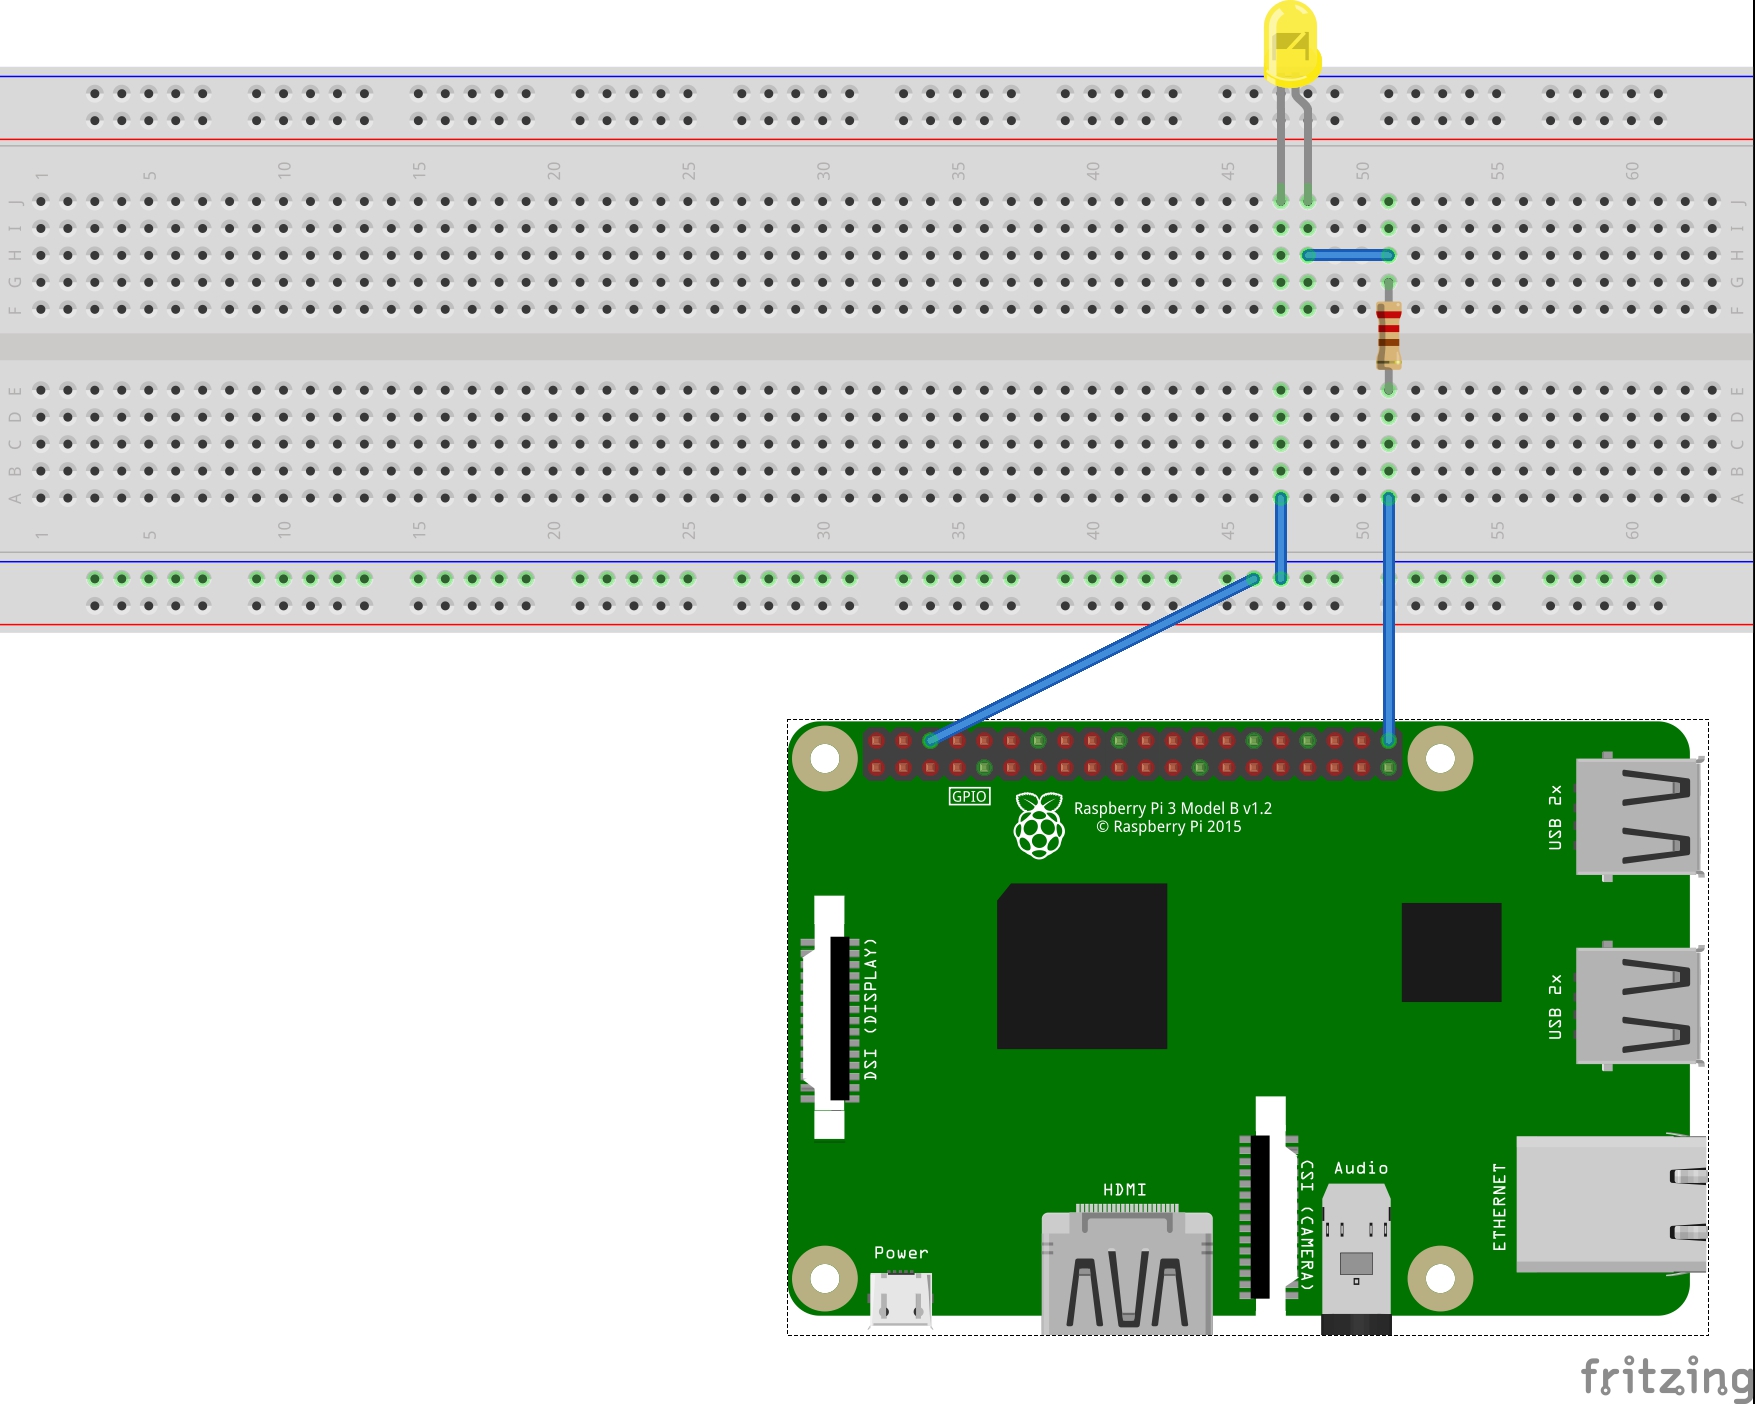
As soon our app starts, we first initialize all components. I have wired my LED to pin 21 and am using it in output drive mode.
public MainPage()
{
   var gpioController = GpioController.GetDefault();
   lightPin = gpioController.OpenPin(21);
   lightPin.SetDriveMode(GpioPinDriveMode.Output);
   this.InitializeComponent();
   this.InitializeRfcommServer();
}
We first setup our device for advertising its capabilities by using a dedicated UID for our service. It has to be later on the same Android-Remote. It's like a unique name for our service, allowing both applications to recognise each other.
rfcommProvider = await RfcommServiceProvider.CreateAsync(RfcommServiceId.FromUuid(Constants.RfcommDeviceServiceUuid));
After receiving a connection, the server starts waiting for messages in an infinite loop. LoadAsync() blocks the thread until it receives data. I very much like the protocol specification from Microsofts example: the first four bytes are always an integer and represent the length of the following message. Allowing us to read the exact incoming length of data.
uint readLength = await reader.LoadAsync(sizeof(uint));
...
var currentLength = reader.ReadUInt32();
       // Load the rest of the message since you already know the length of the data expected.
       readLength = await reader.LoadAsync(currentLength);
...
The command is sent as a string simply because its easier to read them for human eyes, then some integer code values :-) A "on" command turns the light on, and "off" turns it off. Simple as that.
string message = reader.ReadString(currentLength);
if (message.Equals("on", StringComparison.CurrentCultureIgnoreCase))
{
   lightPin.Write(GpioPinValue.High);
}
else if (message.Equals("off", StringComparison.CurrentCultureIgnoreCase))
{
   lightPin.Write(GpioPinValue.Low);
}
While receiving connection, I send a short text message back to client, indicating if light is currently on or off:
var value = lightPin.Read();
if (value == GpioPinValue.High)
{
   SendMessage($"Hi! Light is curently on!");
}
else
{
   SendMessage($"Hi! Light is curently off!");
}
SendMessage follows the same pattern as reading. I check the length of text to be sent and send an integer at beginning, indicating its length.
private async void SendMessage(string message)
{
   ...
   writer.WriteInt32((int)message.Length);
   writer.WriteString(message);
   await writer.StoreAsync();
   ...
}
The client side follows the well written Bluetooth sample provided by Google. I expose their BluetoothService with the singleton pattern.
public class BluetoothService {
 public static final UUID SERVICE_UUID = UUID.fromString("34B1CF4D-1069-4AD6-89B6-E161D79BE4D9");
 private static final String TAG = "BluetoothService";
 private static BluetoothService instance = new BluetoothService();

 ...
 public static BluetoothService getInstance() {
  return instance;
 }
 ...
}
After the ConnectThread is done with connecting to the service and retrieving a connection socket, I instantly start the ConnectedThread.
public void run() {
 try {
 // Connect to the remote device through the socket. This call blocks
        // until it succeeds or throws an exception.
 mmSocket.connect();
 } catch (IOException connectException) {
 // Unable to connect; close the socket and return.
 try {
 mmSocket.close();
 } catch (IOException closeException) {
            Log.e(TAG, "Could not close the client socket", closeException);
 }
 return;
 }
// The connection attempt succeeded. Perform work associated with
    // the connection in a separate thread.
 manageMyConnectedSocket(mmSocket);
}
private void manageMyConnectedSocket(BluetoothSocket mmSocket) {
 if (mmSocket.isConnected()) {
 mConnectedThread = new ConnectedThread(mmSocket);
 mConnectedThread.start();
 }
}
The rest is similar to device code, except that it is in Java. Also, Java knows no unassigned integers. Which is no problem for us, as we still get enough positive values. A handler notifies the UI of incoming messages. This could be also used to read initial values, such as "light is on", to set up the UI's initial state or update it when the device does something on its own.
public void run() {
 // Keep listening to the InputStream until an exception occurs.
 while (true) {
 try {
 // Read from the InputStream.
 byte[] buffer = new byte[4];
            int read = mmInStream.read(buffer);
            if (read < 4) {
 this.cancel();
 }
 int dataLength = ByteBuffer.wrap(buffer).getInt();
 buffer = new byte[dataLength];
 read = mmInStream.read(buffer);
            if (read < dataLength) {
 this.cancel();
 }
           String command = new String(buffer);
 // Send the obtained bytes to the UI activity.
 Message readMsg = mHandler.obtainMessage(
                    MessageConstants.MESSAGE_READ, -1, -1,
 command);
 readMsg.sendToTarget();
 } catch (IOException e) {
            Log.d(TAG, "Input stream was disconnected", e);
            break;
 }
    }
}
The write method is similar to its C# counterpart too. Cool, hmm?
public boolean write(String command) {
 try {
 // Allocate bytes for integer indicating size and message itself
 ByteBuffer bb = ByteBuffer.allocate(4 + command.length())
                .putInt(command.length())
                .put(command.getBytes());
 mmOutStream.write(bb.array());
 mmOutStream.flush();
 // Share the sent message with the UI activity.
 Message writtenMsg = mHandler.obtainMessage(MessageConstants.MESSAGE_WRITE, -1, -1, command);
 writtenMsg.sendToTarget();
        return true;
 } catch (IOException e) {
        Log.e(TAG, "Error occurred when sending data", e);
 // Send a failure message back to the activity.
 Message writeErrorMsg =
 mHandler.obtainMessage(MessageConstants.MESSAGE_TOAST);
 Bundle bundle = new Bundle();
 bundle.putString("toast",
 "Couldn't send data to the other device");
 writeErrorMsg.setData(bundle);
 mHandler.sendMessage(writeErrorMsg);
 }
 return false;
}
That's it! Those are the key points. Detailed code is attached further below and the entire application uploaded to my GitHub account. If you got any questions or suggestion (or just want to say hi!), feel free to post below!


Comments
Please log in or sign up to comment.