Unlock the power of Arduino with our exciting DC Motor Control Project! In this guide, we'll show you how to use an L293D Motor Driver Shield to seamlessly manage the direction and speed of a single DC motor. This project is perfect for beginners and enthusiasts interested in robotics and automation. Whether you're planning to create a future robotics endeavor or just exploring, this project is a great starting point.
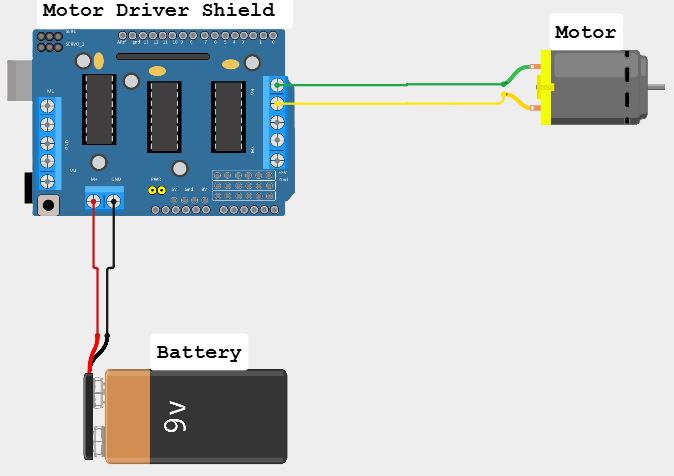
1. Wiring Diagram- Motor Driver Shield: Connect your single motor to the terminals labeled M1 on the motor driver shield.
- Power Supply: Connect the battery pack to the power input terminals on the motor driver shield.
- Arduino Uno: Plug the L293D motor driver shield directly onto the Arduino Uno.
- Upload Code: Connect the Arduino to your computer, open the Arduino IDE, and upload the provided code.
- Test and Debug: Power on the motor and test its responsiveness. Adjust the code or wiring if necessary.
2.Explanation- Motor Control: The
AF_DCMotor class is used to control the motor connected to the motor driver shield. - Direction: The
motor.run(FORWARD) and motor.run(BACKWARD) functions control the motor's rotation direction (clockwise and counter-clockwise, respectively). - Timing: The
delay() function is used to run the motor forward and backward for a specific amount of time.
Demonstration


_ztBMuBhMHo.jpg?auto=compress%2Cformat&w=48&h=48&fit=fill&bg=ffffff)


Comments
Please log in or sign up to comment.