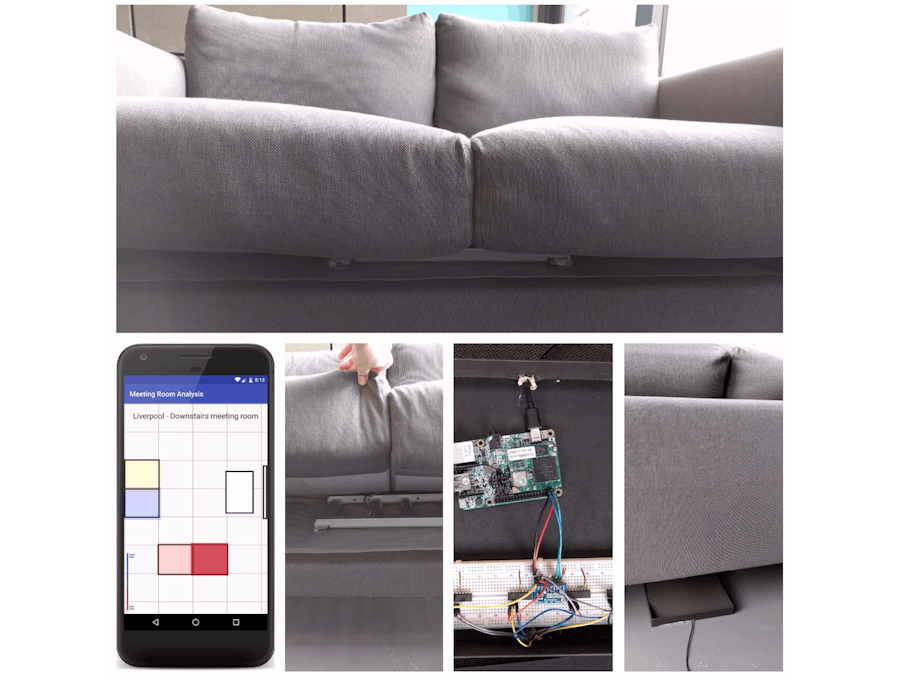
This project is about highlighting the use of seats and meeting rooms. I wanted to bring to peoples attention how rooms are used and how often seats are sat in. I also wanted to bring a bit of psychology into the picture so that people are conscious about the seat they are choosing to sit in and what the history of that seat is. To then perhaps see if this influences future choices.
Benefits include
- Optimised use of meeting rooms in enterprise environment
- Highlight meeting room use, reducing waste
- Engage employee's in meeting room booking systems
- Fun!
A further bonus is, now that the data is gathered, it can be used for other Data Science purposes. For example: combining it with calendar data to see if meeting rooms are actually used.
The project was decided to be made as I realised there was no data available to validate or dispel my assumptions. Creating something ubiquitous that could gather data but not affect the current behaviour was why seat weight change data was chosen over some other medium like a camera object tracking.
The measurements work by being placed under the seat cushions of the meeting room. I have made two variants that allow for individual single seats and a wider variant that can measure something like a couch.
Individual load cell for an individual chair:
Four load cell rig that can measure a couch/sofa:
A couch/sofa is an interesting seat to measure as it could have 1,2 or 3 people sitting on it. Therefore data from four separate sensors needs to be investigated to calculate how the seat is being used.
I'd recommend you stock up on a lot of breadboard wires, getting your wiring colour coordinated really helps debugging later on, try to resist the temptation of just grabbing the nearest wire of any colour.
Wiring is quite straight forward, following the fritzing diagram allows you to wire up as many load cell (weight sensors) as you wish, at a maximum of 4 per ADS1015 board.
If you do choose to use the sensors from a wii fit, you will need to do a bit of hacking of the wires together, I taped extension wires on to the end of my sensors to give them a longer reach.
Once data has been gathered it is sent to the cloud for analysis. This is done using Google Cloud IoT Core which collects the data using MQTT, it is then passed through a Pub/Sub model to Cloud DataFlow and eventually to a BigData database.
Now the data is in the cloud we can run inferences on it to understand who is sitting where in a meeting room. Once this model is created it is published to Firebase realtime database.
A companion app is used to show the layout of the meeting room and a heat map of the most active seats for that room over the last 8 hours. With each seat glowing from a range of dark blue (not sat on recently) to white (someone has just left that seat).
1) Choose your load cell or rig set up: for an individual chair, or for a couch/sofa.
2) Follow the wiring diagram to wire the LoadCell up to the Operational Amplifier
3) Follow the wiring diagram to wire the Op-Amp to the Analog to Digital Converter (ADS1015)
4) Follow the wiring diagram to wire the ADS1015 to the I2C inputs of your AndroidThings board
5) Create a project on Google IoT Core, I recommend starting here
6) Setup the Android Things seat-monitor IoT Core configuration to match what you just created
7) Deploy the `seat-monitor` application to your Android Things device
8) When your rig is in the correct position (inside the chair or sofa), push the GPIO button determined here to reset the weight measurements to account for the weight of the cushion (or hardcode this if the weight is known beforehand)
9) Create a new firebase project to allow the companion app to use the realtime database. The project can be empty, the companion app only requires you setup the google-services.json (which it will say it is missing if you fail this step).
10) Use the companion app to view data from your meeting room. Note that this is currently set up for Liverpool downstairs, and you may want to change the blueprint you use for the rooms and update the grid lookup table, to make sure your chairs are position correctly.
______________
Side note 1: This project has allowed me to create and release a new driver for AndroidThings. The ADS1015 Analog to Digital Converter driver.
Side note 2: When first starting this project. The hardware was not working as expected. To try to figure out what was happening I went and got an Arduino board where I could try some demo code someone else had written just to sanity check that my wiring was correct (and therefore the problem was in my software). I highly recommend this approach.


Comments
Please log in or sign up to comment.