The timer was developed to automate turning off an oil diffuser after a set period of time. Hence the time periods selected of 30, 60, 90 and 120. These periods are set in the programme and could be changed to suite the intended use.
Operation
The time period is selected by pressing the Select button which will circulate through the pre-sets. If held down it will move on every half second.
When activated by pressing the Go button, the relay is triggered through a transistor as the level of current drawn by the coil is too high for the maximum current deliverable by the Nano.
After the selected time period, the output pin is changed to LOW turning off the relay and hence turning off the attached device. It is also possible to turn the device off early by pressing the Stop button.
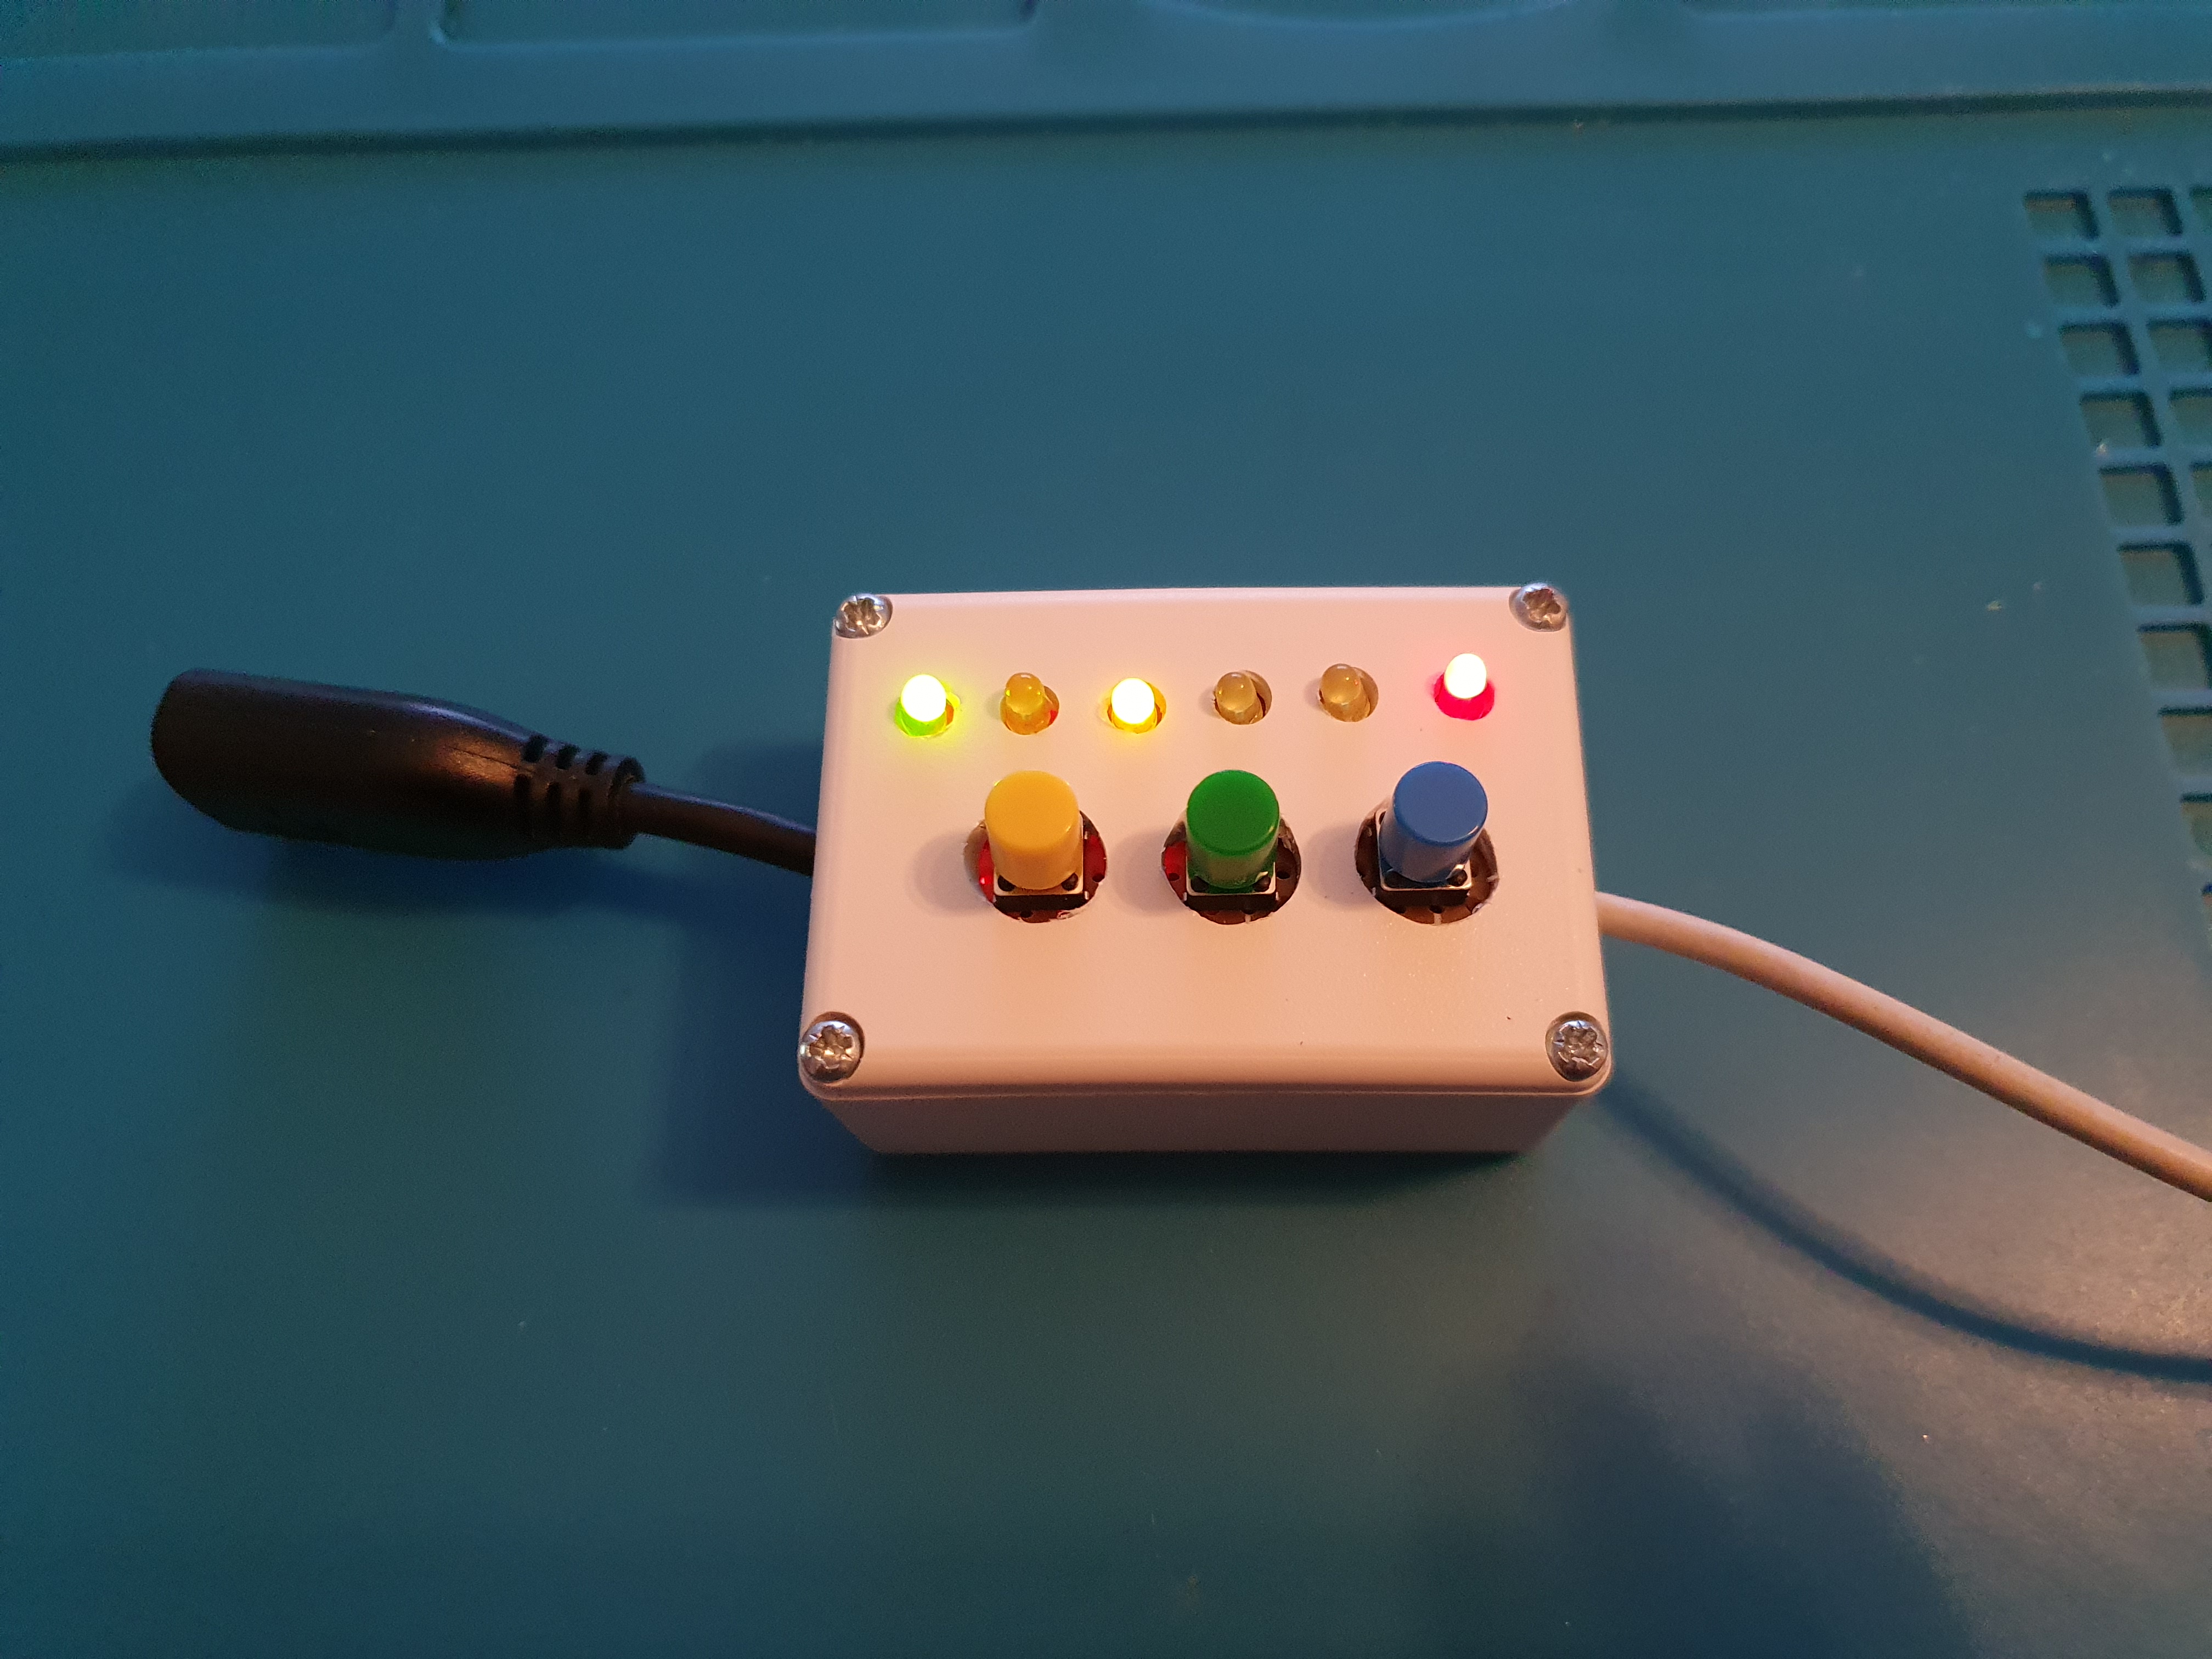
In the project picture I have shown a test device of a simple LED fed by a 9v battery. For my built application, picture below, I have taken the feed from the same supply used to power the Nano, as my diffuser runs off the same voltage, a USB power supply.
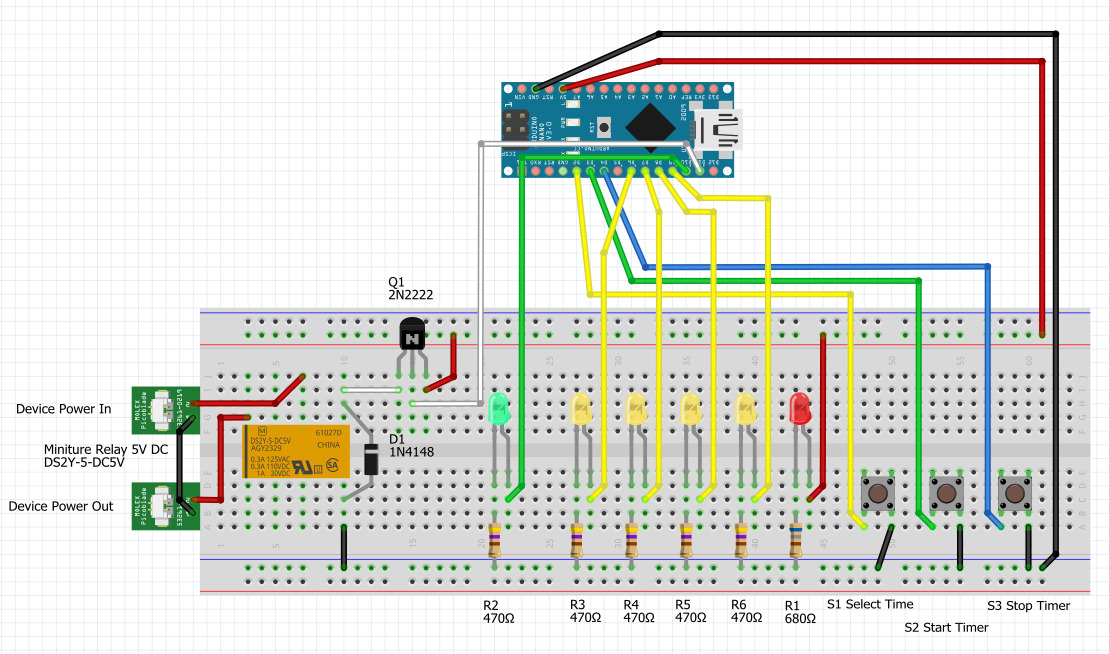
CircuitThe circuit is straightforward.
The 3 momentary switches connect ground to pins D2, D3 and D4 when pressed. The pins are set to INPUT_PULLUP, hence are normally HIGH and go LOW when a button is pushed.
The red power LED is connected across the power supply in series with a 680 ohm resistor to keep power consumption low.
The yellow time indicator LEDs are connected to pins D6 to D9 and in series with 470 ohm resistors to restrict current draw. I have used low current LEDs but if your LEDs are too dim then you can reduce the value of the resistor.
The green active light is connected to pin D10 and a 470 ohm resistor.
Finally, pin 11. The current drawn by the coil of the relay is greater than the maximum 40MA that the pin can supply. Hence, this is connected to the base of a PNP transistor, the collector of which is connected to the +ve supply and the emitter to the relay coil. When high, this causes the transistor to conduct activating the coil, and only draws a small current from the pin.
The diode across the relay coil is good practice. It does not conduct while the coil is active, as it is in the reverse direction to the supply, but when the supply is cut to the coil it will absorb the flyback spike generated.
The programThe variable timerLength is used to store the selected duration. The bool timerActive records if the timer is current active.
When turned on, the duration defaults to 30 minutes and WaitForStart() is called. This uses a while loop to wait for the Start button to be pressed. In the loop, the program also checks if the Select Time button has been pressed and, if so, will advance the timerLength turning the time indicator LEDs on and off as appropriate. If the current time is 120 minutes then it circulates back to 30 minutes.
Once Start is pressed, the timerActive flag is set to true, the startTime variable set to the current millisecond counter (the number of milliseconds since the Nano was turned on) and the duration variable calculated based on the number of milliseconds in the selected duration.
The Active LED is turned on and output to the relay transistor set to HIGH to turn the relay on. Program flow then returns to the loop.
The loop includes a delay(1000) statement so loops every second. In each loop the programme checks if the Stop button has been pressed, or if the elapsed duration is greater than or equals the set duration. If either, then the output pin is set to LOW turning off the relay. timerActive is also set to false so that the whole process starts again.
Note that all variables and calculations relating to milliseconds are unsigned longs to cater for the large numbers that are involved.
millis() RolloverAs indicated, millis() return the number of milliseconds that the processor has been running as an unsigned long. The issue is that after about 50 days the number exceeds the type's capacity and resets to 0. This is not an issue unless the timer is active when this happens and, if it is it will stop as soon as rollover happens as the difference between the start time and the current count will be about 50 days!
If this is a major issue, you could force the Nano to reset after, say, 40 days when the timer is not active, by connecting a spare output pin to the reset pin. In the first line of setup() set this pin to HIGH, as the reset pin activates on low. Set a variable to 40days in milliseconds and check if this has been reached in WaitForStart(). When reached or exceeded, set the output pin to LOW and the Nano will reset.
RelayNote that the relay that you use may have a different pin configuration to that shown in the circuit. The one I used connected the canter pin to the end pin when active. It is a good idea to check the relay you are using before wiring.


Comments
Please log in or sign up to comment.