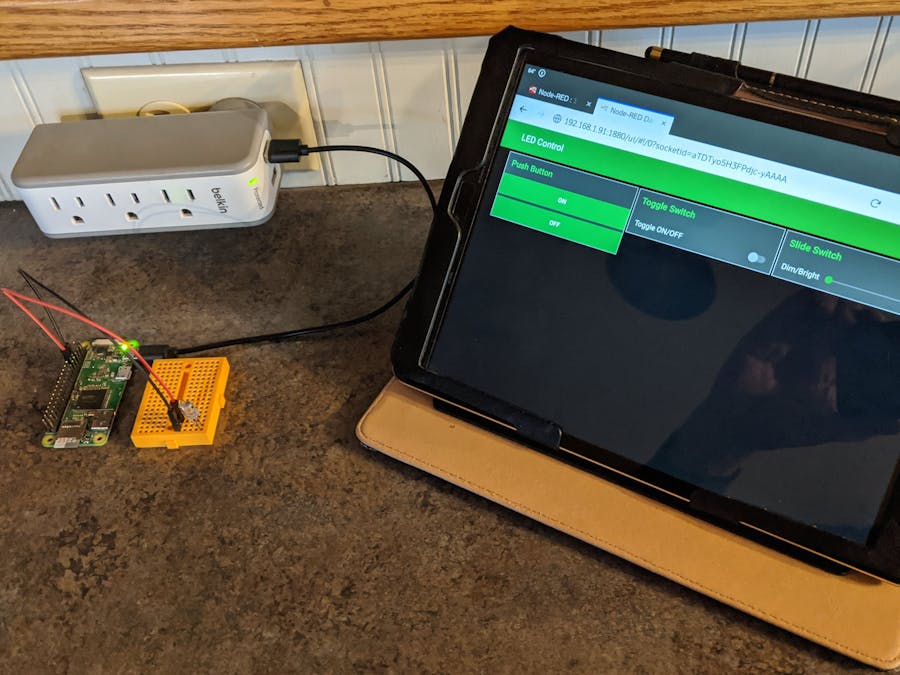
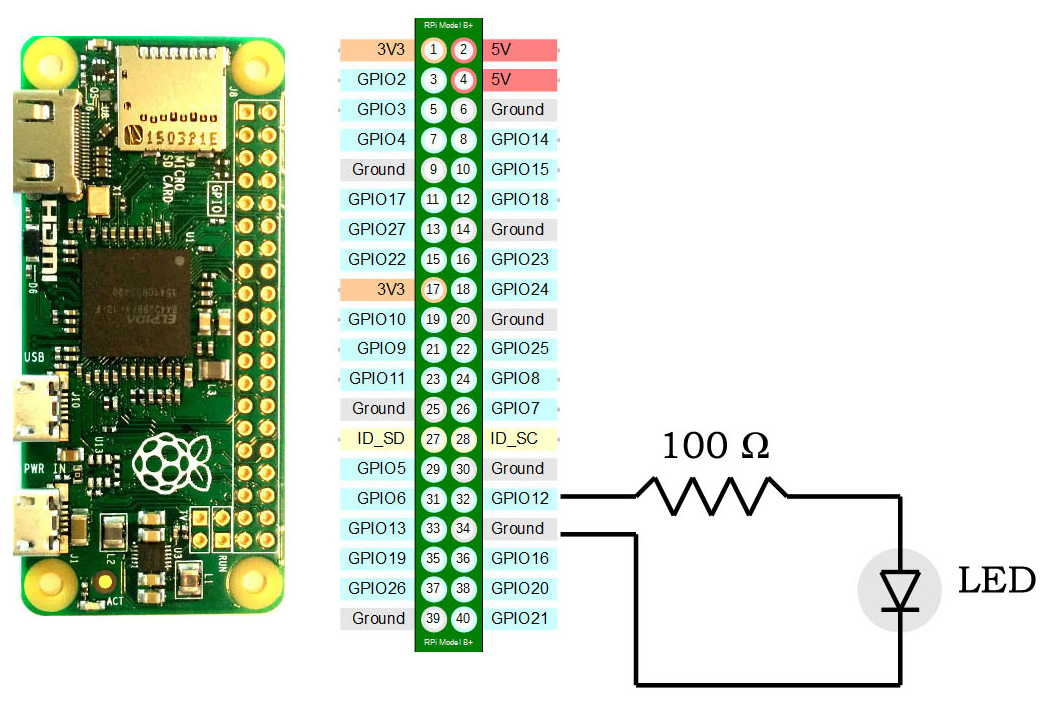
I chose this project to familiarize myself with some common steps I will be needing to repeat for some future projects using the raspberry pi zero w. I think the best part of this project is that it is not necessary to have a keyboard, mouse, or monitor connected to your pi to get it fully functional and useful. You will need a PC or laptop to download the Raspian operating system that will be installed on the sd card and a program called Putty that will allow you to talk with the pi without needing a monitor.
With Node-red up and running you will be able to remotely access the pi and have it turn on an led. With a little playing around with the fundamental ideas presented, you could turn this into a more sophisticated project.
1. To setup an sd card with the latest version of Raspian- 1a. Download Raspberry Pi OS with Desktop. You do not need the one with all the additional software. Size is 1175 MB so may take awhile to download.
- https://www.raspberrypi.org/software/operating-systems/
- 1b. Download Etcher
- https://etcher.download/
- 1c. Install Etcher on pc and follow simple 1-2-3 instructions. It is not necessary to format the sd card first.
- 2a. With the sd card plugged into the pc usb port, open Notepad in Windows.
- 2b. Start a new note and save that empty notepad file as ‘ssh.txt’ in the Boot folder of SD card. ( It will be the same folder that the sd card opens into.)
- 2c. Rename that ‘ssh.txt’ and remove.txt. This way you will get a file named ‘ssh’ without any extension.
- 3a. Using Notepad or something similar. Start a new document and paste the following into it
country=US
ctrl_interface=DIR=/var/run/wpa_supplicant GROUP=netdev
update_config=1
network={
ssid="your_wifi_id"
psk="your_wifi_password"
key_mgmt=WPA-PSK
}- 3b. Now save the Notepad file into the Boot directory of the pi and give it the name.
wpa_supplicant.conf- 3c. Be sure to keep the file ext as.conf and not.txt.
NOTE:
- You will be prompted to confirm the extension change. If you do not get a prompt to change the extension you may have to go to Organize > Folder and search options > View and scroll down and uncheck 'Hide extensions for known file types' before you are allowed to change the extension.
NOTE:
- For this simple led project you can use most any USB port on a pc or laptop, but for anything else a USB charger with at least 1 amp of 5vdc power will do nicely. Always check your specific rpi board and project specs to be sure.
- 4a. Connect a USB cable to the PWR IN USB port on the rpi zero w.
- 4b. Wait a few minutes for the rpi to boot up and the green led to stop flashing.
NOTE:
- If all has went well with the above so far, the rpi will be connected and signed in to your local network.
- 5a. Download Putty from https://www.putty.org/
- 5b. On the opening screen of Putty enter 'raspberrypi.local' into the Host Name, make sure the Port is 22 and SSH is checked, hit Open.
NOTE:
- If you have problems getting Putty to find the pi try entering just ‘raspberrypi’ If this fails also, you will have to get the ip address of the pi from your router.
- 5c. Enter for id "pi" and enter for password "raspberry"
- 5d. Change your pw if told to do so.
- 6a. With Putty still open and signed in copy/paste or type
sudo apt-get update_config- 6b. Copy/paste or type
sudo rasp-config- 6c. Navigate down to Interface Options
- 6d. Navigate down to Remote GPIO and Enable it.
NOTE: For reference see https://nodered.org/docs/getting-started/raspberrypi
- 7a. With Putty still open and signed in copy/paste or type
sudo apt install build-essential git- 7b. Copy/paste or type
bash <(curl -sL https://raw.githubusercontent.com/node-red/linux-installers/master/deb/update-nodejs-and-nodered)- 8a. Copy/paste or type
sudo systemctl enable nodered.serviceNOTE:
- At this point it is assumed that the rpi is powered up, the rpi has connected to the local network, and that Node-red has been automatically started and is waiting for your input.\
- 12a. Open up Putty again and sign into the pi.
- 12b. Copy/paste or type
ifconfig- 12c. look for the wlan 'inet' ip address
- 13a. Open a browser on your pc or laptop
- 13b. Type into the url bar 'youripaddress:1880' it should look similar to 192.168.1.91:1880
- 13c. Navigate to Menu > Manage Palette > search for node-red-dashboard and install it.
- 14a. Navigate to Menu > Import
- 14b. Go to the CODE section of this article copy and paste it into the Import nodes window you have opened (you should be able to right click and paste it.)
- 14c. Hit Import
- 14d. The blue bubbles on the nodes mean that that nodes have not been deployed yet, so deploy them by depressing the Deploy button in the upper right corner.
- 15a. Select the dashboard.
15b. Launch the dashboard.
16. Success
If all went well up to this point you should be able to remotely control the led lamp on your project board. You can use any device on your home network that has an internet browser.
I recommend you play around with the available nodes to change this project into one that serves more function than turning an led on or off. It should give you a general idea of the potential of using Node-red with your projects. With the appropriate power source and a few minor changes this could have just as easily been turning a relay on and off. Then you will have real control!


Comments
Please log in or sign up to comment.