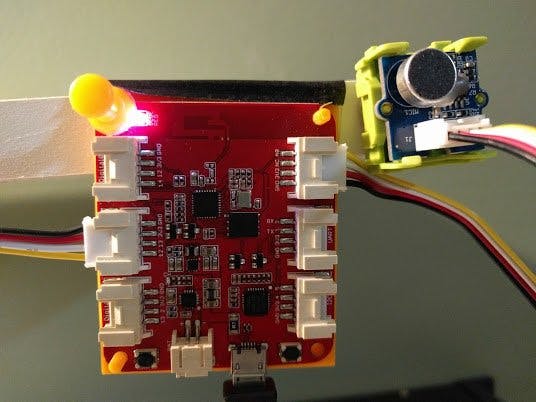
I’ve bought and used many items from SeeedStudio over the past few years. I really like their Grove components and Grove Starter Kits for various platforms. I have one for the Arduino UNO and about a year ago, bought one on Kickstarter for their new platform called Wio. What intrigued me at the time is the boards are configured by a smartphone app and are controlled by a REST API – “3 Steps. 5 Minutes. Build Your Own IoT Applications!” I got the Wio Link Deluxe kit and played around with the board, the Grove sensors and the App.
Of course, I quickly learned, it is 5 minutes to IoT if you are content to send manual HTTP calls to the board. In order to automate the process, you have to write some code.
MotivationI’m not much of a coder. I’ve dabbled in a number of languages over the years and recently settled on JavaScript as my main language. There are a number of reasons for this, but near the top is the Node.js (Nodejs.org) and npm ecosystem. Along the way, I discovered Node-Red (nodered.org), a graphical flow tool written to run under Node.js that is extensible using JavaScript. This ongoing project is an opportunity to work on a number of my desired skills.
HardwareThere are currently three versions of the Wio – The Wio Link, Wio Node and Wio Core. The Wio Link was the first version launched on Kickstarter. It has connectors for up to six Grove modules. The Wio Node is smaller (about ¼ the size of the Node) with connectors for two Grove modules. The Wio Core is even smaller with no dedicated Grove connectors—just bare solder pads to hardwire your components. It’s about ½ the size of the Node (in fact, one is used as the brains of the Node).
These are very affordable boards with the Link selling for around $14 USD and the Core for less than half that.
Basic SetupThese are the basic steps to recreate this:
- Setup your Wio board through the Wio App.
- Configure and attach an input sensor that returns an integer value (I used a Sound Sensor).
- Configure and attach an output that has a color gradient. An LED Bar or LED Strip can both work.
- Make sure you have Node.js, npm and Node-Red installed. (If you have a Raspberry pi, Node-Red comes preinstalled on Raspian, but you will need to install npm to get additional Nodes.)
- Install the Node-Red Wio Nodes from npm (npm install node-red-contrib-wio-seeed).
- Clone my GitHub repo to get the new and updated nodes (https://github.com/potnik/node-red-contrib-wio-seeed).
- Copy the folders with my version of wio_config, wio_ws2812 and the wio_ledbar nodes to your node home directory. -- (On Windows this would be %AppData%\npm\node_modules\node-red-contrib-wio-seeed, On Mac it would be ~\ node_modules\node-red-contrib-wio-seeed).
- Open the flows folder from my repo and copy the text from the wio-sound-ledbar-ledstrip-flow.json file.
- Open a command line and start Node-Red. Navigate to localhost:1880 to view the Node-Red UI.
- From the right-side menu, choose Import, Clipboard and paste in the text from the flow and save. You should now have a flow matching mine.
- Configure your sensor node and the LED Strip node.
- Deploy the flow.
The Wio boards are configured using an App available for both Android and iPhone. Initial setup of your Wio is beyond the scope of this project, but is documented here: http://wiki.seeed.cc/Wio_Link/
Once your boards are setup, you can go into the app and configure your sensors. This is done by choosing your board from the list (if you have more than one).
On the next screen, you find the Grove modules you want to configure and drag them to the appropriate slot. Once this is done, you can click a button to update the firmware of the board.
Next, go to the dropdown menu and choose API. This screen will list the available API endpoints. Choose the API that takes an LED count and a color string:
Hit POST and the LED Strip will turn all Red.
Cool, but after a half a dozen manual posts, kinda dull. Time to automate. Enter Node-Red. Here is one of the flows I used for Node-Red:
In this flow, there is an Inject node that is configured to run every second. The Sound Sensor node is connected to the Grove Sound Sensor and reads the sound level and exports a value from 0 - ~600. The Sound Level node is a function node that takes the sound level and converts it to a color message for the LED Strip. The Sound Level Output node is a debug node used to verify the output from the function. Debug nodes can be turned off or removed for production flows.
There are 30 LEDs on the Grove LED Strip. My function caps the sensor reading at 300 and divides by 10. Values up to 15 are low and colored green, mid values are yellow and high values (above 250) are red. You can add any colors or gradients you want just by parsing the msg.payload from the sensor.


Comments
Please log in or sign up to comment.