I have a Raspberry Pi (RPi) dedicated to controlling my 3D printer using OctoPrint (https://octoprint.org/). Since printing can sometimes run for hours, I wanted some active cooling on my pi, but only when the RPi exceeds a set temp.
I found this article some time ago for inspiration:
https://hackernoon.com/how-to-control-a-fan-to-cool-the-cpu-of-your-raspberrypi-3313b6e7f92c
Recently, I finally had a few minutes to actually wire it up and deploy the code to my printer computer. One problem with waiting: the Raspbian OS of the RPi has evolved, so the code from the post I was referencing needed to be rewritten.
I also found that the original code tended to cycle the fan too often. One way to avoid this is to change the time between temperature checks from 5 seconds to something more. I chose instead to add a temperature range, so the fan would cool the computer to a lower temp and then wait for a higher temp to turn back on (in my case 38C and 42C instead of a single temp of 40C).
The other thing I had to change was the method for auto-running the script on startup. The official OS for the Raspberry Pi is Raspbian which is based on Debian Linux. Debian seems to have deprecated the method in the article, so I went with this method: https://www.dexterindustries.com/howto/run-a-program-on-your-raspberry-pi-at-startup/#systemd. I'll lay it all out below.
Hardware SetupThe Raspberry Pi has 40 pins that can be used to interface to other hardware.
I've used three of these for this project:
- 5v power
- Ground
- Pin 18
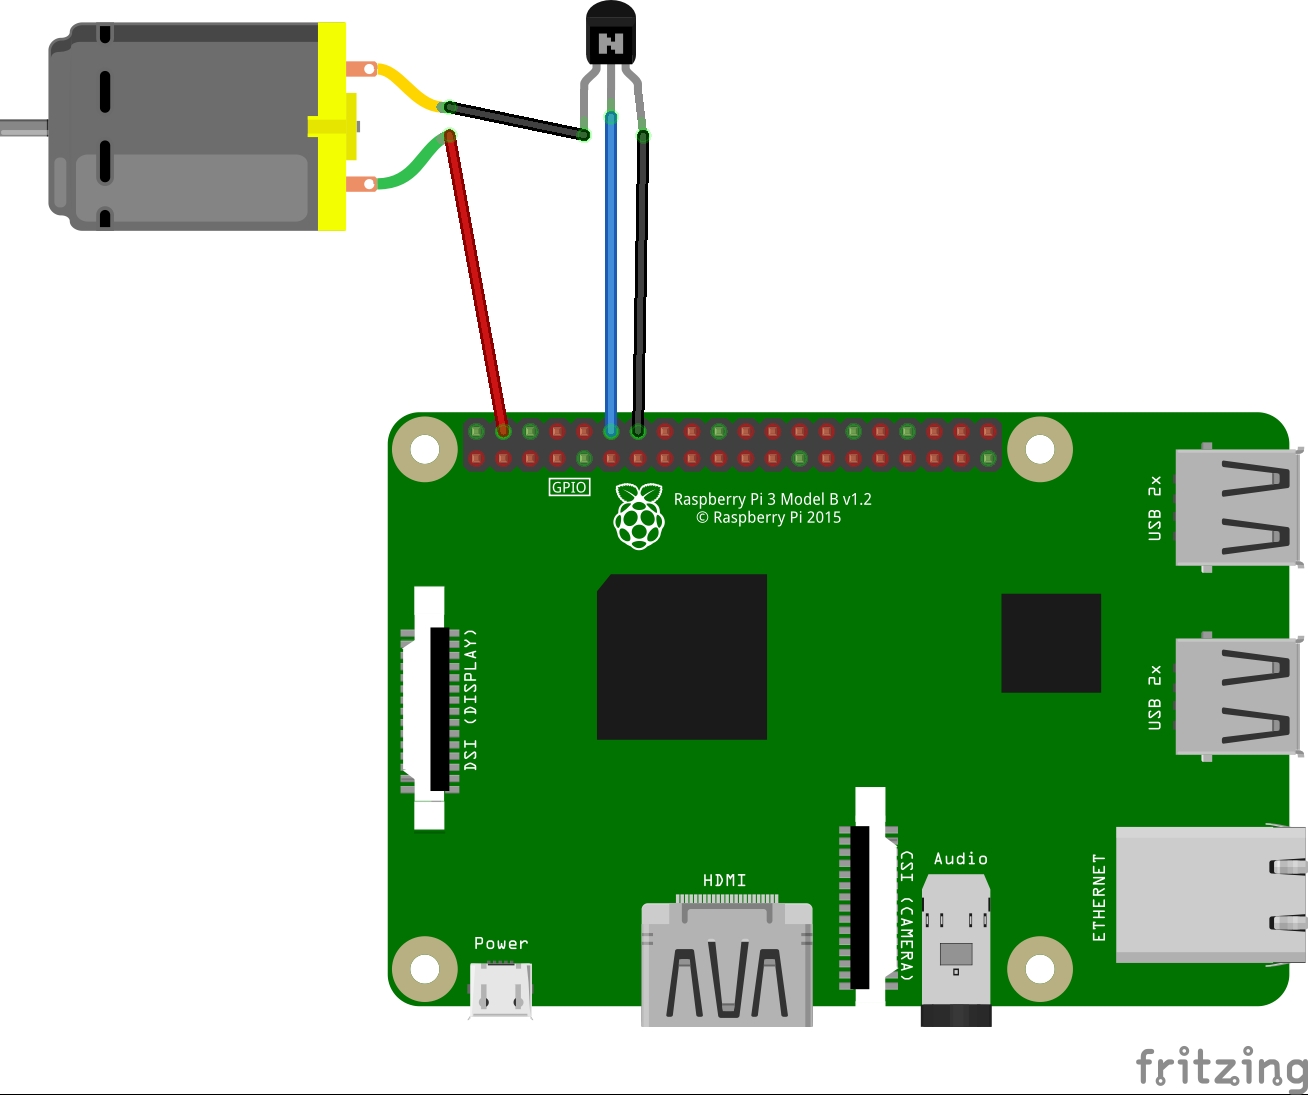
The wiring is pretty simple. In the diagram below, the motor represents the fan. The fan I used has a red and black wire, so I hooked the red wire to a 5v pin of the RPi and the black wire one of the outside legs of the NPN transistor. The other outside leg is connected to the RPi ground and the center leg to the RPi control pin. I used 18, but you can use any of them—just make sure your code references the correct one.
The Raspberry Pi was originally created to teach kids software development, so Raspbian comes with full Python support. In addition, there is a great python library called RPi-GPIO which allows your python program to interact with the on-board pins
There are many ways to get the code onto the RPi. You can wire up the pi to it's own keyboard and monitor, or you can, as I do, remote into it using either an SSH client to work in the command line (I use puTTY) or a VNC client to remote into the GUI. There are config settings that need to be enabled on the RPi for remote access: SSH or VNC
Pick a place to save the file. I already had a /scripts directory in my /home/pi user directory so I put it there.
- Copy the run-fan.py code below
- Switch to your chosen directory
- Create a file on your RPi by typing nano run-fan.py This will open the nano text editor with a blank file.
- Right-click to paste the code into the editor and adjust the four variables to match your setup:
pin = 18
maxTMP = 42
minTMP = 38
sleepTime = 5- Press Ctrl+X, Y, Enter to save your file.
- Test the code by running
python3 ./run-fan.py- If you already have your hardware wired up, you should start seeing your fan cycle on/off. For testing purposes, if you uncomment this line, the program will print the temp readings to the screen:
# print("temp is {0}".format(temp)) # uncomment for testingOnce your wiring and script work well together, you can configure the script to run at startup. As mentioned earlier, I chose to use the SYSTEMD method from this website
Start by creating a new file on you RPi by typing
sudo nano /lib/systemd/system/runfan.serviceThe system will prompt you for your password so you can make a change in the system directory.
In the file, copy and paste the runfan.service code and save the file. Make sure the ExecStart line references the location of your run-fan.py file
Once you have saved the file, change the permission on the file by typing:
sudo chmod 644 /lib/systemd/system/runfan.serviceThen type:
sudo systemctl daemon-reload
sudo systemctl enable runfan.service
And finally, reboot the pi:
sudo rebootAfter the RPi reboots, the script should be running and the fan is now controlled based on CPU temp
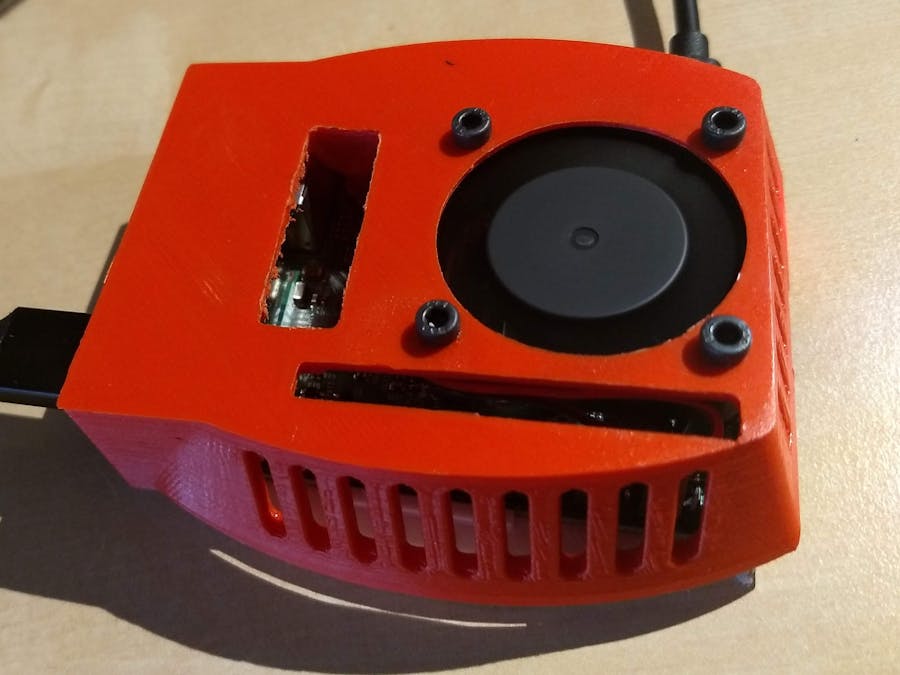
Final AssemblyI chose to keep the assembly simple. I soldered some header pin connectors on the transistor and used the pin connectors on the fan to complete the wiring. This makes it easy for me to remove the cover on the RPi without worrying about permanent connections. I then used shrink tubing to cover the solder joints.
I chose to attach the transistor to the fan with a bit of hot glue. All that was left was to connect the three wires to the correct pins on the Raspberry Pi and snap the cover in place. A quick reboot and now the RPi stays nice and cool!
Thanks for reading! Next up will be to finally wire up the shutdown switch and led indicator light,


Comments
Please log in or sign up to comment.