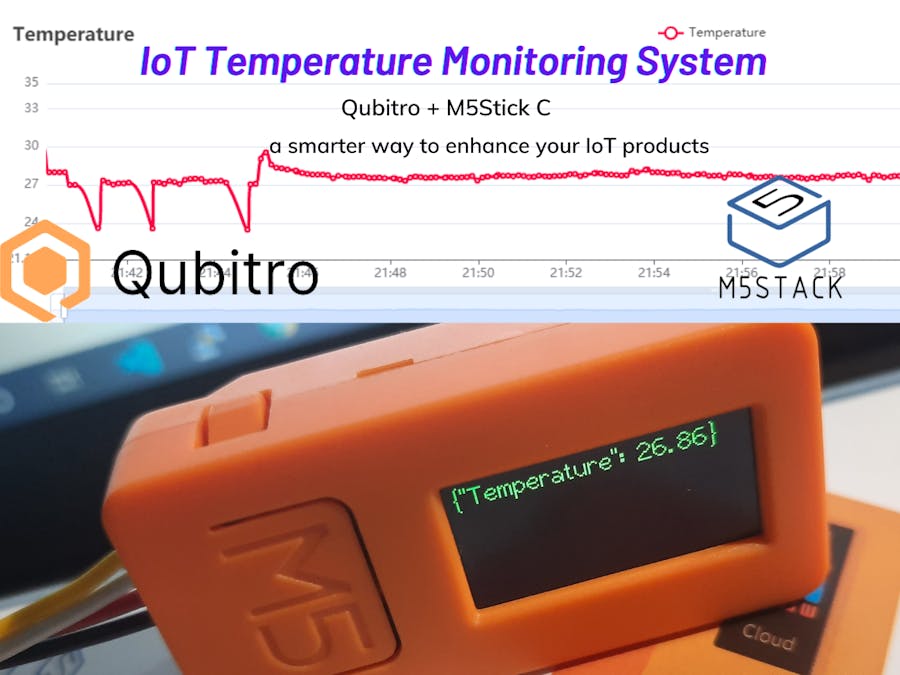
In my last project, I demonstrated how to get started with the Qubitro IoT platform using the M5Stick C microcontroller; in this project, I'll show you how to send real-time temperature data to Qubitro.
What is need ?an active Qubitro account, an ESP32 board (I'm using the M5Stick C), an LM35 temperature sensor, and the Arduino IDE for programming
Let's StartPlease go there and watch my last project if you haven't already.
I'll skip the Qubitro setup because I'm assuming you've already seen my previous project.
Let's start with the Arduino IDE, where I've written few lines of code to retrieve the data from the LM35 and send it to Qubitro.
I connected the data pin of the LM35 to pin 33 of the M5Stick and performed some analogue to digital conversion calculations.
Sum = 0;
  for (int k = 1; k <= 100; k++) {
    RawValue = analogRead(33);
    Sum += RawValue;
  }
  Sum /= 100;
  Voltage = (Sum / 2048.0) * 3300; // in millivots
  tempC = Voltage * 0.1;
  float sensor_value_1 = tempC;

  // Print the random values
  Serial.print("Temperature value: ");
  Serial.println(tempC);
Here is the entire code.
#include <QubitroMqttClient.h>
#include <WiFi.h>
#include <M5StickC.h>

// WiFi Client
WiFiClient wifiClient;

// Qubitro Client
QubitroMqttClient mqttClient(wifiClient);

// Device Parameters
char deviceID[] = "e84f1894-b10";
char deviceToken[] = "sPnwDzjXp4y$2VJz5Z";

// WiFi Parameters
const char* ssid = "";
const char* password = "";
int RawValue = 0;
double Voltage = 0;
double tempC = 0;
double Sum;
double minTemp = 200;
double maxTemp = 0;
void setup() {
  // Initialize the serial port
  serial_init();

  // Initialize wireless connectivity
  wifi_init();

  M5.begin();
  M5.Lcd.setRotation(3);
  M5.Lcd.fillScreen(BLACK);
  M5.Lcd.setSwapBytes(true);
  M5.Lcd.setTextSize(1);
  M5.Lcd.setCursor(7, 20, 2);
  M5.Lcd.setTextColor(TFT_GREEN, TFT_BLACK);
  // Initialize Qubitro
  qubitro_init();
}

void loop() {
  Sum = 0;
  for (int k = 1; k <= 100; k++) {
    RawValue = analogRead(33);
    Sum += RawValue;
  }
  Sum /= 100;
  Voltage = (Sum / 2048.0) * 3300; // in millivots
  tempC = Voltage * 0.1;
  float sensor_value_1 = tempC;

  // Print the random values
  Serial.print("Temperature value: ");
  Serial.println(tempC);


  // Send telemetry
  String payload = "{\"Temperature\": " + String(sensor_value_1) + "}";
  mqttClient.poll();
  mqttClient.beginMessage(deviceID);
  mqttClient.print(payload);

  M5.Lcd.print("I'm Groot ");
  M5.Lcd.fillScreen(BLACK);
  M5.Lcd.setCursor(3, 2);
  M5.Lcd.print(payload);
  mqttClient.endMessage();

  // Delay
  delay(5000);
  M5.Lcd.fillScreen(BLACK);
  M5.Lcd.setCursor(1, 3);
  M5.Lcd.print("I'm Groot ");
  delay(2000);
  M5.Lcd.fillScreen(BLACK);
}

// Initialization code

void serial_init() {
  // Initiate serial port connection
  Serial.begin(115200);

  // Delay for stabilization
  delay(200);
}

void wifi_init() {
  // Set WiFi mode
  WiFi.mode(WIFI_STA);

  // Disconnect WiFi
  WiFi.disconnect();
  delay(100);

  // Initiate WiFi connection
  WiFi.begin(ssid, password);

  // Print connectivity status to the terminal
  Serial.print("Connecting to WiFi...");
  while (true)
  {
    delay(1000);
    Serial.print(".");
    if (WiFi.status() == WL_CONNECTED)
    {
      Serial.println("");
      Serial.println("WiFi Connected.");

      Serial.print("Local IP: ");
      Serial.println(WiFi.localIP());
      Serial.print("RSSI: ");
      Serial.println(WiFi.RSSI());
      break;
    }
  }
}

void qubitro_init() {
  char host[] = "broker.qubitro.com";
  int port = 1883;
  mqttClient.setId(deviceID);
  mqttClient.setDeviceIdToken(deviceID, deviceToken);
  Serial.println("Connecting to Qubitro...");

  if (!mqttClient.connect(host, port))
  {
    Serial.print("Connection failed. Error code: ");
    Serial.println(mqttClient.connectError());
    Serial.println("Visit docs.qubitro.com or create a new issue on github.com/qubitro");
  }
  Serial.println("Connected to Qubitro.");

  mqttClient.subscribe(deviceID);

}
Then replace the code with your device portal's SSID, Password, Device ID, and Token...it, that's you're ready to send data to the Qubitro server.
Connect your Arduino Ide to your board and upload the script...
See what happens when you open your serial monitor in Arduino.
The sensor values sent by your device are visible in your Qubitro device portal. Here's our brand-new Temperature string.
Create a chart for your sensor readings.
Let's view the detailed chart.
I hope you enjoy working on this project. For more fascinating projects and blogs, please visit Qubitro Blog.


Comments
Please log in or sign up to comment.