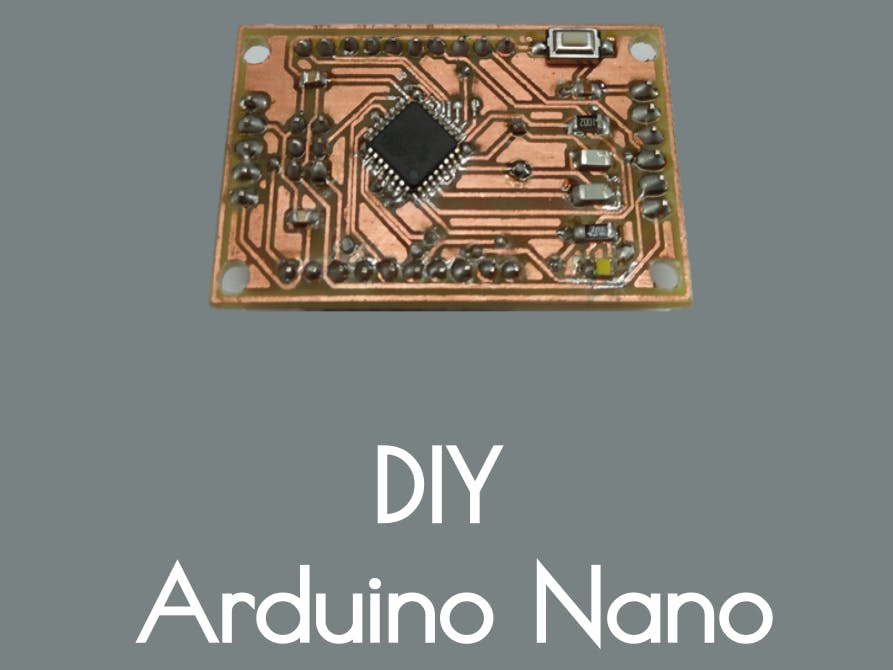
In this tutorial, I will show you how to make your very own Arduino Nano. I'm using laminator for the toner transfer method.
What things you will need:
- Copper - clad board (Dual Layer)
- Ferric Chloride (FeCl3)
- Acetone (Nail polish remover)
- Glossy Paper
- LASER Printer
- Marker Pen
- Scissors
- Plastic container
- Sand paper
- Safety gloves
- Latex gloves
- Saw - For copper board cutting
- Laminator or iron
Let's Do it...
Step 1: Designing of the CircuitDesign schematic diagram in EDA tool (PCB Design Software).List of EDA Tools (PCB Design Software):
You can select any one of them.I prefer EAGLE PCB Design Software.
Step 2: Designing of the PCB LayoutAfter designing of the schematic diagram, Now start designing of PCB Layout in the Eagle EDA tool (PCB Design Software). After that Take print out of PCB Layout on glossy paper.
Note: Use Only LASER printer only.
Remember, Before top layer printing. You need to mirror image of the top layer layout. otherwise, The circuit will be inverted..
Note: Scale Factor set to 1.
Step 3: Cutting of Copper BoardCut the copper board according PCB layout size. After cutting the paper, put this top layout on the top side of the PCB. Now put bottom layout paper on the bottom side of the PCB.
Step 4: Toner Transfer MethodI'm using laminator for the toner transfer method. Laminator maximum temperature is 150 C (302 F). For the toner transfer method, required temperature is 210 C (410 F). So this laminator is slightly modified for the toner transfer method. I changed potentiometer of laminator for increment of laminator temperature. Now set the laminating machine temperature to its maximum value. Now use a laminator to transfer the toner to the glossy paper to the PCB. Make sure your copper board is as clean as possible. Now start laminating machine.
Step 5: Etching ProcessBefore you start etching, check all the tracks. If any track broken, use permanent marker pen to draw a track with carefully. Use ferric chloride (FeCl3) as etchant. Get you ferric chloride(FeCl3) powder and mix with water in your plastic container.Now start to etching of PCB.
After etching process, use the acetone to clean it.
Step 6: Drilling Process & Soldering ProcessAfter cleaning of PCB. Now start drilling of copper board. After Drilling, Start soldering process.
Step 7: After SolderingAfter soldering, Start burning the bootloader on ATMega328-AU.
Step 8: Burning the Bootloader on ATMega328-AU (Arduino Nano)Connect Arduino UNO board to your computer. Start Arduino program and from examples choose "ArduinoISP" sketch and upload it to the Arduino UNO board. Make sure you select the correct board name and serial port. After uploading "ArduinoISP" sketch, Please connect Arduino UNO (Work as Master) with the Arduino Nano (Work as target) using SPI bus.
Connections:Arduino UNO ------ Target AVR (Arduino Nano - ATMega328-AU)
- SS (Pin 10) ------ RESET (Pin 29)
- MISO (Pin 11) ------ MISO (Pin 16)
- MOSI (Pin 12) ------ MOSI (Pin 15)
- SCK (Pin 13) ------ SCK (Pin 17)
- 5V ------ VCC
- GND ------ GND
After connections, Go to Arduino Software and
- Select Tool ----- > Board ------ > Arduino Nano
- Select Tool ----- > Port ------ > Select your Arduino UNO COM Port
- Select Tool ----- > Programmer ------ > Arduino as ISP
After that:
- Select Tool ----- > Burn Bootloader
- Wait for "Done burning bootloader" message.
After burning the bootloader on ATMega328-AU (Arduino Nano), You have to upload your actual sketch for this Arduino nano to work on your Project. For that use USB to UART converter.
I'm using CP2102 USB to UART converter.
Connections:USB to UART Converter (CP2102) ------ Arduino Nano
- VCC ------ VCC
- TX ------ RX (Pin 30)
- RX ------ TX (Pin 31)
- DTR ------ RESET (Pin 29)
- GND ------ GND
After connections, Go to Arduino Software and
- Select File ----- > Examples ------ > 01.Basics ------ > Blink
- Select Tool ----- > Board ------ > Arduino Nano
- Select Tool ----- > Port ------ > Select your Arduino UNO COM Port
- Select Tool ----- > Programmer ------ > AVRISP mkll
After that,
- Upload Blink Sketch to Arduino Nano.
- Wait for "Done Uploading" message.
Job Done!


Comments
Please log in or sign up to comment.