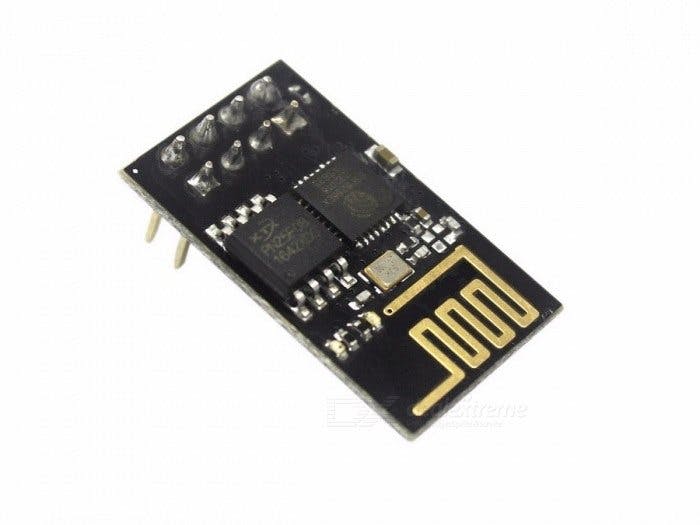
The ESP8266 ESP-01 is a Wi-Fi module that allows microcontrollers access to a Wi-Fi network. This module is a self-contained SOC (System On a Chip) that doesn’t necessarily need a microcontroller to manipulate inputs and outputs as you would normally do with an Arduino, for example, because the ESP-01 acts as a small computer. Depending on the version of the ESP8266, it is possible to have up to 9 GPIOs (General Purpose Input Output). Thus, we can give a microcontroller internet access like the Wi-Fi shield does to the Arduino, or we can simply program the ESP8266 to not only have access to a Wi-Fi network, but to act as a microcontroller as well. This makes the ESP8266 very versatile, and it can save you some money and space in your projects.
Step-by-Step Process:Step 1:
Take your Arduino Uno board and remove your ATmega328P microcontroller from the board carefully with the help of tweezers.
Step 2:
Do connection with your Arduino Uno board:
ESP8266:-------------- >Arduino:
GND -------------------------- GND
GP2 -------------------------- Not connected (open)
GP0 -------------------------- GND
RXD -------------------------- RX
TXD -------------------------- TX
CHPD ------------------------ 3.3V
RST -------------------------- Not connected (open)
VCC -------------------------- 3.3V
Step 3:
Download the firmware (click here) and ESP8266 flasher from the attachment.
Step 4:
Connect your Arduino board with your PC/laptop then go to control panel and check for COM port.
Choose your COM port carefully.
Step 5:
Browse for your firmware.bin file which you downloaded from the link.
Step 6:
Click on the download button.
Step 7:
It will stop at 99% then remove the cable from the PC/laptop and you are done.
Step 8:
Circutary for reset.
Possible Errors:
- GPIO0 is not grounded
- Loose connections
- COM port is not correct


_ztBMuBhMHo.jpg?auto=compress%2Cformat&w=48&h=48&fit=fill&bg=ffffff)


_3u05Tpwasz.png?auto=compress%2Cformat&w=40&h=40&fit=fillmax&bg=fff&dpr=2)
Comments
Please log in or sign up to comment.