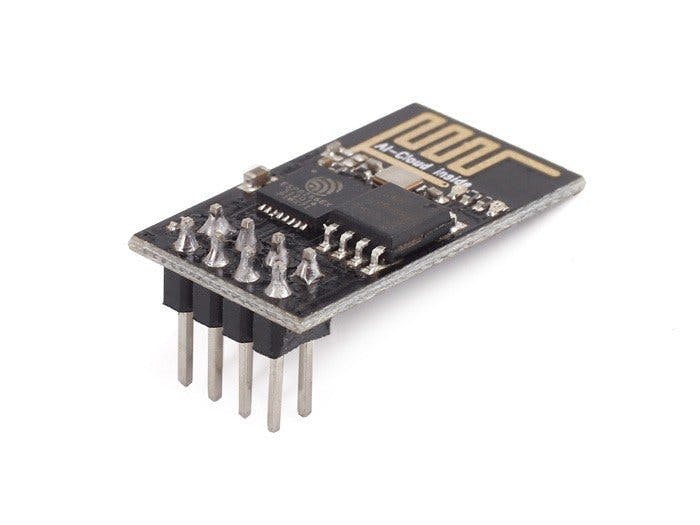
In a previous story we saw how to flash firmware on ESP8266 ESP-01 module. Now we are going to see how to program ESP-01 module using an Arduino UNO with few very simple steps.
Note:Download and install Blynk libraries to your Arduino IDE its very important before programming (Search on YouTube you can find easily).
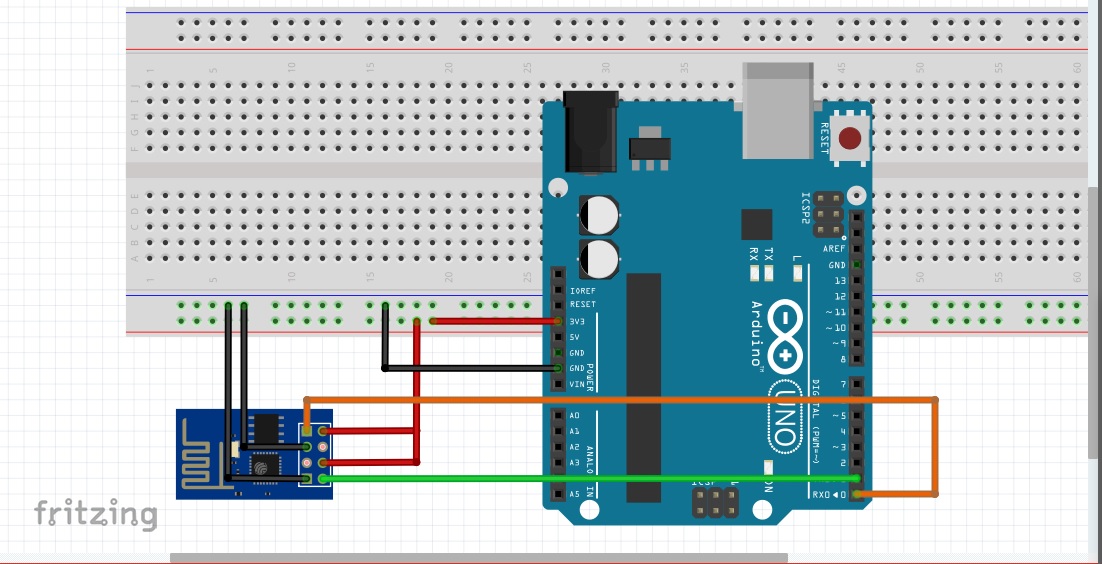
Step 1:Connections for programming
(Find the code in attachments)
ESP8266:-------------- >Arduino:
GND -------------------------- GND
GPIO-2 -------------------------- Not connected (open)
GPIO-0 -------------------------- GND
RXD -------------------------- RX
TXD -------------------------- TX
CHPD ------------------------ 3.3V
RST -------------------------- Not connected (open) *(Read Below Instruction)
VCC -------------------------- 3.3V
Very Important Instruction:Now before hitting upload, take GPIO-0 to ground.
And RST to ground afterwards, remove RST after half a second (the blue LED flashes for some millisecond).
Hit upload, the blue flashes once and then blinks till it gets uploaded.
Now you are all done.
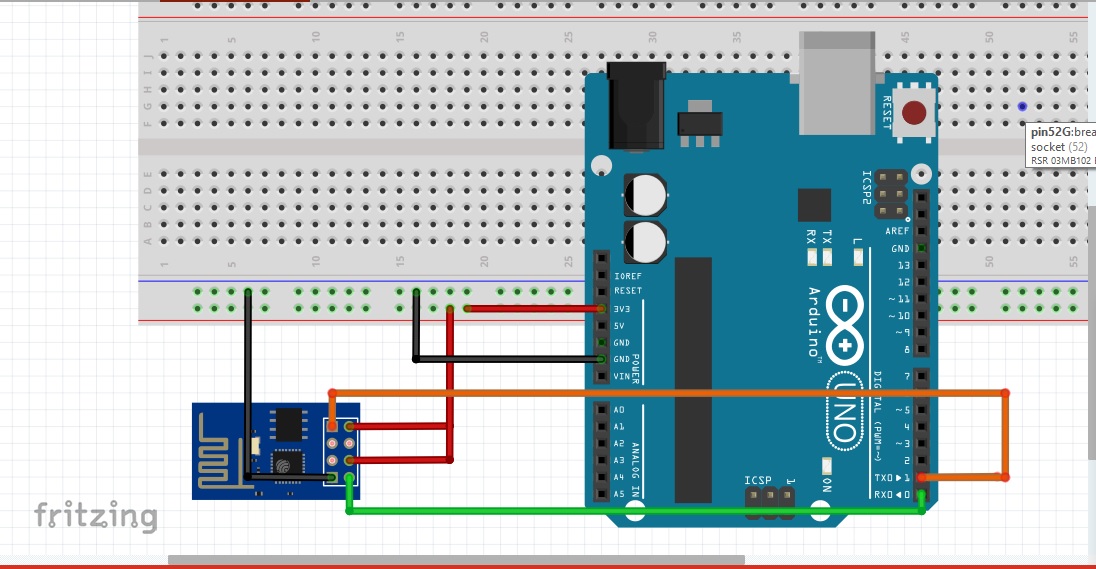
After programming, remove the serial Arduino cable and plug it again and take out GPIO-0 from GND and just interchange the connection of RX and TX that is RX connect to TX and TX connect to RX.
Connections after programming
ESP8266:-------------- >Arduino:
GND -------------------------- GND
GPIO-2 -------------------------- Not connected (open)
GPIO-0 -------------------------- Not connected (open)
RXD -------------------------- TX
TXD -------------------------- RX
CHPD ------------------------ 3.3V
RST -------------------------- Not connected (open)
VCC -------------------------- 3.3V
That's it, you are done!!!
Open serial monitor of Arduino IDE where you see the ESP is connected and ready.


_ztBMuBhMHo.jpg?auto=compress%2Cformat&w=48&h=48&fit=fill&bg=ffffff)


Comments
Please log in or sign up to comment.