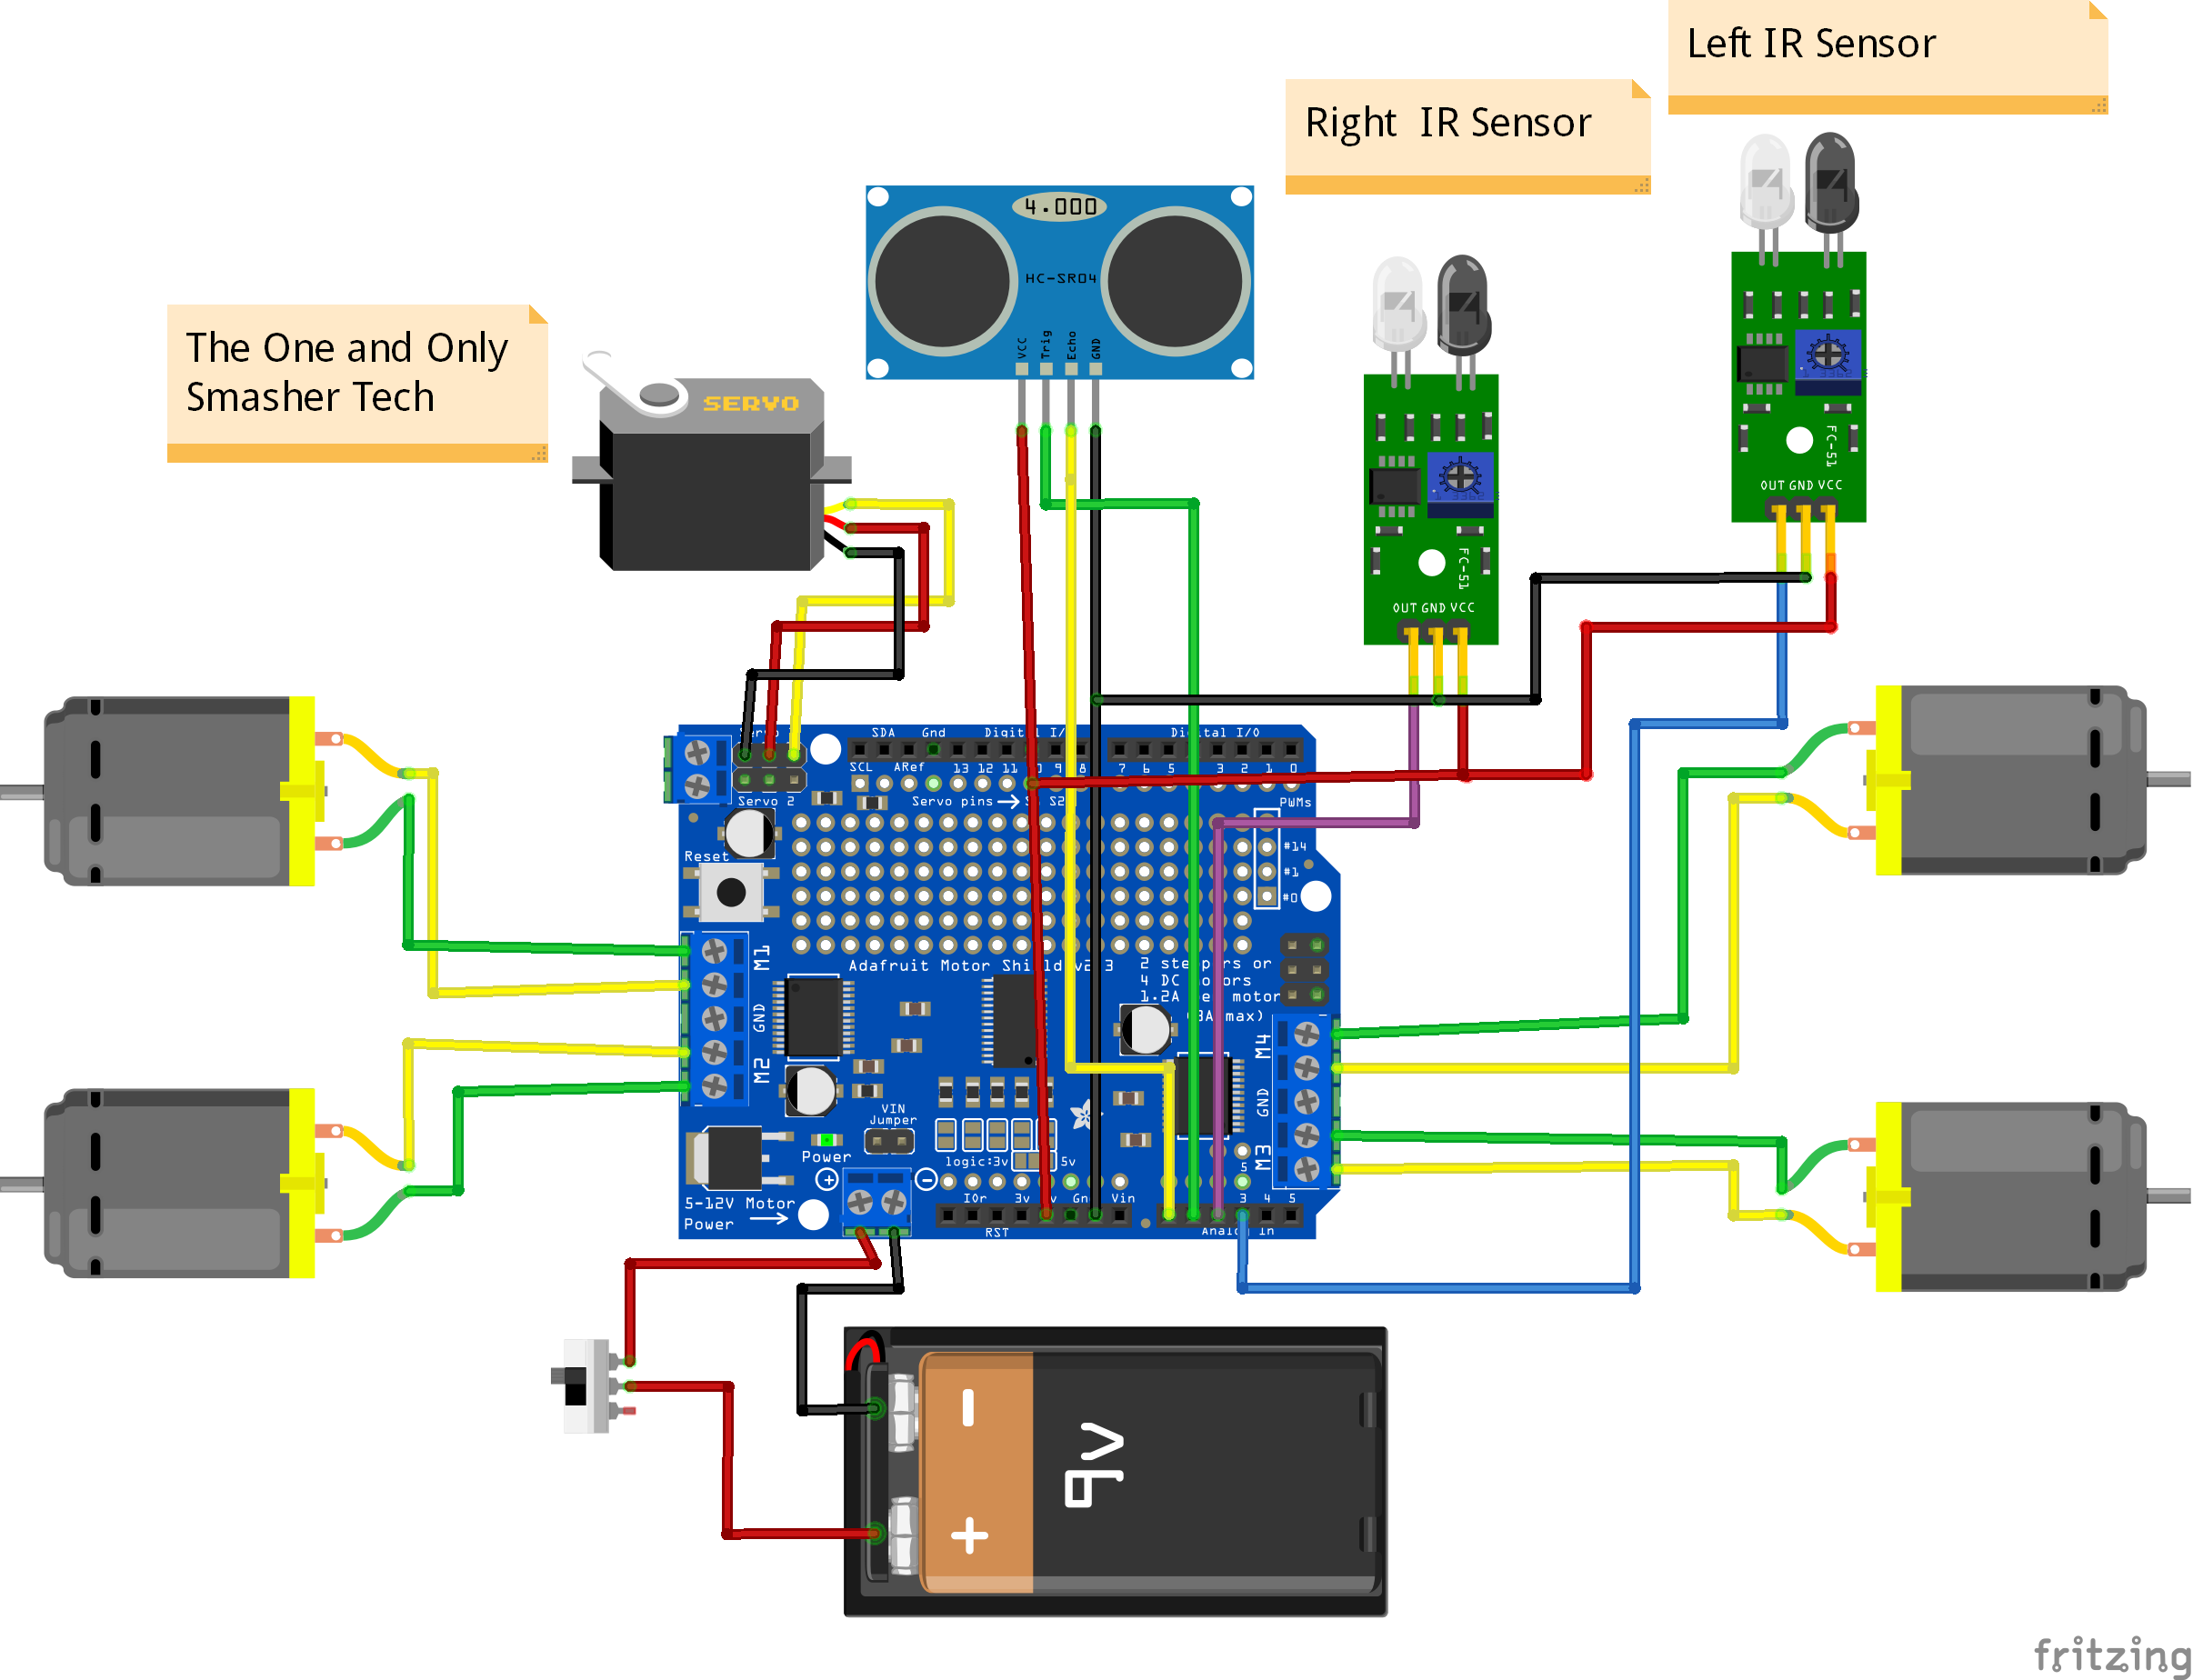
// Human Following Robot Using Arduino Uno Code
// Modified by ProfessorHulk
// You have to Install the AFMotor :https://www.arduino.cc/reference/en/libraries/adafruit-motor-shield-library/
// And NewPing :https://www.arduino.cc/reference/en/libraries/newping/ library Before Uploading the sketch//
// To install the libraries ( first download the AF Motor driver, NewPing and Servo Library zip file //
// then Go to Skecth >> Include Library >> Add .Zip Library >> Select The downloaded zip file >> Done) //
// Have a Query about it, you can reach us here (Insta ID : the_one_and_only_smasher_tech)


#include<NewPing.h>
#include<Servo.h>
#include<AFMotor.h>

#define RIGHT A2
#define LEFT A3
#define TRIGGER_PIN A1
#define ECHO_PIN A0

#define MAX_DISTANCE 100


NewPing sonar(TRIGGER_PIN, ECHO_PIN, MAX_DISTANCE);


AF_DCMotor M1(1,MOTOR12_1KHZ); //For Motor 1
AF_DCMotor M2(2,MOTOR12_1KHZ); //For Motor 2
AF_DCMotor M3(3,MOTOR34_1KHZ); //For Motor 3
AF_DCMotor M4(4,MOTOR34_1KHZ); //For Motor 4

Servo myservo;

int pos =0;

void setup() {
  // put your setup code here, to run once:
  Serial.begin(9600);
myservo.attach(10);
{
for(pos = 90; pos <= 180; pos += 1){
  myservo.write(pos);
  delay(15);
} for(pos = 180; pos >= 0; pos-= 1) {
  myservo.write(pos);
  delay(15);
}for(pos = 0; pos<=90; pos += 1) {
  myservo.write(pos);
  delay(15);
}
}
pinMode(RIGHT, INPUT);
pinMode(LEFT, INPUT);

}

void loop() {
  // put your main code here, to run repeatedly:

  delay(50);
 unsigned int distance = sonar.ping_cm();
Serial.print("distance");
Serial.println(distance);


int Right_Value = digitalRead(RIGHT);
int Left_Value = digitalRead(LEFT);

Serial.print("RIGHT");
Serial.println(Right_Value);
Serial.print("LEFT");
Serial.println(Left_Value);

if((Right_Value==1) && (distance>=10 && distance<=30)&&(Left_Value==1))
{
  M1.setSpeed(200);
  M1.run(FORWARD);
  M2.setSpeed(200);
  M2.run(FORWARD);
  M3.setSpeed(200);
  M3.run(FORWARD);
  M4.setSpeed(200);
  M4.run(FORWARD);
}else if((Right_Value==0) && (Left_Value==1)) {
  M1.setSpeed(200);
  M1.run(FORWARD);
  M2.setSpeed(200);
  M2.run(FORWARD);
  M3.setSpeed(200);
  M3.run(BACKWARD);//Adjust your motor speed as per your need
  M4.setSpeed(200);
  M4.run(BACKWARD);//Adjust your motor speed as per your need
}else if((Right_Value==1)&&(Left_Value==0)) {
  M1.setSpeed(200);
  M1.run(BACKWARD);//Adjust your motor speed as per your need
  M2.setSpeed(200);
  M2.run(BACKWARD);//Adjust your motor speed as per your need
  M3.setSpeed(200);
  M3.run(FORWARD);
  M4.setSpeed(200);
  M4.run(FORWARD);
}else if((Right_Value==1)&&(Left_Value==1)) {
  M1.setSpeed(0);
  M1.run(RELEASE);
  M2.setSpeed(0);
  M2.run(RELEASE);
  M3.setSpeed(0);
  M3.run(RELEASE);
  M4.setSpeed(0);
  M4.run(RELEASE);
}else if(distance > 1 && distance < 10) {
  M1.setSpeed(0);
  M1.run(RELEASE);
  M2.setSpeed(0);
  M2.run(RELEASE);
  M3.setSpeed(0);
  M3.run(RELEASE);
  M4.setSpeed(0);
  M4.run(RELEASE);
  }
 }


Comments
Please log in or sign up to comment.