IoT has also been implemented in home automation with the help of Google Assistant.
The function of this project to control our home lights with voice commands.
This project gives us freedom to control home automation from anywhere in the home. The only things we need is phone and a internet.
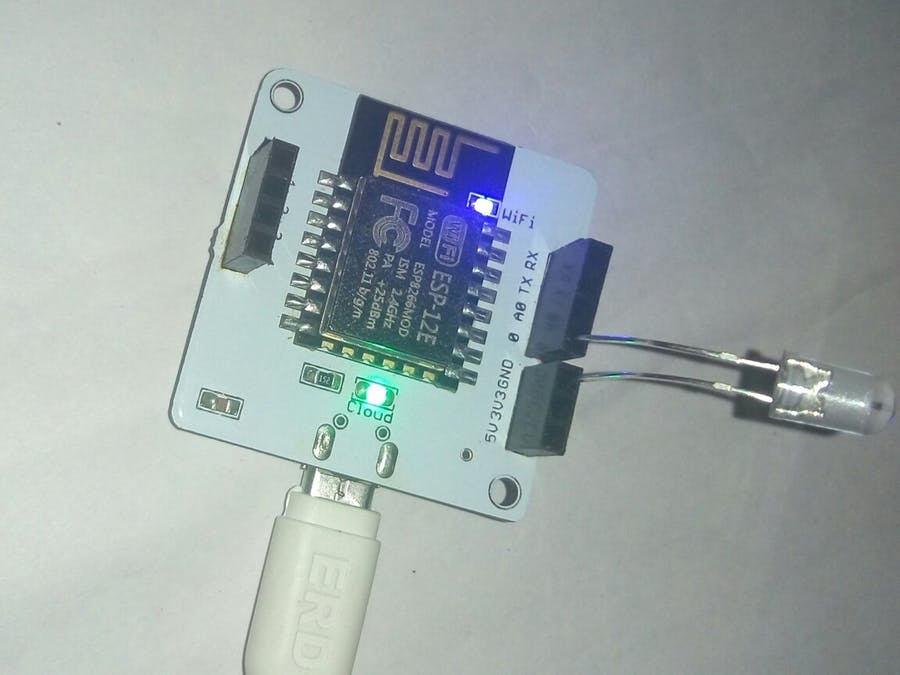
Step 1: Hardware SetupTake the LED and Bolt WiFi Module.The two legs of the LED one is +ve (long) and second is -ve (Shot). Take +ve leg and insert it into pin 0 and the other leg -ve and insert it into ground pin (GND) of Bolt.
Using USB Cable you can connect Bolt WiFi module into online by laptop or Switch board
Step 2: Bolt API Key and Device IDLog in to your Bolt Cloud account. In the dashboard, you can find your device ID.
On the left side of the screen you can find API tab.Click on that and copy your API key.
Save it for further use
Step 3: GPIO Control CommandTo control your LED with your voice, you need to set up some commands.
https://cloud.boltiot.com/remote/API_KEY/digitalWrite?pin=PIN_NUMBER&state=HIGH/LOW&deviceName=DEVICE_ID
The command given above is used to control your device.
Edit this command using your API_KEY, pin, HIGH/LOW and your DEVICE_ID.
API_KEY :- Replace the API_KEY by your API_KEY which you copy from could api tab.
PIN_NUMBER :- Replace the pin number by the pin you connected to LED.
HIGH/LOW:- High will turn lights ON and Low will turn lights off.
DEVICE_ID:- Replace the DEVICE_ID by ID copy from dashboard.
Make separate command for lights on and off in IFTTT
Step 4: IFTTT integration with Google Assistant and WebhooksGo to IFTTT to create a new applet
Login using your Gmail account. Make sure you use same account which you'll be using on your mobile to interact with Google Assistant.
Click on '+This' to create the trigger.
Choose Google Assistant -> Say Specific Phrase
1 / 2
Type the phrase you want to trigger the action. Make sure to specify the trigger command in different ways for example I used
a) Turn the lights on
b) Turn on the lights
c) Lights on
Click on 'Create Trigger'
Click on '+That'
Select Webhooks and then Make a web request.
1 / 2
Enter the API URL you got in the previous Step. Make sure that you change the API Key and device name.
Method will be GET
Content type will be Application/json
Here is how your screen will look like
Click on 'Create Action' and then Click on 'Finish'
Steps to turn OFF the LED bulbNow do the same process for a command to switch of the LED. Here you will change the state to LOW i.e. state=LOW in your code. Here is a sample of the code. Also, add a suitable phrase to switch off the LED.
https://cloud.boltiot.com/remote/API_KEY/digitalWrite?pin=0&state=LOW&deviceName=BOLT#####
Step 5: If you want to edit your applet turn off and turn on your applet once.If you
do so configuring your applet page appears.After configuring dont forget
to click on the save button.
CONFIGURING APPLET
SWITCHING OFF THE LIGHTS
For turning off the lights follow the steps given for "turning on the lights" .The only thing you have to do is to set the state to LOW in the URL section available in the "make the web request" window.
TURNING OFF THE LIGHTS
TURNING OFF THE LIGHTS
Hoooooooollaaaa!!!!! you are done creating your project :-)
Now its time to get your hands on to the google assistant .
Now wake your Android phone by saying "OK Google" and say the phrase you had set while creating the trigger.
RESULT:
Now you can control your lights via google assistant from anywhere!!!!!!!
OUTPUT
If you want you can change as "google" as "jarvis turn on the light" by removing ok google


Comments
Please log in or sign up to comment.