This project will help you create a WiFi based relay switch controller, using an ESP8266 module. The source code to make it work is also provided and it comes with an integrated web interface for configuration. It is very easy to use, you'll see.
Step 1: HardwareYou can find all hardware elements here, or listed above.
ESP8266, Relay, AC/DC + Components
Notes:1) 2mm for the top plastic cover, it affects the touch module capacitance.
2) And 4mm or 5mm for the bottom, it depends on your ability to make the holes.
3) Using a sandpaper on the plastic separators helps to adjust distances
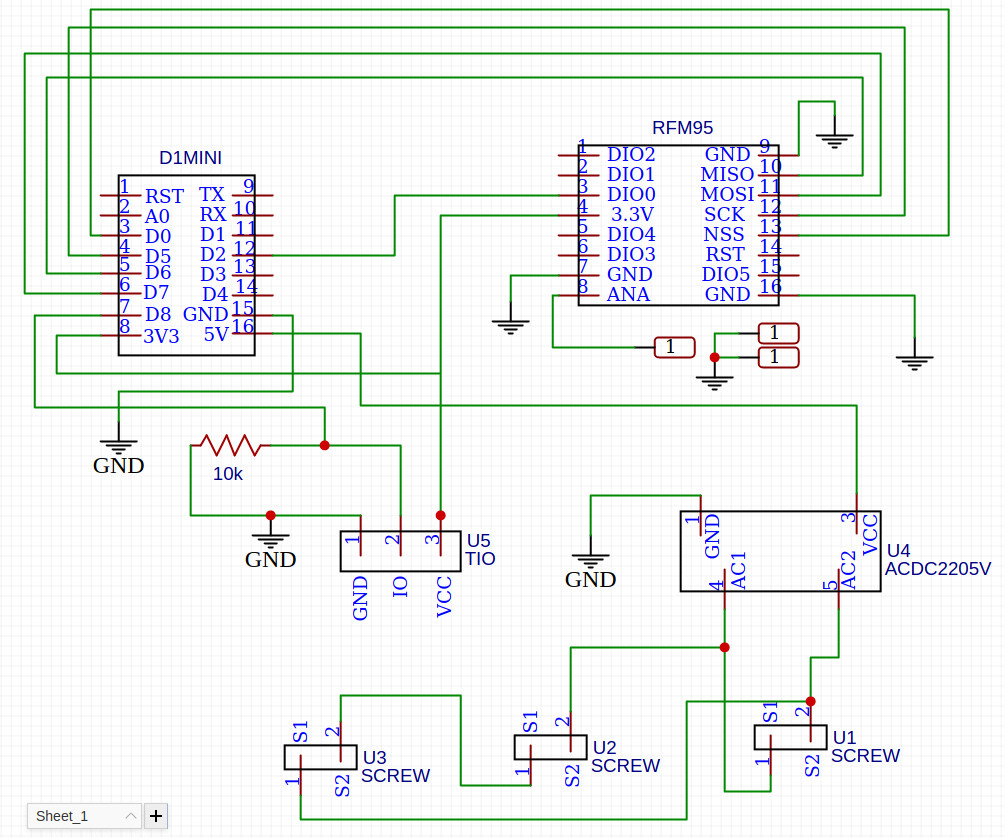
Note about the provided PCB / schematics:There is an integrated slot to connect a LoRa RFM95/96, which is not used in this project, maybe I add it in the future, it is only a matter of software
Now you have to setup the Arduino IDE, note that you can use any other framework you like. It is not difficult but you have to do one or two things in order to compile the project.
Code is hosted in github.com, it is open source, feel free to contribute, reporting bugs or making suggestions would be great :)
Download it and open:
ESP8266Relays/ESP8266Relays.inoChange Sketchbook location under file --> preferences
If needed add additional boards under file --> preferences... I've been using:
http://arduino.esp8266.com/stable/package_esp8266com_index.jsonPay attention here, older versions wont work properly, you have to install at least version 2.6.3
Select your board under tools --> Board (maybe not the same as the picture, chose yours)
It should now compile.
Now open:
ESP8266Relays/ESP8266Relays.cppChange the default values if needed, upload it to your board and configure it using the web interface
Once it is up and running you can open and configure your device through its integrated web interface. It is a little page inside the ESP8266 that lets you easily tweak its values ... here is a demo to play with
With this interface you are able to configure:
- WiFi connection, either as a Client device or as an Access Point
- Relays configuration
- Basic ESP8266 System parameters
- Configuration Interface security/password
By default it will create a WiFi network to let you access its internal configuration.
wifi: ESP8266 RELAYS [CHIP_ID]
pass: 12345678
If extreme security is concerned, you should change the default values, before upload the firmware to your gateway. Either way you can change them from your browser after the first connection.
Once running, gateway configuration can be accessed through a web browser either by its already assigned ip
http://X.X.X.X/or if connected through the Access Point
http://192.168.4.1/ (by default)Now you can use your credentials to log in, defaults are:
user: admin
pass: admin
Note about connectivity: All ESP8266 are single channel modules, meaning that they use the same channel when acting as an Access Point and/or as a WiFi Client, resulting in disconnections, or a big latency, when you are connected to its Access Point and you configure the module to connect to another WiFi router which is in another channel, then the module has to change it, but your network card still have to figure it out, sometimes it takes time, and sometimes it disconnects you, you can always reconnect, it is a common behavior.
Once there, open the Relays tab and change its configuration as needed. Available options are easy to understand, it can be programmed similar to an alarm, it is important to configure your time zone in the System tab, for it to work properly, default is TZ_Europe_London
There is another web app intended to be used as standalone app, here you can group all esp8266 with its respective relays, and control them from one place. here is (another) demo to play with
It is a single HTML file, you can use it from our servers, or you can download it and use it from other location, even from your file system
http://pulsartronic.com/section/ESP8266RelaysApp/app.html (download or use that one)
Make sure you load it using http:// or file://, not https://
You only have to add as many hosts as you want to control
It uses websockets for real time communication whenever possible. Otherwise it makes http requests, not https which will be supported when I have the time to develop it
That's it, I hope it is clear enough... if you have any problems, feel free to ask


Comments
Please log in or sign up to comment.