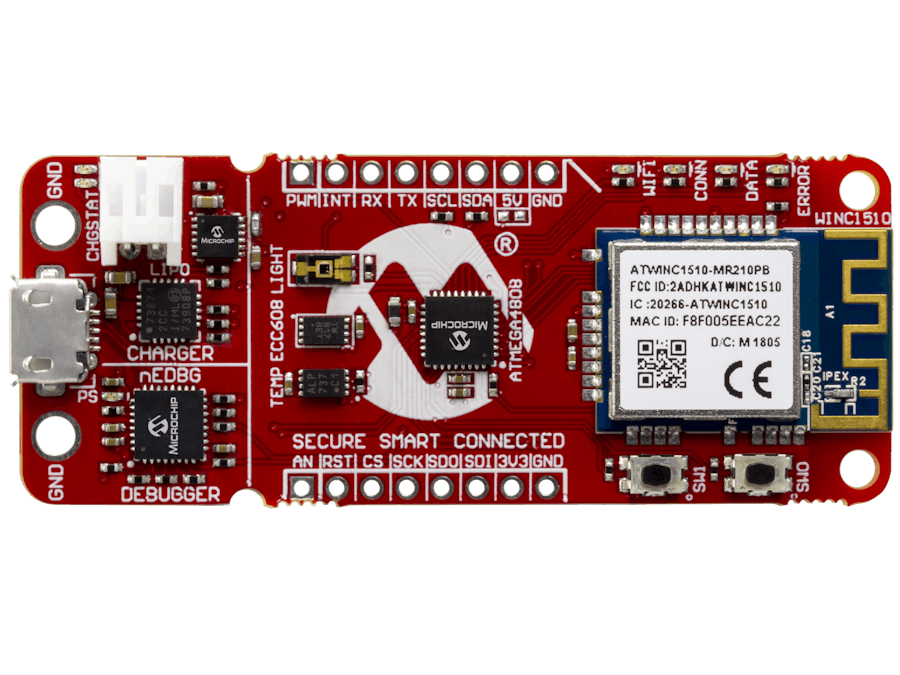
This tutorial will show you how to migrate from the Microchip Google Cloud Sandbox Account to a private Google Cloud account.
Note: Once you migrate to a private account, you may not be able to return to the sandbox. If you are just getting to know your board, we recommended trying a few tutorials in the sandbox before migrating.
Before You StartDemo
Run the demo and get connected by following the quick start guide
Sandbox Tutorials
Try a few tutorials in the Sandbox before you migrate to a private account:
Firmware
Update your firmware by following the instructions on Microchip's AVR-IoT GitHub page
Register Your Device on Google Cloud1. Create a project and enable billing
Go to the Cloud Resource Center to create a new project (or choose an existing)
When you create a project, you'll notice that your Project ID may not be the same as your project name. You'll need the Project ID later, when you program the hardware to connect to the project.
Read the instructions for enabling billing. I've been using my free trial - it's a year long and so far, it's been everything I've needed to work on a prototype.
2. Navigate to IoT Core and pin it to your console
In the Google Cloud console, you'll see IoT Core on the side bar in the BIG DATA section. I've pinned it to the top, since it's easier to access this way.
3. Create a registry called "AVR-IOT"
Set the Registry ID as AVR-IOT
Under Default telemetry topic create a topic also called AVR-IOT
Use AVR-IOT as your topic for Device state topic as well
Choose none for Stackdriver Logging
Hit Create
4. Register your device
In your registry, click Create Device
Navigate back to your CURIOSITY drive and click on the CLICK-ME.htm again.
You can find your unique device UID in the second part of the URL that is generated
Copy this and go back to the create device forum in Google Cloud
Type the letter d in the Device ID section and then paste your device UID
For example, mine ends up being d0123D0ABFDBE5930FE (this is mine, yours will be unique)
In the CURIOSITY drive, you'll see a file called PUBKEY.TXT
Add your public key by uploading the PUBKEY.TXT file in the ES256 format
Full disclosure, the first time I did this Google Cloud threw an error. I unplugged my board and plugged it back in and it was fine. It converts the.txt file automatically.
Program AVR-IoT Board to Connect to Your Google Cloud Project1. Open the AVR-IoT WG Sensor Node example in Atmel START
Use Atmel START, a graphical programming tool, to easily set up your AVR-IoT board with your Google Cloud information
Go to the AVR IOT examples section of START, select the AVR IoT WG Sensor Node example, and select Open Selected Example.
2. Enter Google Cloud Information
Go to the START example and enter Project ID, Registry ID (which should just be "AVR-IOT")
3. Enter Wi-Fi Credentials
In the block diagram, select WIFI_0 and enter your Wi-Fi credentials
4. Export to Atmel Studio
Click Export Project
Select Atmel Studio and Download Pack
5. Use Studio to Make and Program the AVR-IoT board
Import the START file into Studio 7 (I usually just double click the.atzip START file)
Navigate to the toolbar in Studio 7
Set the program to release and click on the tool icon to set it to the nEDBG debugger
Press the green triangle play button (next to the release drop down) to program the board
Set up a Google Cloud Pub/Sub FunctionNavigate to the cloud functions section of Google Cloud
Click Create Function
In the menu, select Cloud Pub/Sub as the trigger
Select AVR-IOT as the topic
This is all you have to do. Google Cloud automatically generates code for a default program.
Click Create
Select the function you created and select view logs
You will now be able to see a live stream of the data from your AVR-IOT board to the cloud!
Here's what mine looks like!
The Wi-Fi chip on the AVR-IoT supports 2.4GHz Wi-Fi connections.
While the chip can support enterprise-level secured connections (such as at your company or university), complex Wi-Fi configuration is not part of this tutorial. I usually just use a hot spot off of my phone.
Initial Wi-Fi setup not working for you? Check out this video to learn about different ways to connect your AVR-IoT board to Wi-Fi


_5V4pkpotf9.jpg)


Comments
Please log in or sign up to comment.