COVID-19 has been a major threat of 2020. It has been six months and the researchers are working hard to develop the vaccines for this virus. We are bound to reduce the spread of this virus in order to win this pandemic. So, it is our responsibility to wash our hands and follow social distancing practices. Although we try to follow social distancing, some people are not responsible to maintain distance or stand away from the neighboring person.
Maintain at least 1 metre (3 feet) distance between yourself and others. Why? When someone coughs, sneezes, or speaks they spray small liquid droplets from their nose or mouth which may contain virus. If you are too close, you can breathe in the droplets, including the COVID-19 virus if the person has the disease.
To avoid getting infected or spreading it, It is essential to maintain social distancing while going out from home especially to public places such as markets or hospitals.
Idea and Working Prototype💡The system is designed to detect the people from the Camera or Video feed and to determine the distance between the humans to classify whether they maintain social distancing or not. Using the above data, we can decide how to take countermeasures if they do not follow frequently. This project can be used in the hospital, market, bus terminals, restaurants, and other public gatherings where the monitoring has to be done.
This project consists of a camera that will capture the image of the people entering public places and measure social distancing among them using the distance features.
To test the real-time scenario, we have fed the video stream to the system to test how possibly it could be used and the results were pretty affirmative.
Video Tutorial + Improved Accuracy Output 👇Step 1: Introduction 🧐This tutorial explains the usage of Google Coral Accelerator to detect people present in the frame and calculating the distance between them. This Writeup explains the basic setup of BalenaFin, and deploying the social distancing app on edge. Assuming that you have already set up the Raspberry Pi with Raspbian OS, I'll be covering the following.
- Parts used and its specification
- Deploying a Tensorflow Lite Object detection Model to the BalenaFin
- Applying the Inference to the video stream
- Accelerate inferences of the TensorFlow Lite model with Google Coral Edge TPU Accelerator and Edge TPU Compiler.
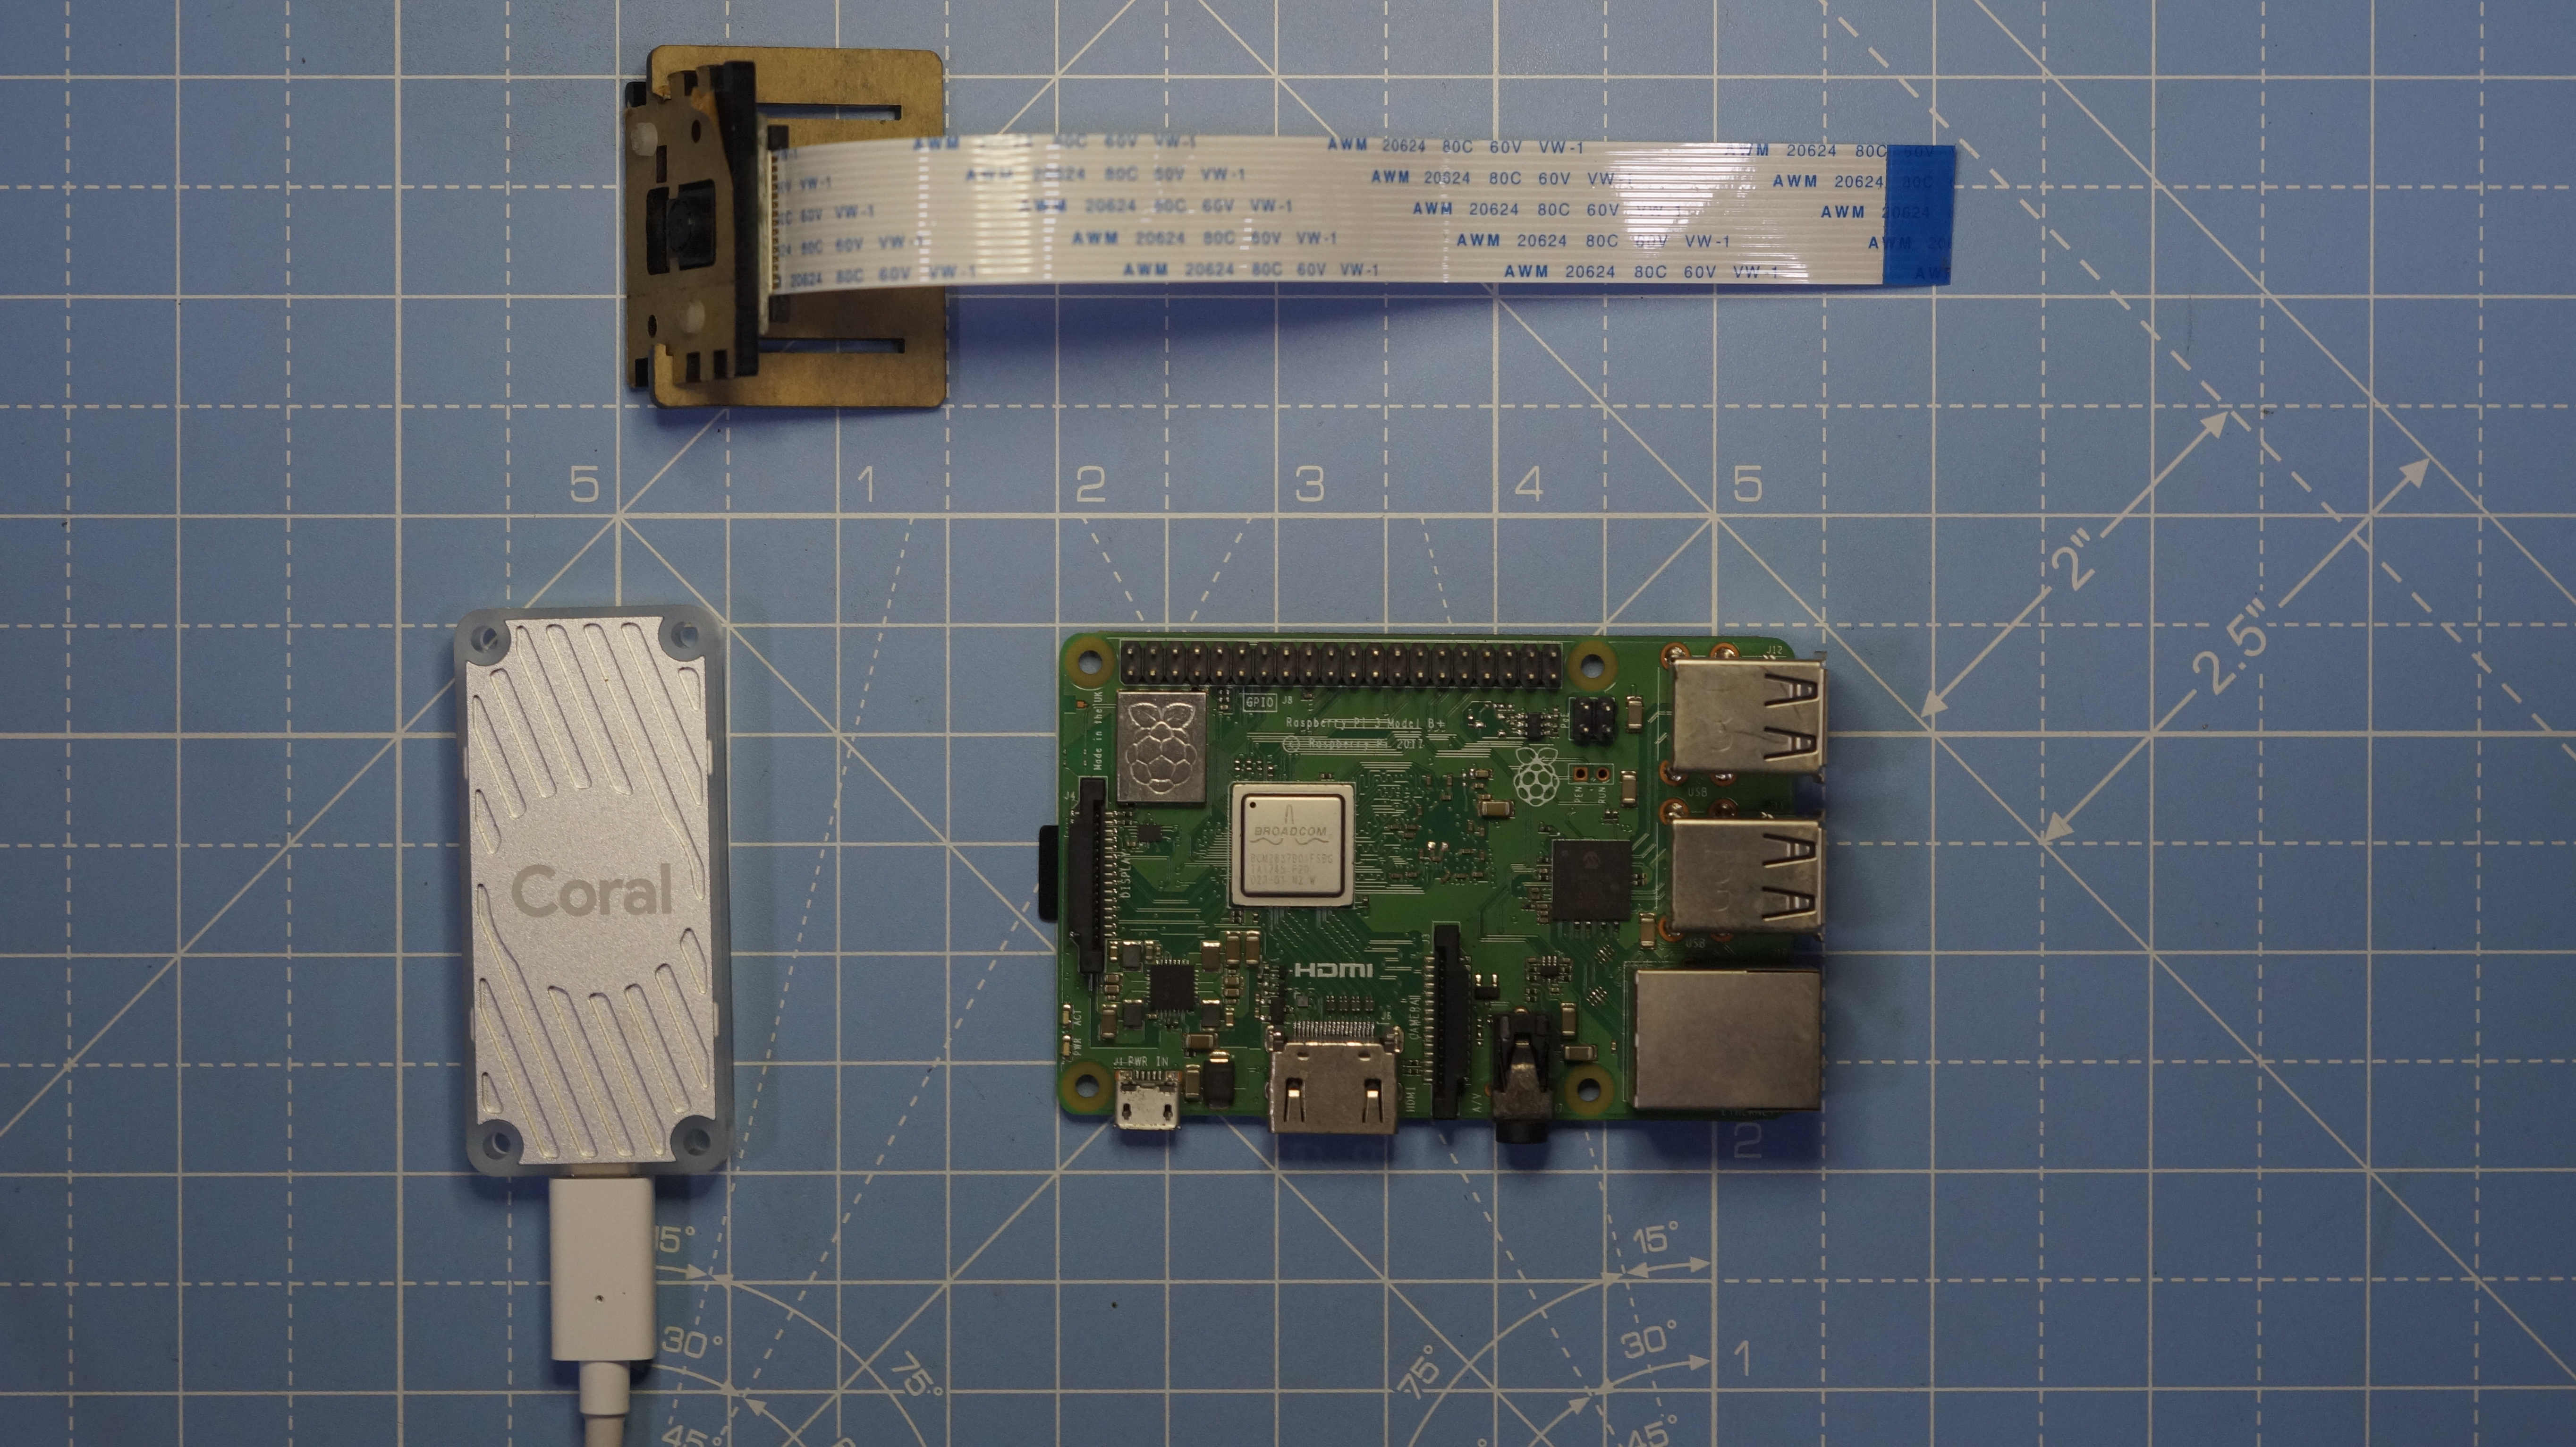
Similar steps are followed when you use a Raspberry Pi.
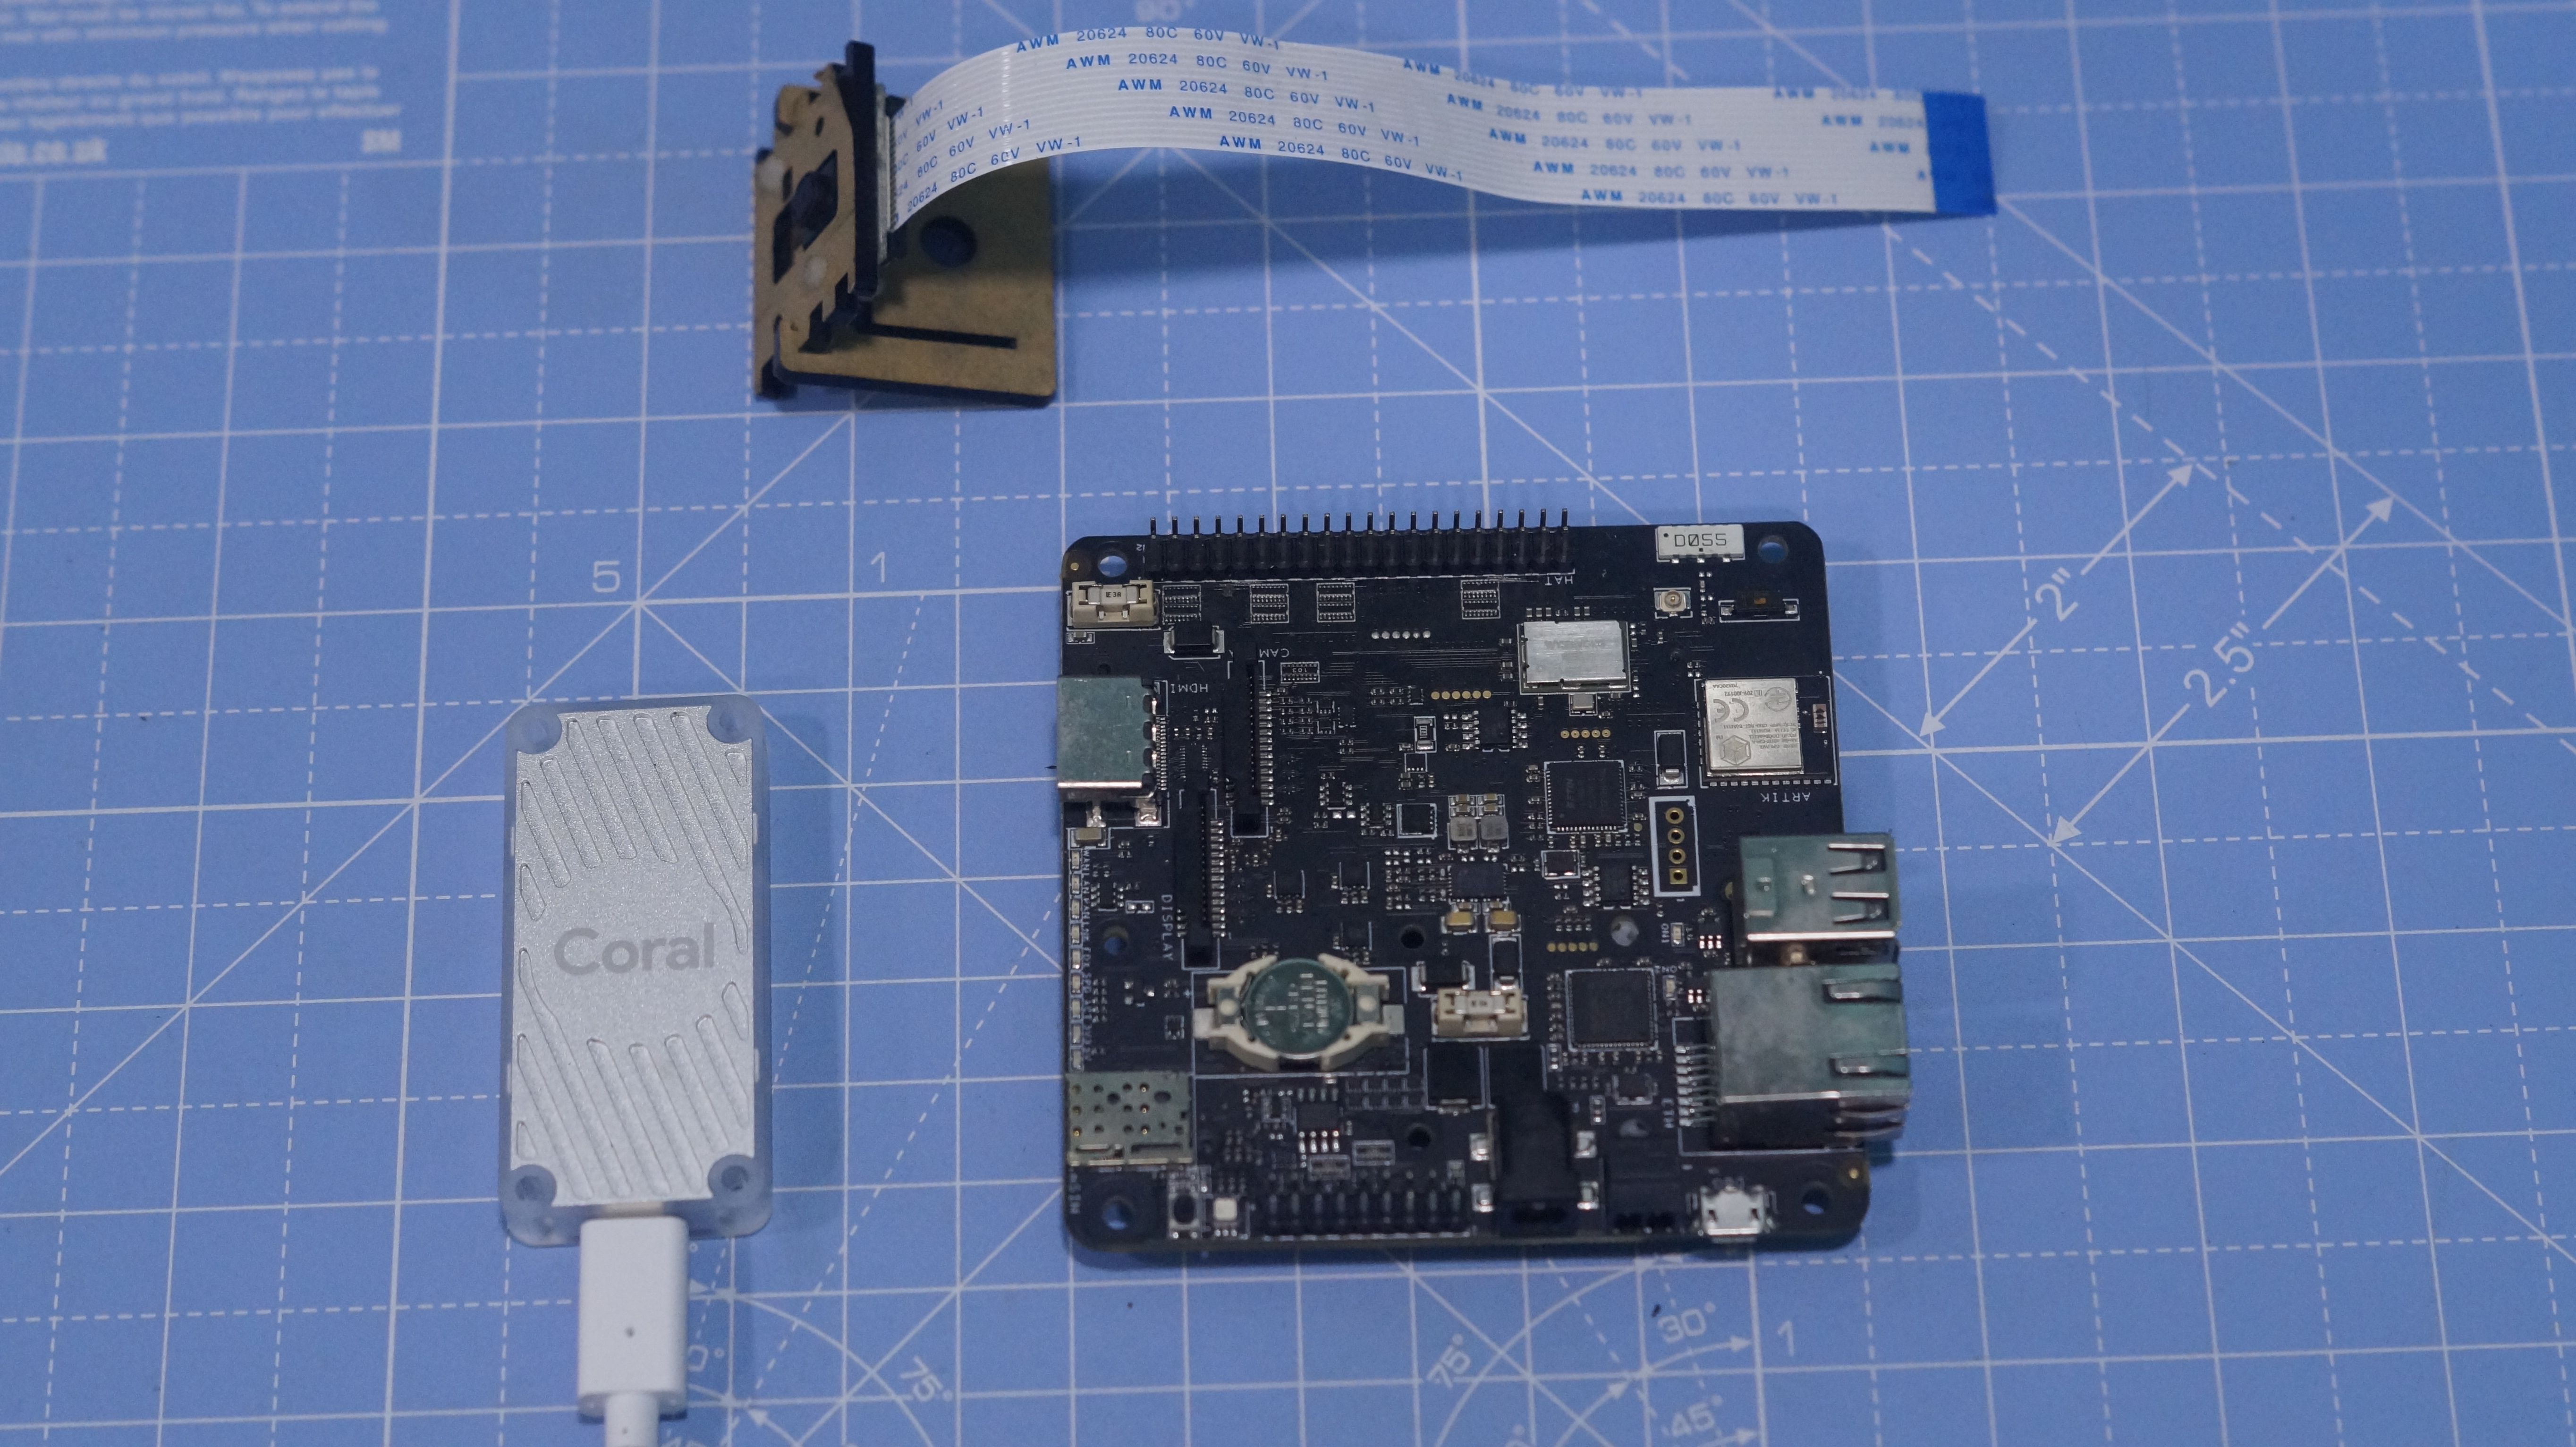
The Overall components used for this project are shown below.
One of the recently expanding markets is the Edge AI device. Edge devices are the co-processors used to process AI implementation. Some of the popular edge devices are Intel's Neural Compute Stick and Google Coral Accelerator. These help us to run inference on an edge device without sending the data to the cloud.
The KIT
First of all, I would like to thank balena, and Hackster.io for supporting this project with the powerful balenaFin v1 kit, which is highly-designed for field deployment application. It is powered by the Raspberry Compute Module 3 & 3+ Lite.
The balenaFin has been designed with field deployment in mind. It is a carrier board for the Raspberry Compute Module 3 and 3+ Lite (CM3L/CM3+L), that can run all the software that the Raspberry Pi can run, hardened for field deployment use cases.
Raspberry Pi Compute Module: The balenaFin supports the Raspberry Pi Compute Module 3 and 3+ lite (CM3L/CM3+L).
Some of the additional things required are:
- Micro-USB to USB cable
- Raspberry Pi Compute Module 3 (or 3+) Lite
- 12V Power Supply
- RTC coin-cell battery
Hardware Setup:
- Place the Raspberry Pi Compute Module in the dedicated CM3L/CM3+L socket and make sure that the two side clips are gripping the module.
- Place the RTC coin-cell battery with the positive side facing upwards.
There are two OS officially supported by the balenaFin.
- balenaOS
- Raspbian
The Configured OS can be downloaded from this link.
Raspbian is the Linux distribution of choice running on the Raspberry Pi. In this guide, we will be using the Lite version, but the Desktop version (which comes with a graphical environment) can be used as well. Make sure to install the CM3 drivers from here.
- Download Etcher and install it.
- Connect the micro USB cable to the balenaFin's USB debugger.
- Open Etcher and select from your hard drive the Raspberry Pi.img or.zip file you wish to write.
- Select Target as the ComputeModule. Once you select it, you can see the 5V & 3V3 LEDs illuminated.
- Review your selections and click 'Flash!' to begin writing data to the balenaFin
Once the image is flashed, remove the micro USB cable from the balenaFin and then power it using the phoenix connector or the Barrel Jack. If you face any issue, please refer to the troubleshooting page.
Now you can find the Raspberry Pi OS is booted on the balenaFin.
Step 4: Getting Started with Google Coral AcceleratorThe Coral USB Accelerator is a USB device that provides an Edge TPU as a co-processor for your computer. It accelerates inferencing for your machine learning models when attached to either a Linux, Mac, or Windows host computer. The dimension of the Coral USB Accelerator is 65mm x 30mm x 8mm, which makes it compact.
Features
- Google Edge TPU ML accelerator coprocessor
- USB 3.0 (USB 3.1 Gen 1) Type-C socket
- Supports Linux, Mac, and Windows on host CPU
You can buy a Google Coral USB Accelerator for $75.
The entire setup of this project looks as shown below. You can connect a pi-camera or a webcam to the the Balena Fin.
- First, let's add the Debian package repository to the system.
echo "deb https://packages.cloud.google.com/apt coral-edgetpu-stable main" | sudo tee /etc/apt/sources.list.d/coral-edgetpu.list

curl https://packages.cloud.google.com/apt/doc/apt-key.gpg | sudo apt-key add -

sudo apt-get update- Install the Edge TPU runtime:
sudo apt-get install libedgetpu1-stdIf you want to increase the inference speed, you can install the runtime mentioned below.
sudo apt-get install libedgetpu1-maxNote that, this can increase power consumption and makes the Accelerator very hot to touch.
- Install the Edge TPU Python API:
sudo apt-get install python3-edgetpu- Install the TensorFlow Lite library:
Make sure that you have already installed the TensorFlow and other support packages to continue. The TensorFlow Lite library is
pip3 install https://dl.google.com/coral/python/tflite_runtime-2.1.0.post1-cp35-cp35m-linux_armv7l.whlMake sure that you choose the proper python version to avoid the error.
- Once done, reboot the Raspberry Pi to complete the installation.
sudo reboot now- Next, we connect the Coral Accelerator to the BalenaFin. The USB Accelerator includes an LED that indicates the current system state. The Solid LED light indicates that the Edge TPU is initialized and the Pulsing light indicates that Edge TPU is running.
- Download the example code from GitHub:
mkdir coral && cd coral

git clone https://github.com/google-coral/tflite.git- Open the classification directory to run an inference with the bird classifier model, labels file and a bird photo:
cd tflite/python/examples/classification

bash install_requirements.sh- Run the image classifier with the bird photo (shown in figure 1):
python3 classify_image.py \
--model models/mobilenet_v2_1.0_224_inat_bird_quant_edgetpu.tflite \
--labels models/inat_bird_labels.txt \
--input images/parrot.jpg- The Inference results look like this.
Now, we have successfully performed inference on the Edge TPU using TensorFlow Lite.
Step 7: WorkflowNow, let's see how the social distancing project can be implemented. The Workflow diagram is given below:
- Use object detection to detect all the people in the frame
- Compute the pair-wise distance between the detected people
- From the distance, set a threshold of N pixels to see if they are close to each other.
Some of the optional packages for working with BalenaFin.
$ pip install "picamera[array]"
$ pip install scipy
$ pip install numpy
$ pip install opencv-contrib-python==4.1.0.25
$ pip install imutils
$ pip install scikit-image
$ pip install pillow
You can find the list of the model supported by the Coral Accelerator here.
Step 8: ImplementationObject Detection
The input feed can be either an image, video, or CAM feed. MobileNet SSD v2 (COCO) is used to perform the inference. The model uses the COCO dataset and it is capable of detecting the location of 90 types of objects. Input is resized to 300x300 as it requires input in that shape.
# Normalize pixel values if using a floating model (if model is non-quantized)
if floating_model:
    input_data = (np.float32(input_data) - input_mean) / input_std
We start the performance counter to calculate the inference time.
start = time.perf_counter()Perform the object detection for the given frame
# Perform the actual detection by running the model with the image as input
interpreter.set_tensor(input_details[0]['index'],input_data)
interpreter.invoke()
The Inference is carried out for the given frame and the following parameters are generated
# Inference Result
# Bounding box coordinates of detected objects
boxes = interpreter.get_tensor(output_details[0]['index'])[0]
# Class index of detected objects
classes = interpreter.get_tensor(output_details[1]['index'])[0]
# Confidence of detected objects
scores = interpreter.get_tensor(output_details[2]['index'])[0]
The Inference is performed using the invoke() and the bounding box coords, class and the confidence are extracted.
Calculating Pair-wise Distance
Thanks to Adrian for the euclidian distance calculation between two detected objects. First, the inference result is flattened and the list is created. Then we compute the pair-wise distance between the detected people and append the index to the list if the distance between the people is lesser than the Threshold value.
D = dist.cdist(cent[0], cent[1], metric="euclidean")The distance calculation is done using the Scipy. The centroid of the bounding boxes is computed and appended to the 'cent 'list. The Euclidean distance between the detected objects is used to measuring the social distancing level.
Filtering using threshold
The threshold value is set to identify people who are very close and people who are within the short-range to the other person. The threshold value is calculated based upon the pixel value and can be altered depending on the deployment.
if D[i, j] < MIN_DISTANCE:
	violate.add(i)
	violate.add(j)

elif D[i, j] < NEAR_DISTANCE:
	nearby.add(i)
	nearby.add(j)
The distance is denoted in pixel. The MIN_DISTANCE and NEAR_DISTANCE are set by the trial and error method.
Step 9: Deploying on BalenaFin and Google CoralMake sure that you have completed the above steps properly.
Groundwork:
- Clone the repository
git clone https://github.com/Rahul24-06/Vision-based-Social-Distancing-Monitor- Then, create the "coral" virtual environment by
python3 -m venv coral-envThis will create a folder called coral-env inside the directory. The coral-env folder will hold all the package libraries for this environment. Next, activate the environment by:
source coral-env/bin/activateNow you can see the coral-env virtual environment initialized.
Installing the Dependencies
To make the above installation steps simple, I've written a shell script that automatically downloads and installs the packages and dependencies necessary.
bash install_requirements.shDownloading the model
The Google example using the TFLite model uses the following model and labelmap which is downloaded as follows:
wget https://storage.googleapis.com/download.tensorflow.org/models/tflite/coco_ssd_mobilenet_v1_1.0_quant_2018_06_29.zip

unzip coco_ssd_mobilenet_v1_1.0_quant_2018_06_29.zip -d TFLite_model
The quantized MobileNet SSD model is downloaded and saved to the model directory by:
wget https://dl.google.com/coral/canned_models/mobilenet_ssd_v2_coco_quant_postprocess_edgetpu.tflite

mv mobilenet_ssd_v2_coco_quant_postprocess_edgetpu.tflite TFLite_model/edgetpu.tflite
Command-line arguments
The vision-social-dist-final.py file is fed with the following arguments in the command line inference, where
- --modeldir "Folder path to the.tflite file."
- --graph "Name of the.tflite file, if different than detect.tflite."
- --labels "Name of the labelmap file, if different than labelmap.txt.".
- --input "Path to image or video file or CAM."
- --edgetpu "Use Coral Edge TPU Accelerator to speed up detection"
- --threshold "Probability threshold for detection filtering"
To run on the Intel® Neural Compute Stick, use the -d MYRIAD command-line argument:
python3 vision-social-dist-final.py -d MYRIAD -i resources/input.mp4 -m your-model.xml -pt 0.6 | ffmpeg -v warning -f rawvideo -pixel_format bgr24 -video_size 768x432 -framerate 24 -iNote: The Intel® Neural Compute Stick can only run FP16 models at this time. The model that is passed to the application, through the -m <path_to_model> command-line argument, must be of data type FP16.
Run the vision-social-dist-final.py
- To run inference on an image file:
python3 vision-social-dist-final.py --edgetpu --modeldir=TFLite_model --input=/test_data/test-img4.jpgTo run inference on a video file:
python3 vision-social-dist-final.py --edgetpu --modeldir=TFLite_model --input=/test_data/test-ped.mp4Using a camera stream instead of a video file
python3 vision-social-dist-final.py --edgetpu --modeldir=TFLite_model --input=CAMYou can find the complete code on my GitHub repository.
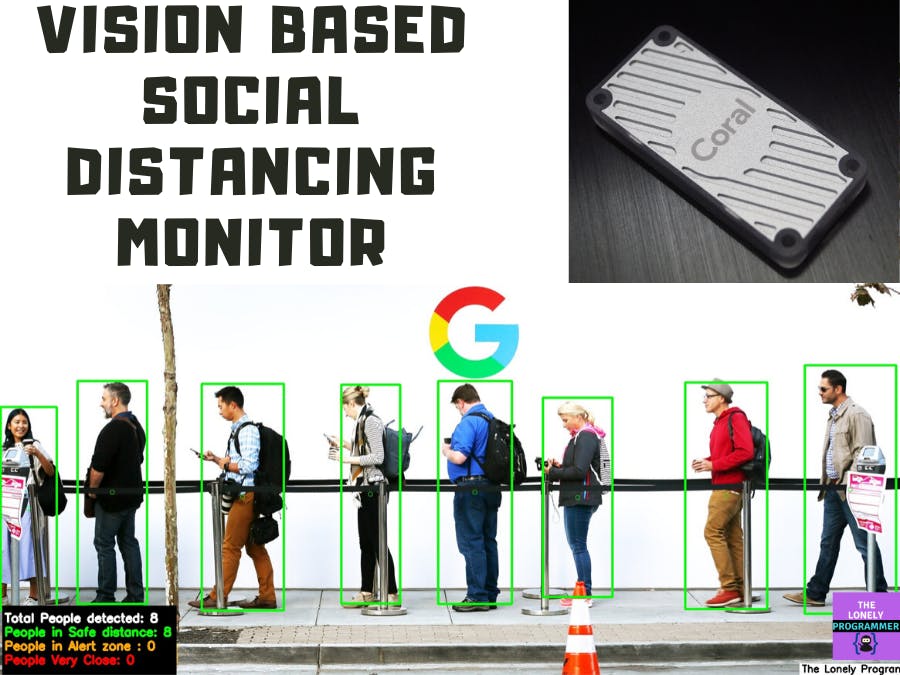
Step 11: Working of the Project 🔭To test the real-time scenario, we have fed the video stream to the system to test how possibly it could be used and the results were pretty affirmative.
Image Source: Google
Video Source: Oxford Town Center public dataset
The accuracy in detecting the people is average as the coral supports TFLite models which use an 8bit fixed-point number. i.e INT8 or UINT8. The Tensorflow model of FP32 has quantized to the INT8 TFLite model, which losses some of the important information, which degrades the performance.
The detection can be improved by retraining the detection model using TF and converting it to a TFLite model. I've planned to implement some major changes with the Hardware which will be published very soon.
I've also made a video tutorial of this project that will cover the entire installation of this project.
People in the Safe distance are marked with Green boxes, the orange box shows that they are approaching the neighboring person or the alert zone and the red boxes indicate that the people are very close or not maintaining the social distancing practices.
NOTE: This prototype is licensed. Do not use it for commercialized products without prior permission.This system is affordable and can be deployed in public places such as hospitals and markets to decrease the spreading of the virus unknowingly. This solution will be very useful and easy to integrate with a CCTV/DVR. This is a valuable approach to reduce the disease's impact on the economies of these vulnerable areas
The entire world is going through a lot of struggle and pain due to COVID-19. Let's stay strong at home and support our kind to fight against this pandemic. Thanks to Hackster.io and Adafruit, Amazon Web Services, Arduino, Arm, Avnet, balena, DFRobot, Google, Intel, Microsoft, Nordic Semiconductor, NVIDIA, NXP, Seeed, Silicon Labs, SORACOM, The Things Network, Ubidots, UNDP and UNICEF for this inspiring event. :D
-----------------------------------------------------------------------------------------------------------------
If you faced any issues in building this project, feel free to ask me. Please do suggest new projects that you want me to do next.
Give a thumbs up if it really helped you and do follow my channel for interesting projects. :)
Share this video if you like.
Blog - https://rahulthelonelyprogrammer.blogspot.com/
Github - https://github.com/Rahul24-06
Happy to have you subscribed: https://www.youtube.com/c/rahulkhanna24june?sub_confirmation=1
Thanks for reading!


Comments
Please log in or sign up to comment.