During the covid-19 pandemic, we have learnt the ways of doing household tasks by ourselves. Not only that, the post pandemic situation would be more valuable in need of keep maintaining those habits that grew within us. In our regular daily routine involves:
- Set an alarm to wake up or take medicine timely.
- Do Cleanup(Vacuum dirt from the floor/mop the floor).
- Time to leave for office!(And you forgot to switch off light or fans).
- Necessary to keep monitoring indoor activities with some surveillance device while staying away from home for long period.
So, the aim is to building a robot that can assist us with all of these tasks. This way, life would be more enjoyable, also less effort will be required.
What is ACRWhat it doesThe Robot
- can remember the time when to wake up,
- reminds you about taking medicine with beeping sound,
- helps with cleaning,
- can be used as a remote controlled toy for kids,
- when senses low battery level, it can return autonomously to charging dock,
- and when we won’t be at home, it can also monitor indoor activities. For ease of access, all these have to be remotely accessible with an android app. Also the application will be secure, so that each time the user wants access, it can verify his authentication.
For the software section, the app is built and made freeware on the following GitHub repository. URL:GitHub_Repo_ACR. Full work hasn't completed yet, modifications are still on progress. Demo of the software:
Vacuum Cleaning Section: To vacuum clean, we are going to follow the primary approach of how a leaf blower sucks air from one chamber and blows air to it's exhaust.
Primary Design: I fabricated it with some primary components like, cardboard box, propeller, some pieces of wood and wires to hold it all together. Although I have used 11kv brushless motor, but it isn't necessary to follow my power measurement. Choose the motor and ESC, according to your need.
How it performs:
Look closely. See? It vacuums the pieces of paper. Isn't it great that it actually works! Although there are some design flaws but it's quite satisfying to see the prototype working.
Final Assembly of Suction Mechanism:
We can't have our suction mechanism with paper and some wire, so it is necessary to make a solid piece of work. I have selected plywood for this job, because it makes the prototype light weight and quite durable. And the final assembly turns out to be like this.
Used AutoCAD design software to make measurements and adjust fabrication process. Make your adjustments according to the design parameters of your requirement.
Chassis Fabrication:
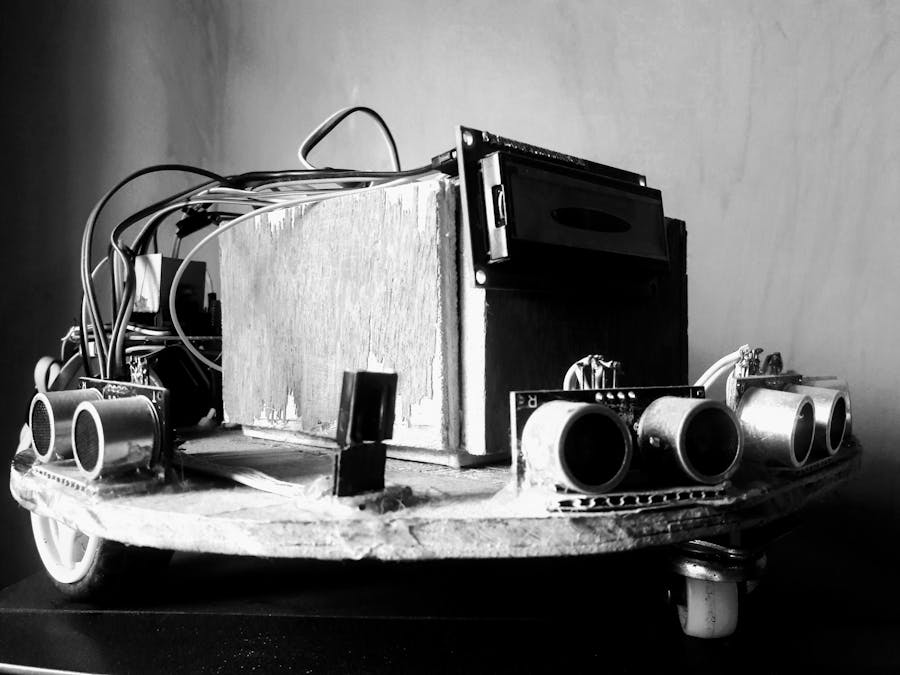
Chassis is made of plywood which is easily available in most of the hardware stores. Had it built in such a way that it can traverse in all areas and all the equipment can fit easily. For this, the preferable shape should be circle/oval shape. The chassis circular shape radius is 5 inch.
Drive motor and Wheels Installation:
Caster Wheel Installation:
Mounting Sonar Sensors on the chassis:
Used Glue gun to mount sonar sensors on the chassis body and card-board paper is used to make them elevated and balanced.
Final Sonar Assembly And Soldering :
Mounting IR receiver on the chassis:
Used female header pins soldered on the Vero board to attach IR receiver and hot glued it on the chassis and the connecting white wires works as VCC, gnd and Signal.
The IR beacon Housing assembly:
The IR beacon/transmitter circuit is extracted from an old tv remote which has some button malfunctions. To keep the beacon always working, had to short a button. The beacon generates frequency at 38KHz and the robot tries to follow that path.
Final Circuit Assembly:
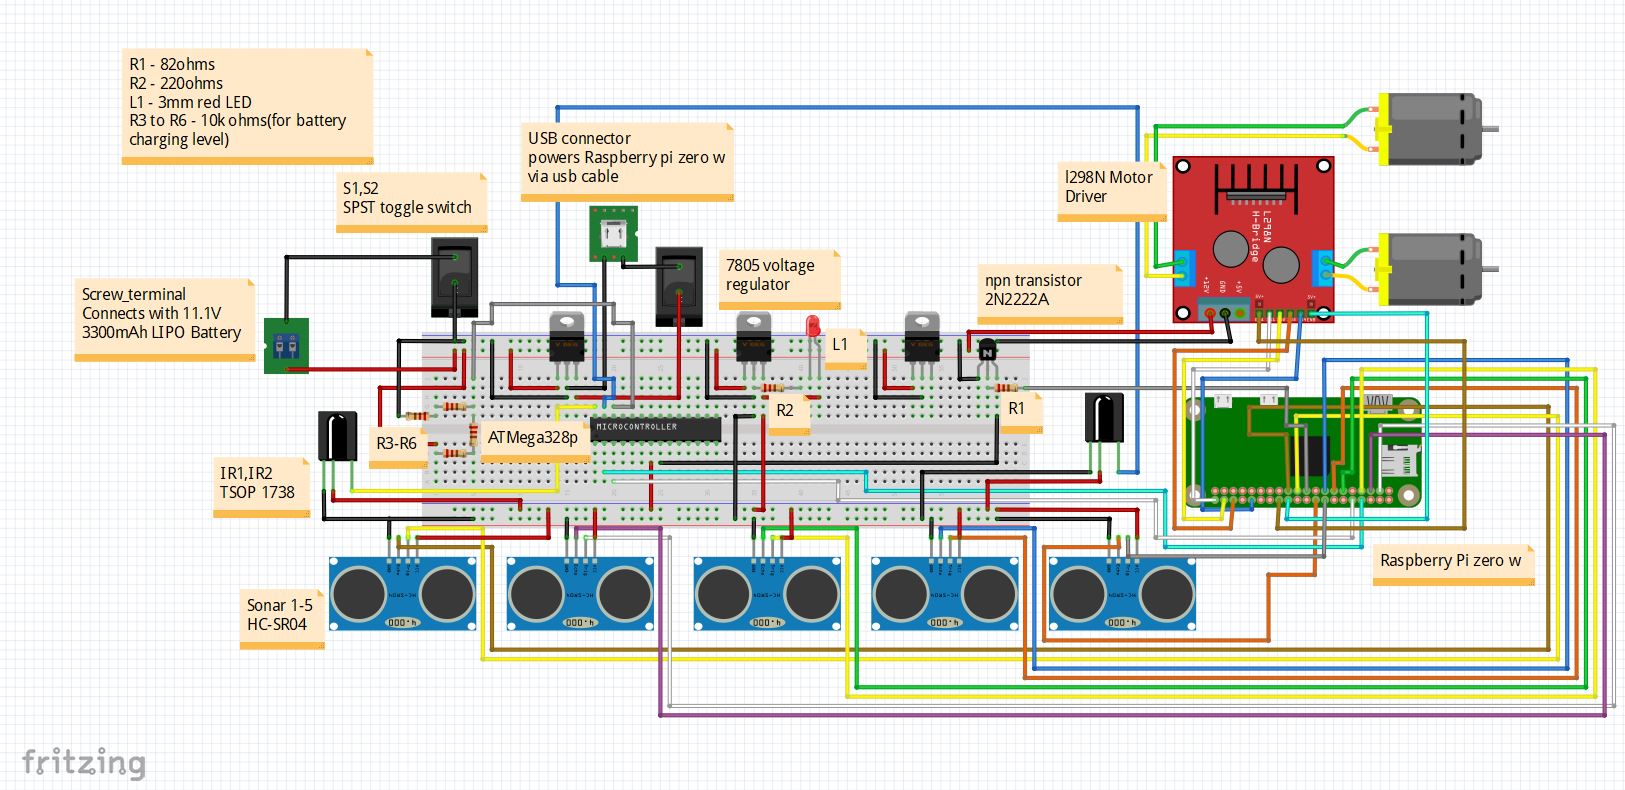
Circuit Diagram can be found on the fritzing file.
Some Instructions:
- I have used analogue sensor like, IR receiver, for reading the sensor value ATMega328p is used.
- ATMega328p extracts sensor data, executes Arduino code and generates motor control strings like:forward, left, right which goes to raspberry pi using serial port (reading tx pin from micro-controller).
- Serial communication setup procedure between raspberry pi and Arduino, can be found here.
- We used external wifi adapter for better connectivity. It's not mandatory to have an external adapter, one can use the built in too.
** This project is quite a long one as it has so many mechanical parts. I have used a chassis previously built for another project of mine so, it was easy for me to refabricate it. Don't worry! I have described the whole procedure as perfect as I could. Hope it helps. :)
Happy Making!


_3u05Tpwasz.png?auto=compress%2Cformat&w=40&h=40&fit=fillmax&bg=fff&dpr=2)
Comments