


Hardware components | ||||||
 |
| × | 1 | |||
 |
| × | 1 | |||
 |
| × | 1 | |||
 |
| × | 1 | |||
 |
| × | 2 | |||
 |
| × | 3 | |||
Software apps and online services | ||||||
| ||||||
We'll explore how to use a WebSocket control panel to broadcast Raspberry Pi Pico W RAM usage and total available and control LEDs in real time.
We'll use MicroPython and the Microdot framework to create a WebSocket server on the Pico, which will send memory stats and temperature data, while also allowing control over two LEDs.
You can also access the full source code on Buy Me a Coffee page.
Project Overview
We will:
- Connect the Raspberry Pi Pico W to a Wi-Fi network.
- Set up a WebSocket server to broadcast data like memory usage and temperature.
- Create a control panel where users can control two LEDs connected to the Pico.
- Display this data and control interface in a web browser using HTML.
- We will test Web Socket from Postman client.
First, we need to connect the Raspberry Pi Pico W to a Wi-Fi network. The following function will establish the connection:
import network

def connect_to_wifi():
    sta_if = network.WLAN(network.STA_IF)
    if not sta_if.isconnected():
        print("Connecting to the network...")
        sta_if.active(True)
        sta_if.connect("YOUR_WIFI_NAME", "YOUR_WIFI_PASSWORD")
        while not sta_if.isconnected():
            pass
    print("Connected to IP: ", sta_if.ifconfig()[0])

connect_to_wifi()
Replace "YOUR_WIFI_NAME" and "YOUR_WIFI_PASSWORD" with your actual Wi-Fi credentials.
Step 2: Setting Up Microdot WebSocket ServerWe will use the Microdot framework to create a basic WebSocket server on the Pico. This server will periodically broadcast the Pico's memory stats and temperature sensor readings.
Here's how to set it up:
import machine
import gc
import uasyncio as asyncio
import json
from microdot import Microdot, send_file
from microdot.websocket import with_websocket
app = Microdot()
adc = machine.ADC(4)
conversion_factor = 3.3 / 65535 # ADC conversion factor
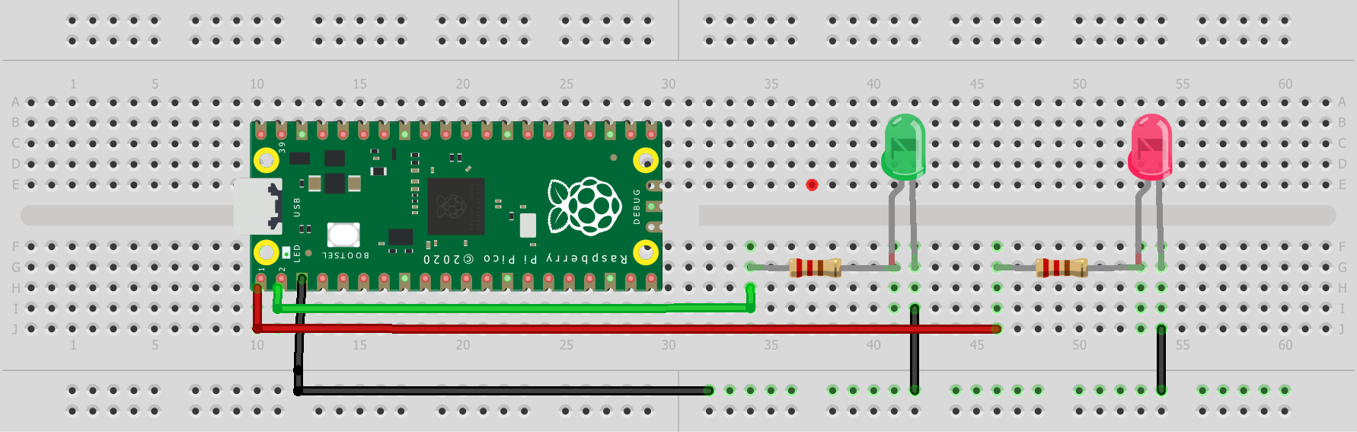
led_green = machine.Pin(0, machine.Pin.OUT)
led_red = machine.Pin(1, machine.Pin.OUT)Next, let's create the WebSocket control panel where the Pico broadcasts memory data and reads incoming LED control commands.
@app.route('/control-panel')
@with_websocket
async def publish_memory(request, ws):
    while True:
        used_memory = gc.mem_alloc() / 1024  # Convert to KB
        free_memory = gc.mem_free() / 1024  # Convert to KB
        total_memory = round(free_memory + used_memory, 2)

        sensor_value = adc.read_u16() * conversion_factor
        temperature = 27 - (sensor_value - 0.706) / 0.001721

        memory_data = {
            'used_memory': round(used_memory, 2),
            'free_memory': round(free_memory, 2),
            'total_memory': round(total_memory, 2),
            'temperature': round(temperature, 2)
        }

        json_data = json.dumps(memory_data)
        await ws.send(json_data)

await asyncio.sleep(1) For the control panel interface, create an index.html file that connects to the WebSocket server running on the Pico, you can get this from official Buy Me Coffee Page.
Step 5: Run the ServerFinally, we run the Microdot server on port 80:
app.run(debug=True, port=80)- Upload the code to your Raspberry Pi Pico W.
- Open the browser and navigate to the Pico's IP address (which you can find in the terminal output).
- You should see the control panel with buttons to control the LEDs.
If you found this guide helpful, consider buying me a coffee to keep the projects coming!


Comments
Please log in or sign up to comment.