Internet of Things is a concept of connecting any device (so long as it has an on/off switch) to the Internet and to other connected devices. The IoT is a giant network of connected things and people – all of which collect and share data about the way they are used and about the environment around them.
Main advantage of IoT is we can control it remotely at anywhere in the world. So in this project we are focused on building a smart power relay which can be connect between any electric appliance and AC power outlet. We can apply this to smart building concepts easily.
The Use CaseBefore going into details on building this project we should take a step back and look at the bigger picture as to how a simple demo project like this could be applied to a real world use-case, solving real problems.
Imagine you are staying at a apartment where each room is equipped with its own refrigerator. In most cases these refrigerators just sits there, consuming energy and not being used, still you end up paying for it indirectly as part of the rent. What if there was a mechanism that would allow you to pay the refrigerator directly for the time it is being used, and at the same time have it automatically turned off when it’s not being used? This is basically the use case we are going to recreate on this tutorial, only difference is that we will be using this remote accessible power relay.
You can use IOTA as a payment method for this system. IOTA is a cryptocurrency designed for the Internet of Things which is Scalable, Decentralised, Modular and Fee Less.
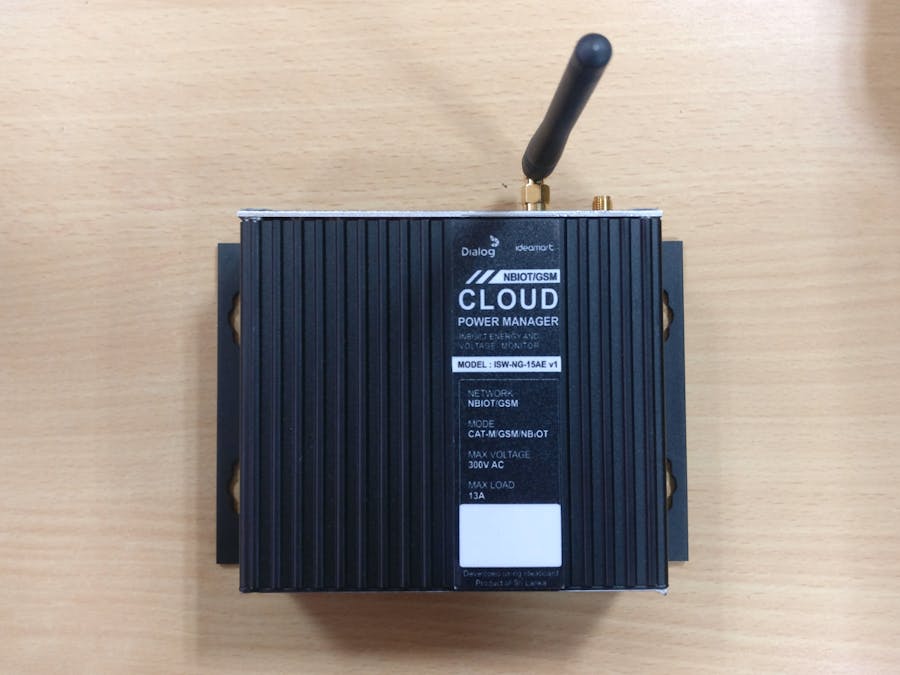
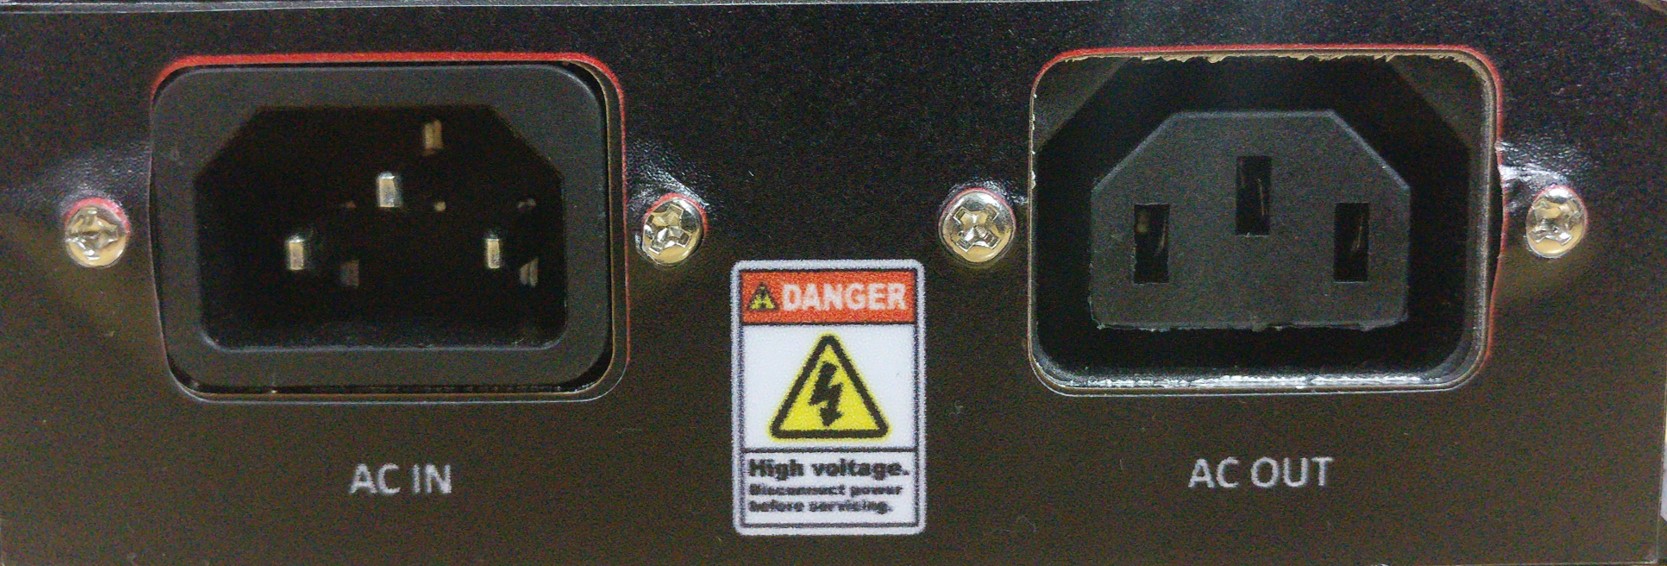
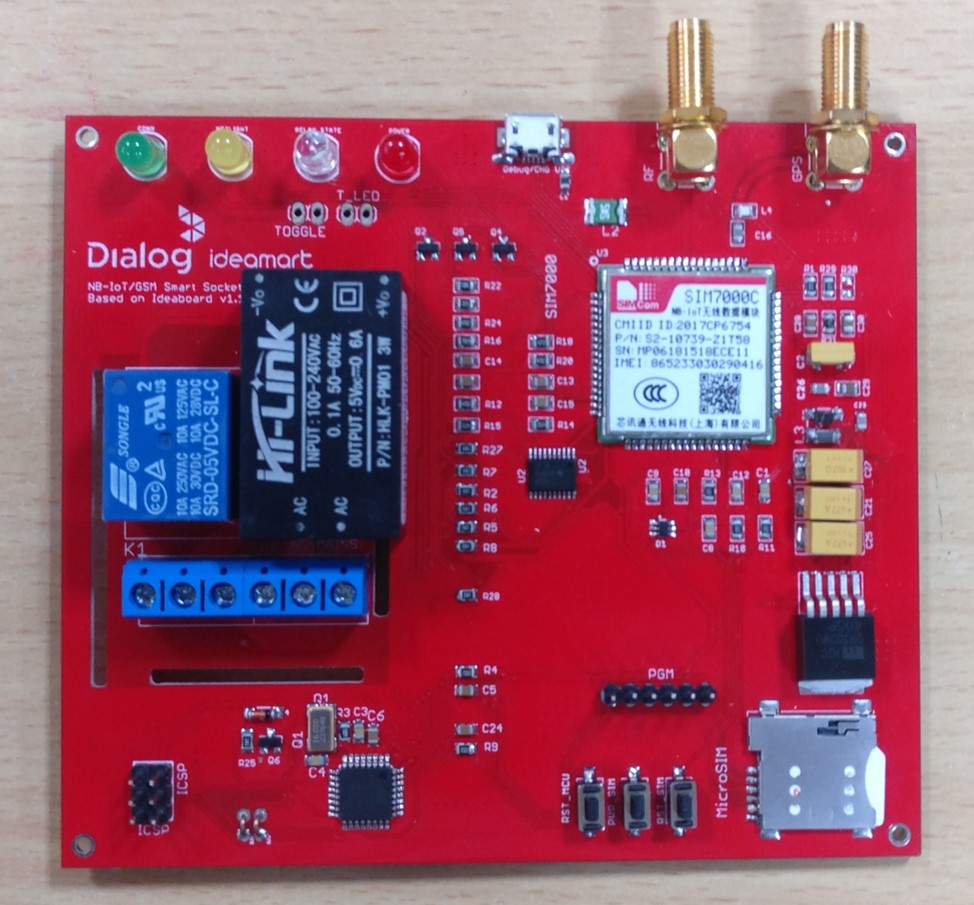
Power Relay ModuleIdeamart Smart Socket is based on Ideamart NB-IoT Developemnet which can be connected to nearest Base transceiver station (BTS) of Mobile Network Operator(MNO). This Development board based on SIM7000E modem which has capability of Radio Access Network technologies like GSM/LTE-M/NB-IoT. In this project we are using a GSM communication. Therefore no need to worry about WiFi connectivity like typical IoT devices.
Here is the Network architecture of proposing system. As you can see Our MNO has enabled GSM/NB-IOT/LTE-M for existing 4G base stations therefore we can directly connect our device to the Ideamart IoT platform because it is a part of our MNO.
Let’s describe a sequence of events to demonstrate how the system can be implemented and used.
First, let’s imagine a hotel owner has installed a refrigerator in your room, placing this power relay module in the refrigerator power circuit. The Power relay works as a control unit for the refrigerator payment system. Next, we create an IOTA address for the refrigerator to be used for monitoring when new refrigerator funds are being added. Finally, we can print a QR code of the IOTA address and attaches the QR code to the refrigerator.
Now, physical part of the system is completed and then we have to write the firmware for our smart power relay module. The PCB design for the Smart socket is based on Ideamart development board and it is actually an extended version of Arduino open hardware project. Therefore you can use your existing Arduino IDE to program. So you need to select board type as Arduino UNO and relevant COM port.
Let's start creating our Arduino sketch as following. First you need to include all the headers of relevant libraries.
#include <TinyGsmClient.h>
#include <PubSubClient.h>
#include <ArduinoJson.h>
#include <SoftwareSerial.h>
In here we are using GSM technology to connect Smart socket with our Mobile Network Operator (MNO) so it need TinyGSMClient library. You can use any GSM library that you are familiar with but I'm using TinyGSM because it is more lightweight than others. And we can not forget MQTT when we are talking about IoT. Because it is the most lightweight and powerful communication protocol for IoT/M2M. So we added PubSubClient to assist us with MQTT. Then we added ArduinoJson library to convert our data format to JSON array because Ideamart IoT platform like to handle with JSON objects. SoftwareSerial library need to be added for passing AT commands to the Simcom modem.
Afterwards you need to define the Simcom module type. Our development board is built with SIM7000 module.
#define TINY_GSM_MODEM_SIM7000
Then we have to define all the GPIO pins given in the below.
 //Socket Pins
#define RELAY_CTRL      5
#define RELAY_STATE     3

//ideaBoard pin configuration
#define ideaBoard_PWRKEY 13
#define ideaBoard_RX      8
#define ideaBoard_TX      7
#define ideaBoard_RST    11
After pin configurations we need to define all parameters required for the establishment of connectivity to Ideamart IoT Platform. Here we defined relevant MQTT protocol parameters such as client id, subscriber topic and publisher topics.
//Ideamart IoT params
#define ID "PM-321"
#define SUB_TOPIC "+/PM-321/ideamart/power_relay/v2/sub"
#define PUB_TOPIC "ideamart/power_relay/v2/common"
#define RES_TOPIC "/PM-321/ideamart/power_relay/v2/pub"
Then we need to assign a default state a LOW and should be initiate all objects regarding connectivity. SerialAT object will communicate to Simcom module via AT commands.
volatile byte state = LOW;

SoftwareSerial SerialAT(7,8); // RX, TX
TinyGsm modem(SerialAT);
TinyGsmClient client(modem);
PubSubClient mqtt(client);
Now we are moving on to setup() section of the Arduino sketch. At first part all the pin configurations related to the indicators LEDs and SIM7000 modem are done. Then Modem Serial communication initiated and afterward GPRS connection is established. In here I was used "dialogbb" as relevant Access Point Name (APN) for my GSM connection. You need to clarify with your MNO regarding exact APN. Finally MQTT Broker is setup by defining server address and port number. Remember that there is a MQTT broker is run on Ideamart IoT platform. Callback function also mentioned here.
 void setup() {
//pinMode configurations
 pinMode(RELAY_CTRL, OUTPUT);
 digitalWrite(RELAY_CTRL, state);
 pinMode(ideaBoard_RST, OUTPUT);
 digitalWrite(ideaBoard_RST, LOW);
 pinMode(ideaBoard_PWRKEY, OUTPUT);
 digitalWrite(ideaBoard_PWRKEY, HIGH);

//Modem setup for AT commands
Serial.begin(115200);
 SerialAT.begin(4800);
 Serial.print(F("Network  : "));
 if (!modem.waitForNetwork()) {
   Serial.println(F(" fail"));
   while (true);
 }
 Serial.println(F(" OK"));

//GPRS connection setup
 Serial.print(F("GPRS     : "));
 if (!modem.gprsConnect("dialogbb", "", "")) {
   Serial.println(F(" fail"));
   while (true);
 }
 Serial.println(F(" OK"));

 // MQTT Broker setup
 mqtt.setServer("mqtt.iot.ideamart.io", 1883);
 mqtt.setCallback(cb);
}
Now moving on to loop() section. This is the program code that run repeatedly until program termination. Here we will try to continue the MQTT connection and if it is failed we try to reconnect every 10 seconds.
void loop() {

//MQTT Connection
 if (mqtt.connected()) {
   mqtt.loop();
 } else {
   if(!modem.gprsConnect("dialogbb", "", "")) {
   Serial.println(F(" GPRS fail"));
   while (true);
 }
   unsigned long t = millis();
   if (t - lra > 10000L) {  // Reconnect every 10 seconds
     lra = t;
     if (mCon()) {
       lra = 0;
     }
   }
 }

 digitalWrite(RELAY_CTRL, state);

}
Following mCon() function generate random client id and subscribe to relevant topic.
boolean mCon() {
 Serial.print(F("MQTT     : "));
 randomSeed(analogRead(5)); //analog pin 5 used to generate random number
 clientId = "PM-" + String(random(0,100000000), HEX);
 if (!mqtt.connect(clientId.c_str(),"ideamart-smartplug-v2_1654","1542340015_1654")) {
   Serial.println(F(" fail"));
   return false;
 }
 Serial.println(F(" OK"));
 Serial.print(F("ClientID :  "));
 Serial.println(clientId);
 mqtt.subscribe(SUB_TOPIC);
 return mqtt.connected();
}
Below callback function filter the received message from the Ideamart IoT platform and run the doA() function.
void cb(char* t, byte* payload, int l) {
 Serial.print(F("Message : "));
 char *id;
 id = strtok(t,"/");
 for (int i = 0; i < l; i++) {
   msg[i] = (char)payload[i];
 }
 doA(msg,id);
 for (int i = 0; i < l; i++) {
   msg[i] = NULL;
 }
}
This doA() function describe the what action need to perform according to received message. Basically it is "on" or "off" action.
void doA(const char* message,String id) {
 StaticJsonBuffer<100> jsonBuffer;
 JsonObject& root = jsonBuffer.parseObject(message);
 String action = root["action"];
    if(action == "on"){
     Serial.println(F("Received ON"));
     digitalWrite(RELAY_CTRL, LOW);
     state= LOW;
     sendResponse(id);
   }
    else if(action == "off"){
     Serial.println(F("Received OFF"));
     digitalWrite(RELAY_CTRL, HIGH);
     state= HIGH;
     sendResponse(id);
   }
}
sendResponse() function publish response status to IoT platform via RES_TOPIC after doing relevant action.
void sendResponse(String id){
 String t= id + RES_TOPIC;
 String message = "{\"response\":\"ok\"}";
 Serial.println(t);
 mqtt.publish(t.c_str(),message.c_str());
}
Okay, now our firmware part is already done. Next move on to device onboarding to Ideamart IoT platform.
Device On-BoardingIdeamart IoT platform is powered by Dialog Axiata, a leading MNO located in Sri Lanka. So definitely you have to create developer account by signing up Ideamart IoT portal. All the instructions of this process well documented and you can access guide by clicking here.
After logging the portal you have to click Device Management section then click Device On-boarding (JSON). Following instructions of documentation, we can onboard our smart power relay device easily.
Let's move on to IOTA side. As you know IOTA is a cryptocurrency designed for the IoT applications and also a distributed ledger for the Internet of Things. It differs from other platforms in that it uses a directed acyclic graph (DAC) instead of the conventional blockchain. You can find lot of tutorials regarding IOTA by searching on the internet.
In this implementation I have used Python distribution for IOTA (PyOTA). Firstly It need to be imported essential Python modules.
# Imports some Python Date/Time functions and json
import time
import datetime
import json
import urllib2

# Imports the PyOTA library
from iota import Iota
from iota import Address
By using get_balances() method we can check the current balance.
# Function for checking address balance on the IOTA tangle.
def checkbalance():
   print("Checking balance")
   gb_result = api.get_balances(address)
   balance = gb_result['balances']
   return (balance[0])
Then we are connecting to IOTA Tangle and creating an IOTA object.
# URL to IOTA fullnode used when checking balance
iotaNode = "https://nodes.thetangle.org:443"
# Create an IOTA object
api = Iota(iotaNode, "")
We can create a new IOTA wallet address or can be used a existing address for the reload the balance.
# IOTA address to be checked for new light funds
# IOTA addresses can be created using the IOTA Wallet
address = [Address(b'GTZUHQSPRAQCTSQBZEEMLZPQUPAA9LPLGWCKFNEVKBINXEXZRACVKKKCYPWPKH9AWLGJHPLOZZOYTALAWOVSIJIYVZ')]
# Get current address balance at startup and use as baseline for measuring new funds being added.
currentbalance = checkbalance()
lastbalance = currentbalance
# Define some variables
lightbalance = 0
balcheckcount = 0
relaystatus = False
Following JSON object talk with Ideamart IoT API to command the device actions.
req = urllib2.Request('https://iotdev.dialog.lk/axt-iot-mbil-instance0001001/apkios/axtitomblebckendde/iotadmindev/device')
req.add_header('Content-Type', 'application/json')

# Main loop that executes every 1 second
while True:
   # Check for new funds and add to relaybalance when found.
   if balcheckcount == 10:
       currentbalance = checkbalance()
       if currentbalance > lastbalance:
           relaybalance = relaybalance + (currentbalance - lastbalance)
           lastbalance = currentbalance
       balcheckcount = 0
   # Manage light balance and light ON/OFF
   if lightbalance > 0:
       if relaystatus == False:
           print("ON")
           data = {"operation":"deviceControl","deviceId":"PM-321","actionName":"actionOne", "actionParameters" : {"ac1Value1":"on"}}
            esponse = urllib2.urlopen(req, json.dumps(data))
           relaytstatus=True
       relaybalance = relaybalance -1
   else:
       if relaystatus == True:
           print("OFF")
           data = {"operation":"deviceControl","deviceId":"PM-321","actionName":"actionOne", "actionParameters" : {"ac1Value1":"off"}}
            esponse = urllib2.urlopen(req, json.dumps(data))
           relaystatus=False
   # Print remaining light balance
   print(datetime.timedelta(seconds=relaybalance))
   # Increase balance check counter
   balcheckcount = balcheckcount +1
   # Pause for 1 sec.
   time.sleep(1)
Python program is finished we have to integrate this program on Ideamart IoT platform. Using Docker we can onboard this Python service. For that click "Device Management" section on IoT portal an go to "Service Onboarding (Plugin)". There are some fields you have to fill and upload zipped folder above python program. Then you have to configure Docker image settings. For more details, you can access documentation.
Note that, if you have own cloud service, you can host your Python script in your space instead of using Ideamart service onboarding feature.
That's it we have successfully implemented our coding part of this system.
To turn on the power relay, you can simply use your favorite IOTA wallet and transfer some IOTAs to the power relay's IOTA address. As soon as the transaction is confirmed by the IOTA Tangle, the power relay should turn on and stay on until the power relay balance is empty depending on the amount of IOTAs you transferred. In this example I have set the IOTA/Power_Relay ratio to be 1 IOTA for 1 second of power relay on.
If you are using a mobile wallet to pay the power relay you may consider printing a QR code that can be scanned for convenience whenever you want to pay the relay.
Now imagine, a guest coming back from shopping having bought a nice bottle of white wine for later that evening. To make sure it stays cool you pick up your mobile phone, open your favorite IOTA wallet, scan the QR code attached to your refrigerator and transfer a certain amount of IOTAs to the refrigerator depending on how long you plan to use it.
As soon as your transaction is confirmed by the Tangle, the refrigerator balance is increased and the change in balance is picked up by the Python program running on the Docker image at Ideamart platform. It will then switch on the relay using MNO's network and the refrigerator will turn on.
The Python program will keep track of time used and the amount of IOTAs you transferred, continuously removing time from your active balance, and finally turning off the refrigerator when your balance is empty.
That’s it… Hope you learn the real world IOTA application. Cheers!!!


Comments
Please log in or sign up to comment.