


Hardware components | ||||||
_xcg7vos8ax_LjVH1Q6mKB.png?auto=compress%2Cformat&w=48&h=48&fit=fill&bg=ffffff) |
| × | 1 | |||
 |
| × | 1 | |||
 |
| × | 1 | |||
Software apps and online services | ||||||
| ||||||
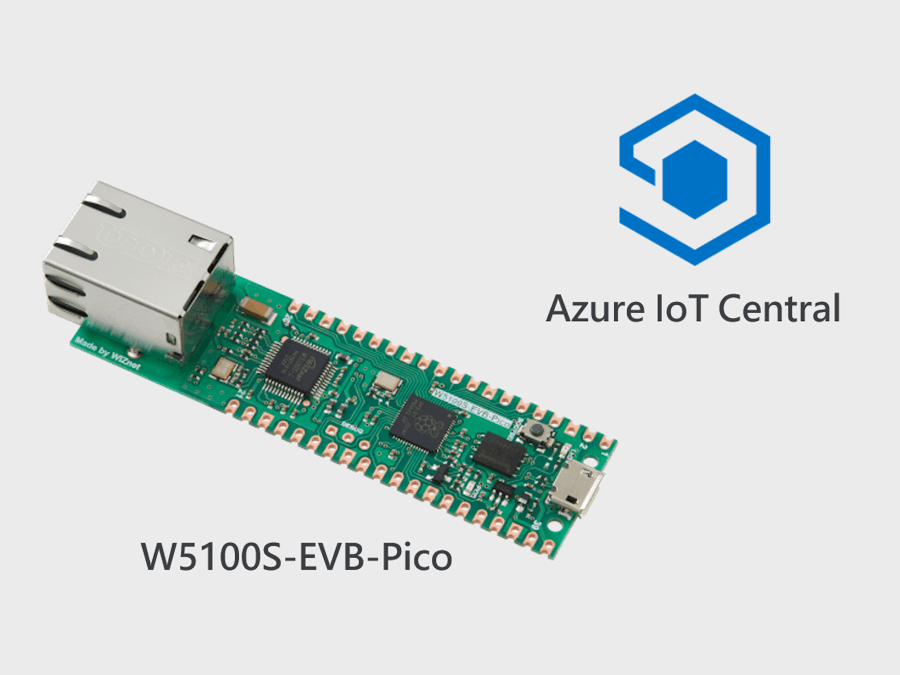
Using WIZnet’s W5100S-EVB-Pico board, I’ll summarize the contents to connect to Azure IoT Central with an X.509 certificate.
W5100S-EVB-Pico is an evaluation board based on the recently released RP2040 microcontroller chip from Raspberry Pi and W5100S, the Ethernet chip of WIZnet.
It can be developed in the same environment as the Raspberry Pi Pico platform, and Ethernet can be used through W5100S. You can refer to the link below for the device information.
Hardware SetupThe hardware setup is simple.
Just connect the micro 5 pin cable to power the W5100S-EVB-Pico.
Additionally, to use the network, I used an Ethernet cable to connect to an AP that supports a DHCP server.
Information on setting up the development environment is in the official documentation (Getting Started Guide).
I refer to the Windows and Visual Studio Code environment part of the documentation.
The documentation can be found at the link below.
The development environment configuration is well described in the guide, so you can follow it according to your own development environment.
One thing to check is to install and use the Build Tool of Visual Studio 2019. If you run VS Code through VS Command Prompt, you can use the related tools.
At first, I tried to build without checking this part, but it kept failing, so I read the guide again and applied the contents.
Visual Studio Build Tools must be installed first.
Run VS Code with Developer Command Prompt
To use Visual Studio’s build environment, run VS Code through the Developer Command Prompt for VS 2019 as follows:
This will open Visual Studio Code with all the correct environment variables set so that the toolchain is correctly configured.
VS Code settings
To build in VS Code settings, CMake and Pico SDK paths are set as follows.
"cmake.cmakePath": "C:\\Program Files\\CMake\\bin\\cmake.exe",
"cmake.configureSettings": {
    "PICO_SDK_PATH": "D:\\_RaspberryPi_Pico\\pico-sdk"
},
Github Repository
The code used the RP2040-HAT-AZURE-C project provided by WIZnet.
Clone the project to the local PC using the git command.
git clone https://github.com/Wiznet/RP2040-HAT-AZURE-CRun VS code through the Developer Command Prompt, and then open the project directory through the Open Folder menu.
With the IoT Central trial plan (7 days), you can create and use applications without an Azure subscription.
The Azure Subscription is required after 7 days.
For more information, refer to the MS Azure Guide.
Create certificates with OpenSSLGenerates an X.509 certificate to be used for device authentication. I used OpenSSL, refer to the guide below.
I'll generate the certificates below and enter them into the IoT Central app and device code.
To use OpenSSL command, I used WSL(Windows Subsystem for Linux) environment.
The .conf file used to create the Root CA and Sub CA uses the contents in the guide as it is, and only the name has been changed.
- Root CA
- Subordinate CA
- Device certificates
Root CA setup and creation
- Create Root CA directory structure
- Create rootca.conf file
- Generate certificate
~$ mkdir rootca
~$ cd rootca/
~/rootca$ mkdir certs db private
~/rootca$ touch db/index
~/rootca$ openssl rand -hex 16 > db/serial
~/rootca$ echo 1001 > db/crlnumber
*# Change certificate name (commonName)**
~/subca$ vi rootca.conf
~/rootca$ openssl req -new -config rootca.conf -out rootca.csr -keyout private/rootca.key
~/rootca$ openssl ca -selfsign -config rootca.conf -in rootca.csr -out rootca.crt -extensions ca_ext
Sub certificate setup and creation
- Create Sub CA directory structure
- Create subca.conf file
- Generate certificate
~/rootca$ cd ..
~$ ls
~$ mkdir subca
~$ cd subca/
~/subca$ mkdir certs db private
~/subca$ touch db/index
~/subca$ openssl rand -hex 16 > db/serial
~/subca$ echo 1001 > db/crlnumber
# Change certificate name (modify commonName value)
~/subca$ vi subca.conf
~/subca$ openssl rand -hex 16 > ../rootca/db/serial
~/subca$ openssl req -new -config subca.conf -out subca.csr -keyout private/subca.key
~/subca$ openssl ca -config ../rootca/rootca.conf -in subca.csr -out subca.crt -extensions sub_ca_ext
Proof of possession (verify certificate)
Register subca.crt created earlier in IoT Central.
Click the new button → Create a new enrollment group
- Name: Specify an identifiable name
- Attestation type: Certificates (X.509)
If you click the Save button to save, the screen to register the certificate appears at the bottom.
After clicking the ‘Manage primary’ button, click the folder-shaped icon to upload the certificate.
Upload subca.crt
Click the Generate verification code button to generate and copy the verification code.
Generate a verified certificate using OpenSSL. Enter the generated verification code at this time.
~/subca$ openssl genpkey -out pop.key -algorithm RSA -pkeyopt rsa_keygen_bits:2048
~/subca$ openssl req -new -key pop.key -out pop.csr
****Paste the verification code into Common Name**

~/subca$ openssl ca -config subca.conf -in pop.csr -out pop.crt -extensions client_ext
After clicking the Verify button, select the generated verify certificate from the file selection pop-up window that appears.
(If you can’t see the files, select the option to view all files)
When the proof of ownership is completed, the status is changed to Verified as shown in the screen above.
Now the Group Enrollment is complete, will create a certificate to be used on the device.
Device certificate
- Generate device certificate.
- Enter the Device ID to be used when entering the Common Name.
$ openssl genpkey -out device.key -algorithm RSA -pkeyopt rsa_keygen_bits:2048
$ openssl req -new -key device.key -out device.csr
==> Common Name (e.g. server FQDN or YOUR name) []: Enter w5100s-evb-pico-01

$ openssl req -text -in device.csr -noout
$ openssl ca -config subca.conf -in device.csr -out device.crt -extensions client_ext
During the code writing process, the device certificate file will be created and added as a variable.
Build and RunModify and execute some application code.
Modify main code
Set up the example application to be used in the main code.
Since we will be provisioning with an X.509 certificate, we define it as APP_PROV_X509.
// The application you wish to use should be uncommented
//
//#define APP_TELEMETRY
//#define APP_C2D
//#define APP_CLI_X509
#define APP_PROV_X509
Modify sample_certs code
The generated device certificate must be added as a variable to sample_certs.c.
The variables to use to connect with IoT Central X.509 certificate authentication are as follows.
For pico_az_COMMON_NAME, use the same value as the Common Name written when creating the device certificate.
Convert certificate file to a variable (Using Bash shell)
To add the certificate value as a variable in the device source code, the value must be converted into a variable form.
You can open the file with VS Code and edit it directly, but it is cumbersome to edit the file every time, so I used the script provided by MS Guide.
Details can be found at the link below.
Once you change the input in the script to the target file name and paste it into the shell as it is, the result value in the form of a variable is output. To change the path to a parameter, only the input part was changed.
Create a script file (.sh) with Vim and use it.
Create a certificate conversion script
$ vi convert_cert.sh
input=$1
bContinue=true
prev=
while $bContinue; do
    if read -r next; then
        if [ -n "$prev" ]; then
            echo "\"$prev\\n\""
        fi
        prev=$next
    else
        echo "\"$prev\";"
        bContinue=false
    fi
done < "$input"
Run script
$ chmod +x convert_cert.sh
$ ./convert_cert.sh <Certificate path>
The key file is also can be converted in the same way.
Update certificates to code
Put the corresponding values in the sample_cert.c file.
const char pico_az_id_scope[] = "<ID Scope>";
const char pico_az_COMMON_NAME[] = "w5100s-evb-pico-01";
const char pico_az_CERTIFICATE[] =
"-----BEGIN CERTIFICATE-----\n"
"MIIDQDCCAiigAwIBAgIPAoh1JOyCoN2l8TasygP2MA0GCSqGSIb3DQEBCwUAMCUx\n"
...
"3agwSktbbJYEpQt2sZrdgIf5V3RsZH2/wZtLBBiVFismcVVEgY2qnBQXNxyQcc0z\n"
"9Vz3OITjhrWKTMkF0l/TNiy4eEU=\n"
"-----END CERTIFICATE-----";
const char pico_az_PRIVATE_KEY[] =
"-----BEGIN PRIVATE KEY-----\n"
"MIIEvgIBADANBgkqhkiG9w0BAQEFAASCBKgwggSkAgEAAoIBAQDpHayE/0vdXbp2\n"
...
"W10KeONpLN+MyMr0fDgsHb6Bc5Re/S4s+CgprfvxiHLgQSFlb1wfCXG3xvuqgJk+\n"
"vrEySFLI2uifS0f64HLVtAPe\n"
"-----END PRIVATE KEY-----";
Build
Click the Build button at the bottom of VS Code or press the shortcut **F7** to build.
The first build may take a few minutes to complete.
[main] Building folder: RP2040-HAT-AZURE-C
[build] Starting build
[proc] Executing command: "C:\Program Files\CMake\bin\cmake.exe" --build d:/_RaspberryPi_Pico/RP2040-HAT-AZURE-C/build --config Debug --target all -j 10 --
[build] Warning: NMake does not support parallel builds. Ignoring parallel build command line option.
[build] [  0%] Built target bs2_default
[build] [  1%] Built target bs2_default_padded_checksummed_asm
[build] [ 12%] Built target mbedcrypto
...
...
[build] [ 97%] Built target LOOPBACK_FILES
[build] [ 97%] Built target FTPSERVER_FILES
[build] [ 98%] Built target HTTPSERVER_FILES
[build] [100%] Built target MQTT_FILES
[build] Build finished with exit code 0When the build completes successfully, the output is created in the build directory.
The firmware to be used in W5100S-EVB-Pico is the main.uf2 file.
Upload Firmware
Copy the firmware to the device through the following procedure.
While pressing the BOOTSEL button of W5100S-EVB-Pico, supply power to make it into Storage mode.
- W5100S-EVB-Pico Pinout: https://docs.wiznet.io/Product/iEthernet/W5100S/w5100s-evb-pico#pin-out
- If you enter Storage mode, the device drive named RPI-RP2 appears. (Windows environment)
Copy the main.uf2 file to the top-level path of the drive.
- The device will restart automatically.
Check the device created in IoT Central
Confirm device creation
Check the sample data sent from the example code
Device operation status can be monitored using terminal programs such as Terra Term or Putty.
Check the COM port number corresponding to W5100S-EVB-Pico in Windows Device Manager, and connect by setting the corresponding port in the terminal program.
In the case of Terra Term, you can connect by setting as follows.


Comments
Please log in or sign up to comment.