Alarm systems are great, but how practical are they when you cant see exactly what has happened at your house/workplace? Was it just a spider that walked across the sensor, or is there someone breaking into your house?
Being able to get realtime notifications whilst you are away from your home, with a photo showing exactly what is happening, is a great feature to have as well.
Features of Android Things Motion Camera:
• Remotely Arm/Disarm system
• Detect Motion and take photos of motion
• Receive push notifications when motion is detected
• Ability to view photos and the time the photo was taken when motion has occurred in the companion mobile app
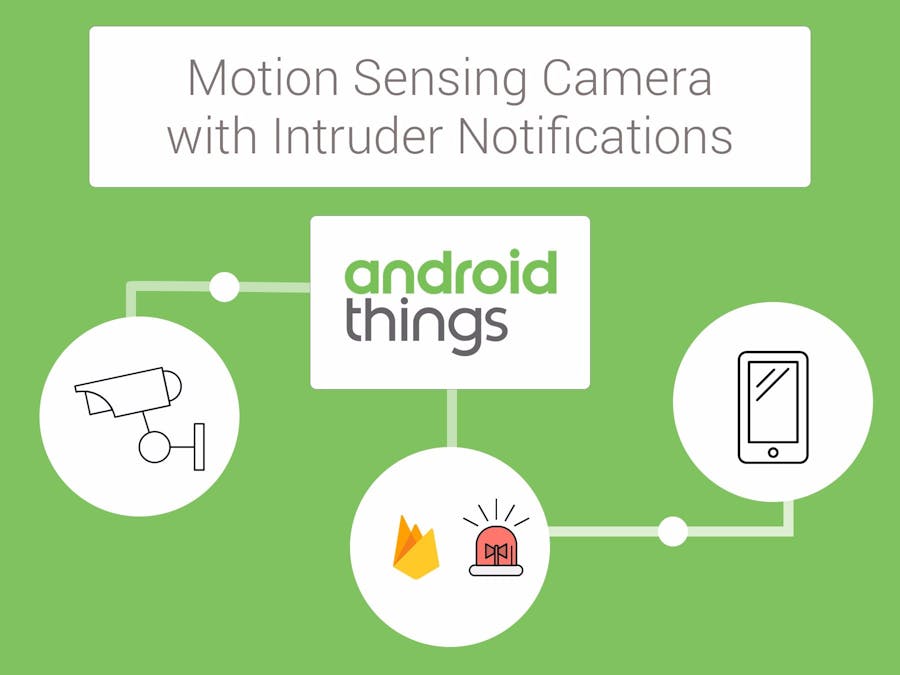
This Android Things application works as follows:
If the motion sensor picks up motion, a photo is taken and uploaded to Firebase Realtime Database with a timestamp.
If it detects motion, a notification is sent to the companion Android Device indicating that motion has been detected.
Want to make your own version of this project?Follow the steps below:
Hardware set up:Make sure you have an Android Things Device. In my case I will be using the i.MX7D device running Android Things. Follow this guide to setup your device to run Android Things.
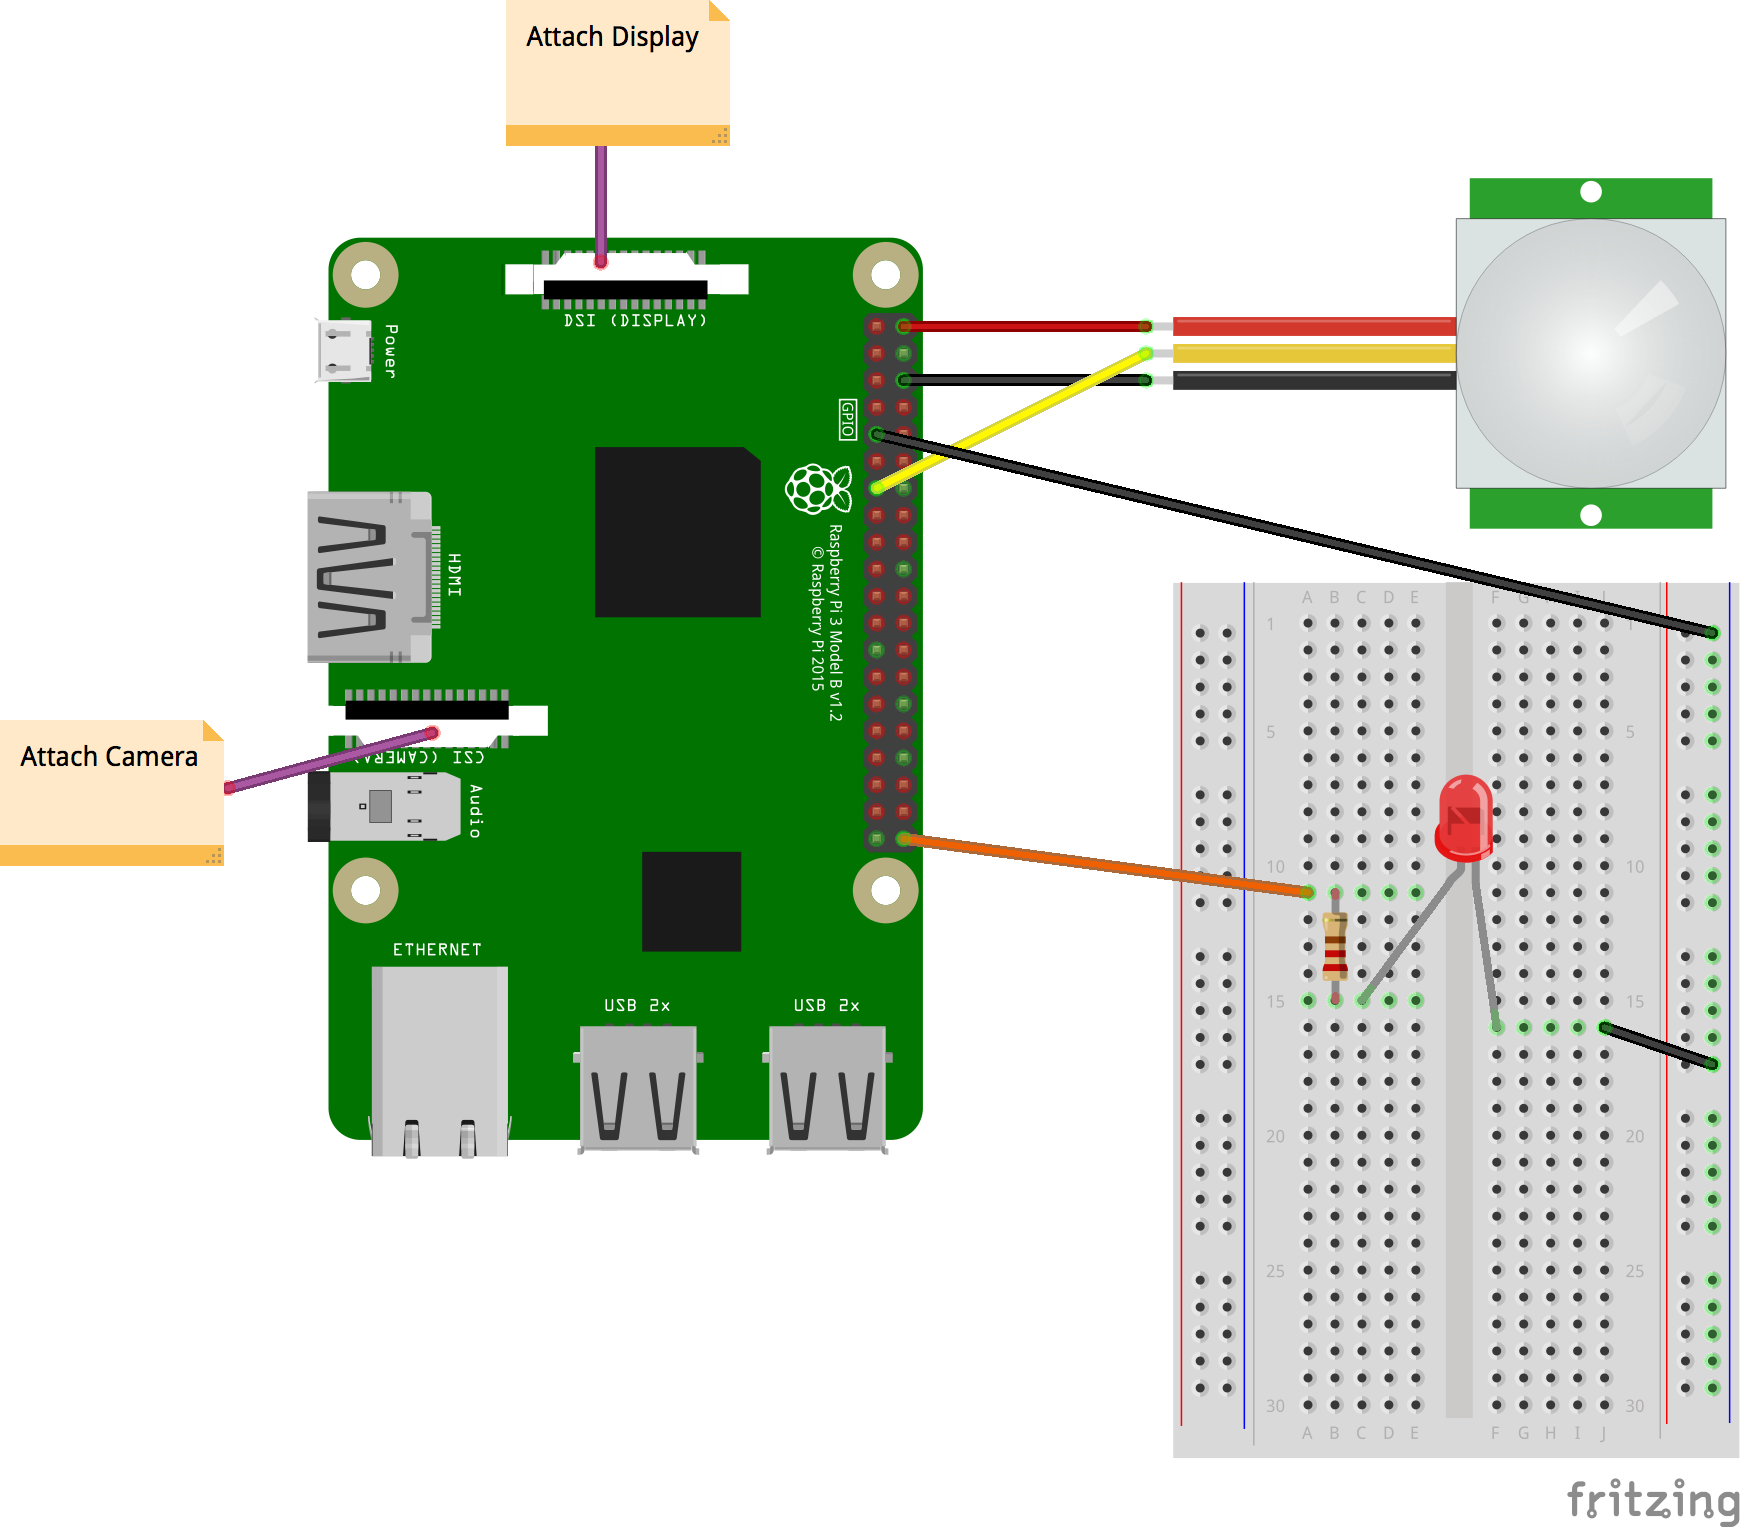
Once you have the device setup running Android Things, attach the Motion Sensor to the Android Things board. Setup an LED indicator as well using a breadboard. The LED will go on and off when motion is detected by the PIR Motion sensor. Follow the schematics below:
A display is optional for this app but allows you to see the images that the system is taking, as well as arm/disarm the system from the Android Things device.
Here is an image of the whole setup and wiring:
Check out the sample code from the Github repository linked here. Open the source code in Android Studio.
The repository consists of 3 projects:
- things : the project that runs on the Android Things device, this includes the motion sensor detection and photo capturing.
- mobile : the companion app that runs on any Android phone. Receives push notifications when photos are taken from the things project.
- cloud-functions : the Cloud Functions that will be deployed to your Firebase Server. This function contains the logic that monitors when a new motion log is added on the server. It constructs a push notification to send to registered mobile devices.
You will need to create a Firebase Project. The Firebase Realtime database will be used to store information about when the motion sensor was triggered. Firebase Storage will be used to store the images that we capture when motion is detected.
Head to firebase.google.com and click "Get Started".
Select "Add project", give it a useful name and a default region and select "Create Project"
Select "Add Firebase to your Android App"
Input the package name, in this case we will use "za.co.riggaroo.motioncamera" , give it an App nickname and then select "Register App".
It will then prompt you to save the google-services.json file to your own directory for your application.
You will need to save this file in two places:
android-things-motion-camera/mobile/google-services.json
android-things-motion-camera/things/google-services.json
Once you have saved these files, click "Continue" and then "Finish" in Firebase.
We will need to edit the default Firebase Database Rules in order to enable full write access to the database and storage (Please don't leave something in production with these rules on like this, it is a major security issue if anyone can arm/disarm your alarm and see what is happening in your house!)
Click on "Database" and select "Rules". Change "read" and "write" to return true. Click "Publish".
We need to do the same for the "Storage". Select "Rules" and change the config to allow all reads and writes. Once changed, hit "Publish"
You have now setup the Firebase portion of the project.
Running the Android Things Project [things]Switch back to Android Studio and sync your gradle project.
Plug in your Android Things device into your computer or make sure you are connected to the device via ADB. You can ensure that your device is connected by running the following via command line:
adb devices
You should then see something along the lines of:
List of devices attached
000003b56f2a5022 device
Make sure your device has an internet connection so that it can upload images to Firebase. To connect the device to the internet, run the following ADB command with your WiFi SSID and WiFi Password (alternatively connect an ethernet cable):
adb shell am startservice -n com.google.wifisetup/.WifiSetupService -a WifiSetupService.Connect -e ssid YourWifiSSID -e passphrase YourWifiPassword
In Android Studio make sure the "things" module is selected to deploy onto your device. Click the run button.
Select the Android Things IoT device to deploy the "things" module onto:
You should then see the app running on the Android Things device. Move your hand in front of the motion sensor to trigger it. The LED should come on, it should snap a picture and upload the picture to Firebase. You can use the "ARM SYSTEM / DISARM SYSTEM" button in order to stop the upload of images/logs to the Firebase database.
Firebase Cloud Functions Deployment [cloud-functions]:In order to receive push notifications to our phones when motion has been detected, we need to deploy the Cloud Functions to Firebase.
In order to do this, navigate into the cloud-functions/functions folder within the repository. For more information about getting started with Cloud Functions, read here.
The Firebase CLI requires Node.js and npm, which you can install by following the instructions on https://nodejs.org/. Installing Node.js also installs npm.
Cloud Functions runs Node v.6.11.1, so we recommend that you develop locally with this version.
Once you have Node.js and npm installed, install the Firebase CLI via npm:
npm install -g firebase-tools
To initialize your project:
- Run
firebase loginto log in via the browser and authenticate the firebase tool.
- Go to your Firebase project directory.
- Run
firebase deploy --only functionsfrom within the android-things-motion-camera/cloud-functions/functions directory.
You should then see "Deploy complete" with a link to the project console for you to view the deployed functions.
You should then be able to view the function in the Firebase Console online:
Switch back to Android Studio, make sure you have another Android device plugged in (Android Phone). Select "mobile" module to deploy, press the green run button.
Select your phone and select "OK".
You should now see the Motion Sensing companion app running on your device, with a list of the latest motion pictures and the option to remotely arm/disarm your alarm.
There we have it, you have successfully built your Android Things Motion Sensing camera! Have anything to add? Let me know on Twitter.
A Note about Security
Currently this application has no security rules implemented. Anyone who gains access to the Firebase Storage URL as well as the Firebase Realtime Database URL can easily access any information on the system as well as change any information. There are plenty of different ways in which you can secure the system but for demonstration purposes it hasn't been implemented in this project. Please do not do this if you intend on using this project in production.
Further improvements:Example Control using Google AssistantThis project can also be extended to use the Google Assistant to control the alarm system. This is just a prototype example of it and I wont include details of how to do that in this post, as it requires quite a few steps to implement. You can see the Google Assistant Branch on the repository for more information.
TensorFlow IntegrationIn future, I would like this example to take a photo and let me know what is detected in the image, for example I would like to receive a notification only when a body / person is detected in the image. To do that, I would make use of TensorFlow and base it of the TensorFlow example here.
References


Comments