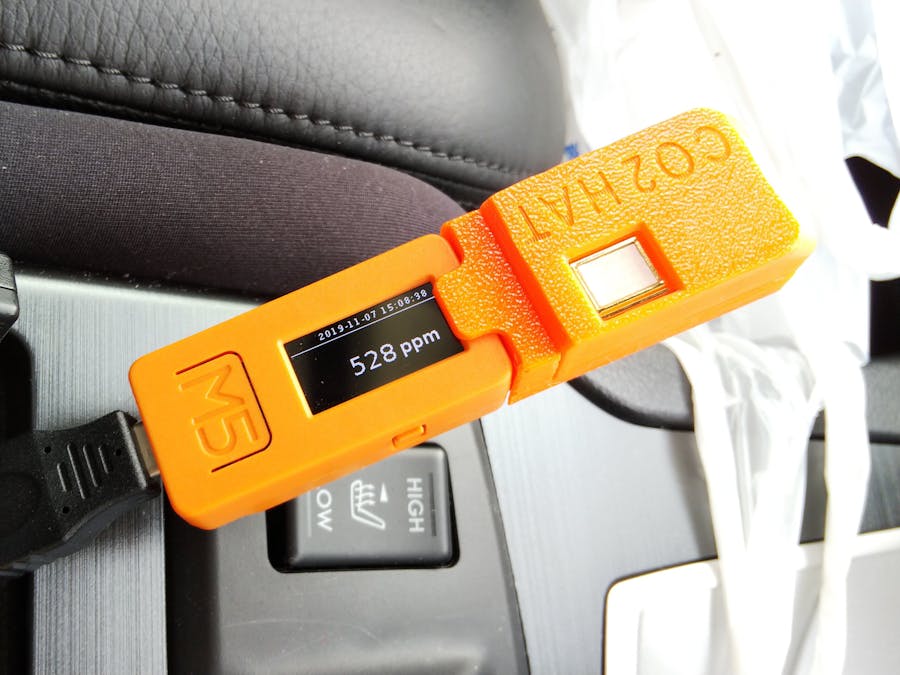
Cause I've been working at home and being cooped up in my room, I decided to make a CO2 meter as a guide to ventilate my room.
A MOX gas type that called CCS811 showed inappropriate results for measuring actual CO2 concentration, such as higher readings due to human farting, so I use a high-precision NDIR-type MH-Z19B in this case.
I designed all of these to fit inside the enclosure for safe use.
I designed the board in KiCAD, ordered the board from FusionPCB, and 3D printed the enclosure using the same orange-colored filament as the M5StickC.
It can be easily attached to the M5StickC.
You can take it outside with a USB power supply.
It is possible to display past records as graphs when you use Ambient that is a data visualization service.
Note: The following is a simplified version of the explanation. For more detailed explanation, please refer to my blog.
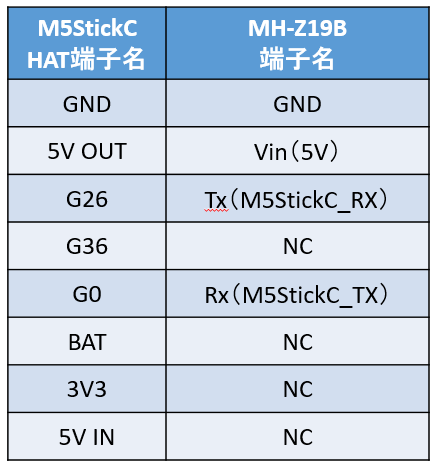
How to build a CO2 HATSolder MH-Z19B to the board.
Put it in the case and assemble it.
Attach it to the M5StickC.
The program code is available on GitHub.
The program is written in MicroPython.
Please write the UIFlow firmware to the M5StickC and use it.
How to use itOnce started, the CO2 concentration value will be displayed.
It is preheat time of the MH-Z19B so the value displayed less than 3 minutes is not appropriate.
Press A button on the M5StickC to toggle the screen off and on.
Press B button on the M5StickC to rotate the screen display 180 degrees.
ConclusionIt's very good that showing me the timing of room ventilation, which I used to do with my physical senses.
I would like to be careful to ventilate the room frequently to prevent COVID-19.


Comments
Please log in or sign up to comment.