


Hardware components | ||||||
| × | 1 | ||||
| × | 1 | ||||
| × | 1 | ||||
| × | 1 | ||||
Software apps and online services | ||||||
 |
| |||||
I want to present an IoT barometer. It permits to measure and store temperature and pressure data in theAdafruit IoT Platform.
I have published a similar project that measures temperature and humidity.
For this project, I used a BMP280 sensor connected to an ESP8266. This one connects via wifi to send data to the Adafruit IO platform.
I show a picture of my dashboards.
If you do not know about Adafruit IO. Go to the following link for a tutorial:
Tutorial Link: https://learn.adafruit.com/adafruit-io-basics-analog-input
Note: If you are having issues connecting, please ensure you have the latest Adafruit IO Arduino library.
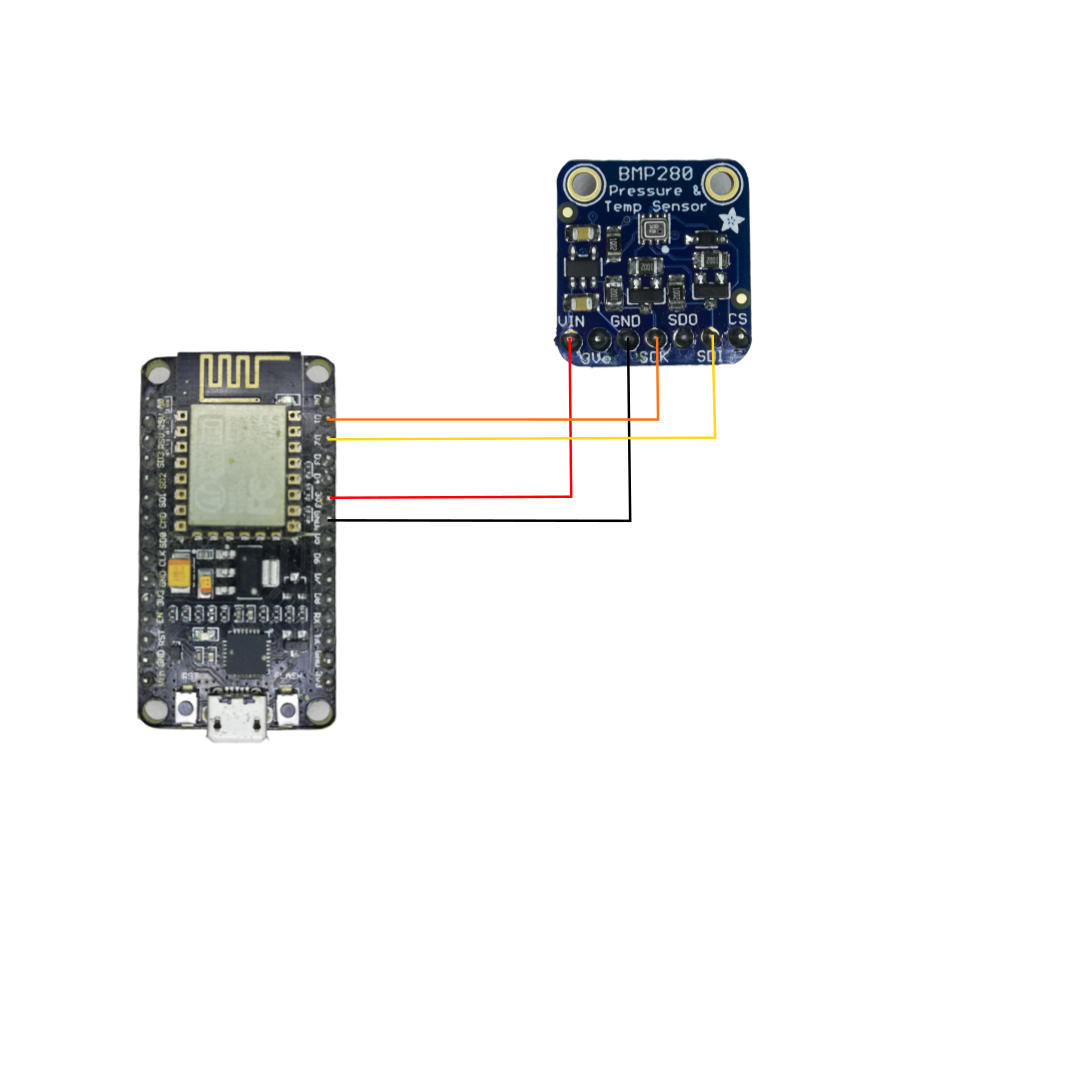
Diagram
Power Pins:
• Vin: 3-5VDC.
• 3Vo: 3.3V output from the voltage regulator.
• GND - common ground for power and logic.
I2C Logic pins:
• SCK: the I2C clock pin, connect to your microcontroller I2C clock line.
• SDI: the I2C data pin, connect to your microcontroller I2C data line.
Connections
D1 => SCK
D2 => SDI
• Vin: 3-5VDC.
• 3Vo: 3.3V output from the voltage regulator.
• GND - common ground for power and logic.
I2C Logic pins:
• SCK: the I2C clock pin, connect to your microcontroller I2C clock line.
• SDI: the I2C data pin, connect to your microcontroller I2C data line.
Connections
D1 => SCK
D2 => SDI
11 projects • 8 followers
Electronic is my passion. I like to work with programming devices like Arduino, ESP8266, Raspberry Pi. I enjoy design electronic projects.


Comments
Please log in or sign up to comment.