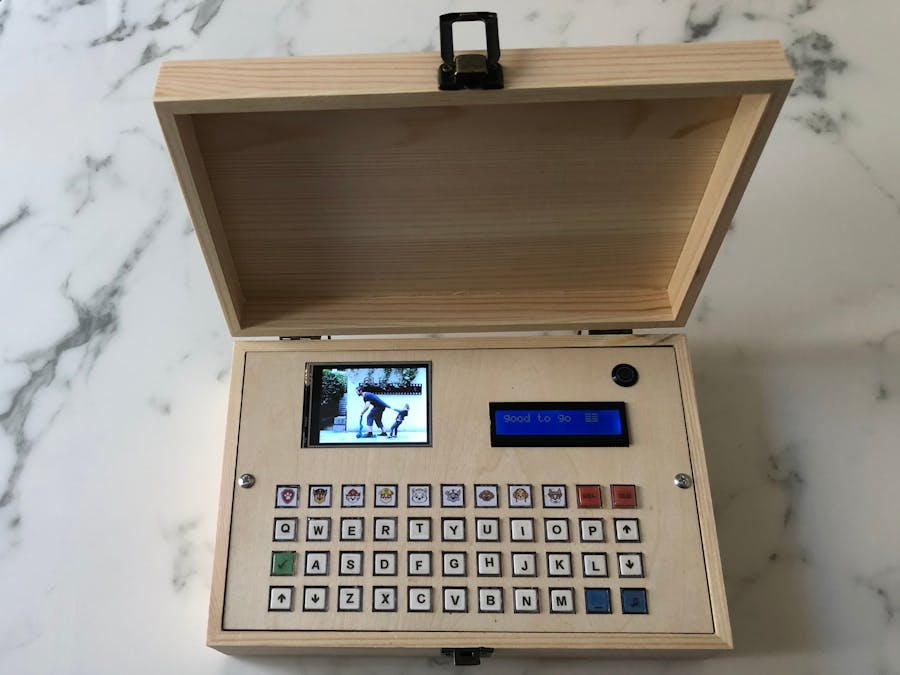
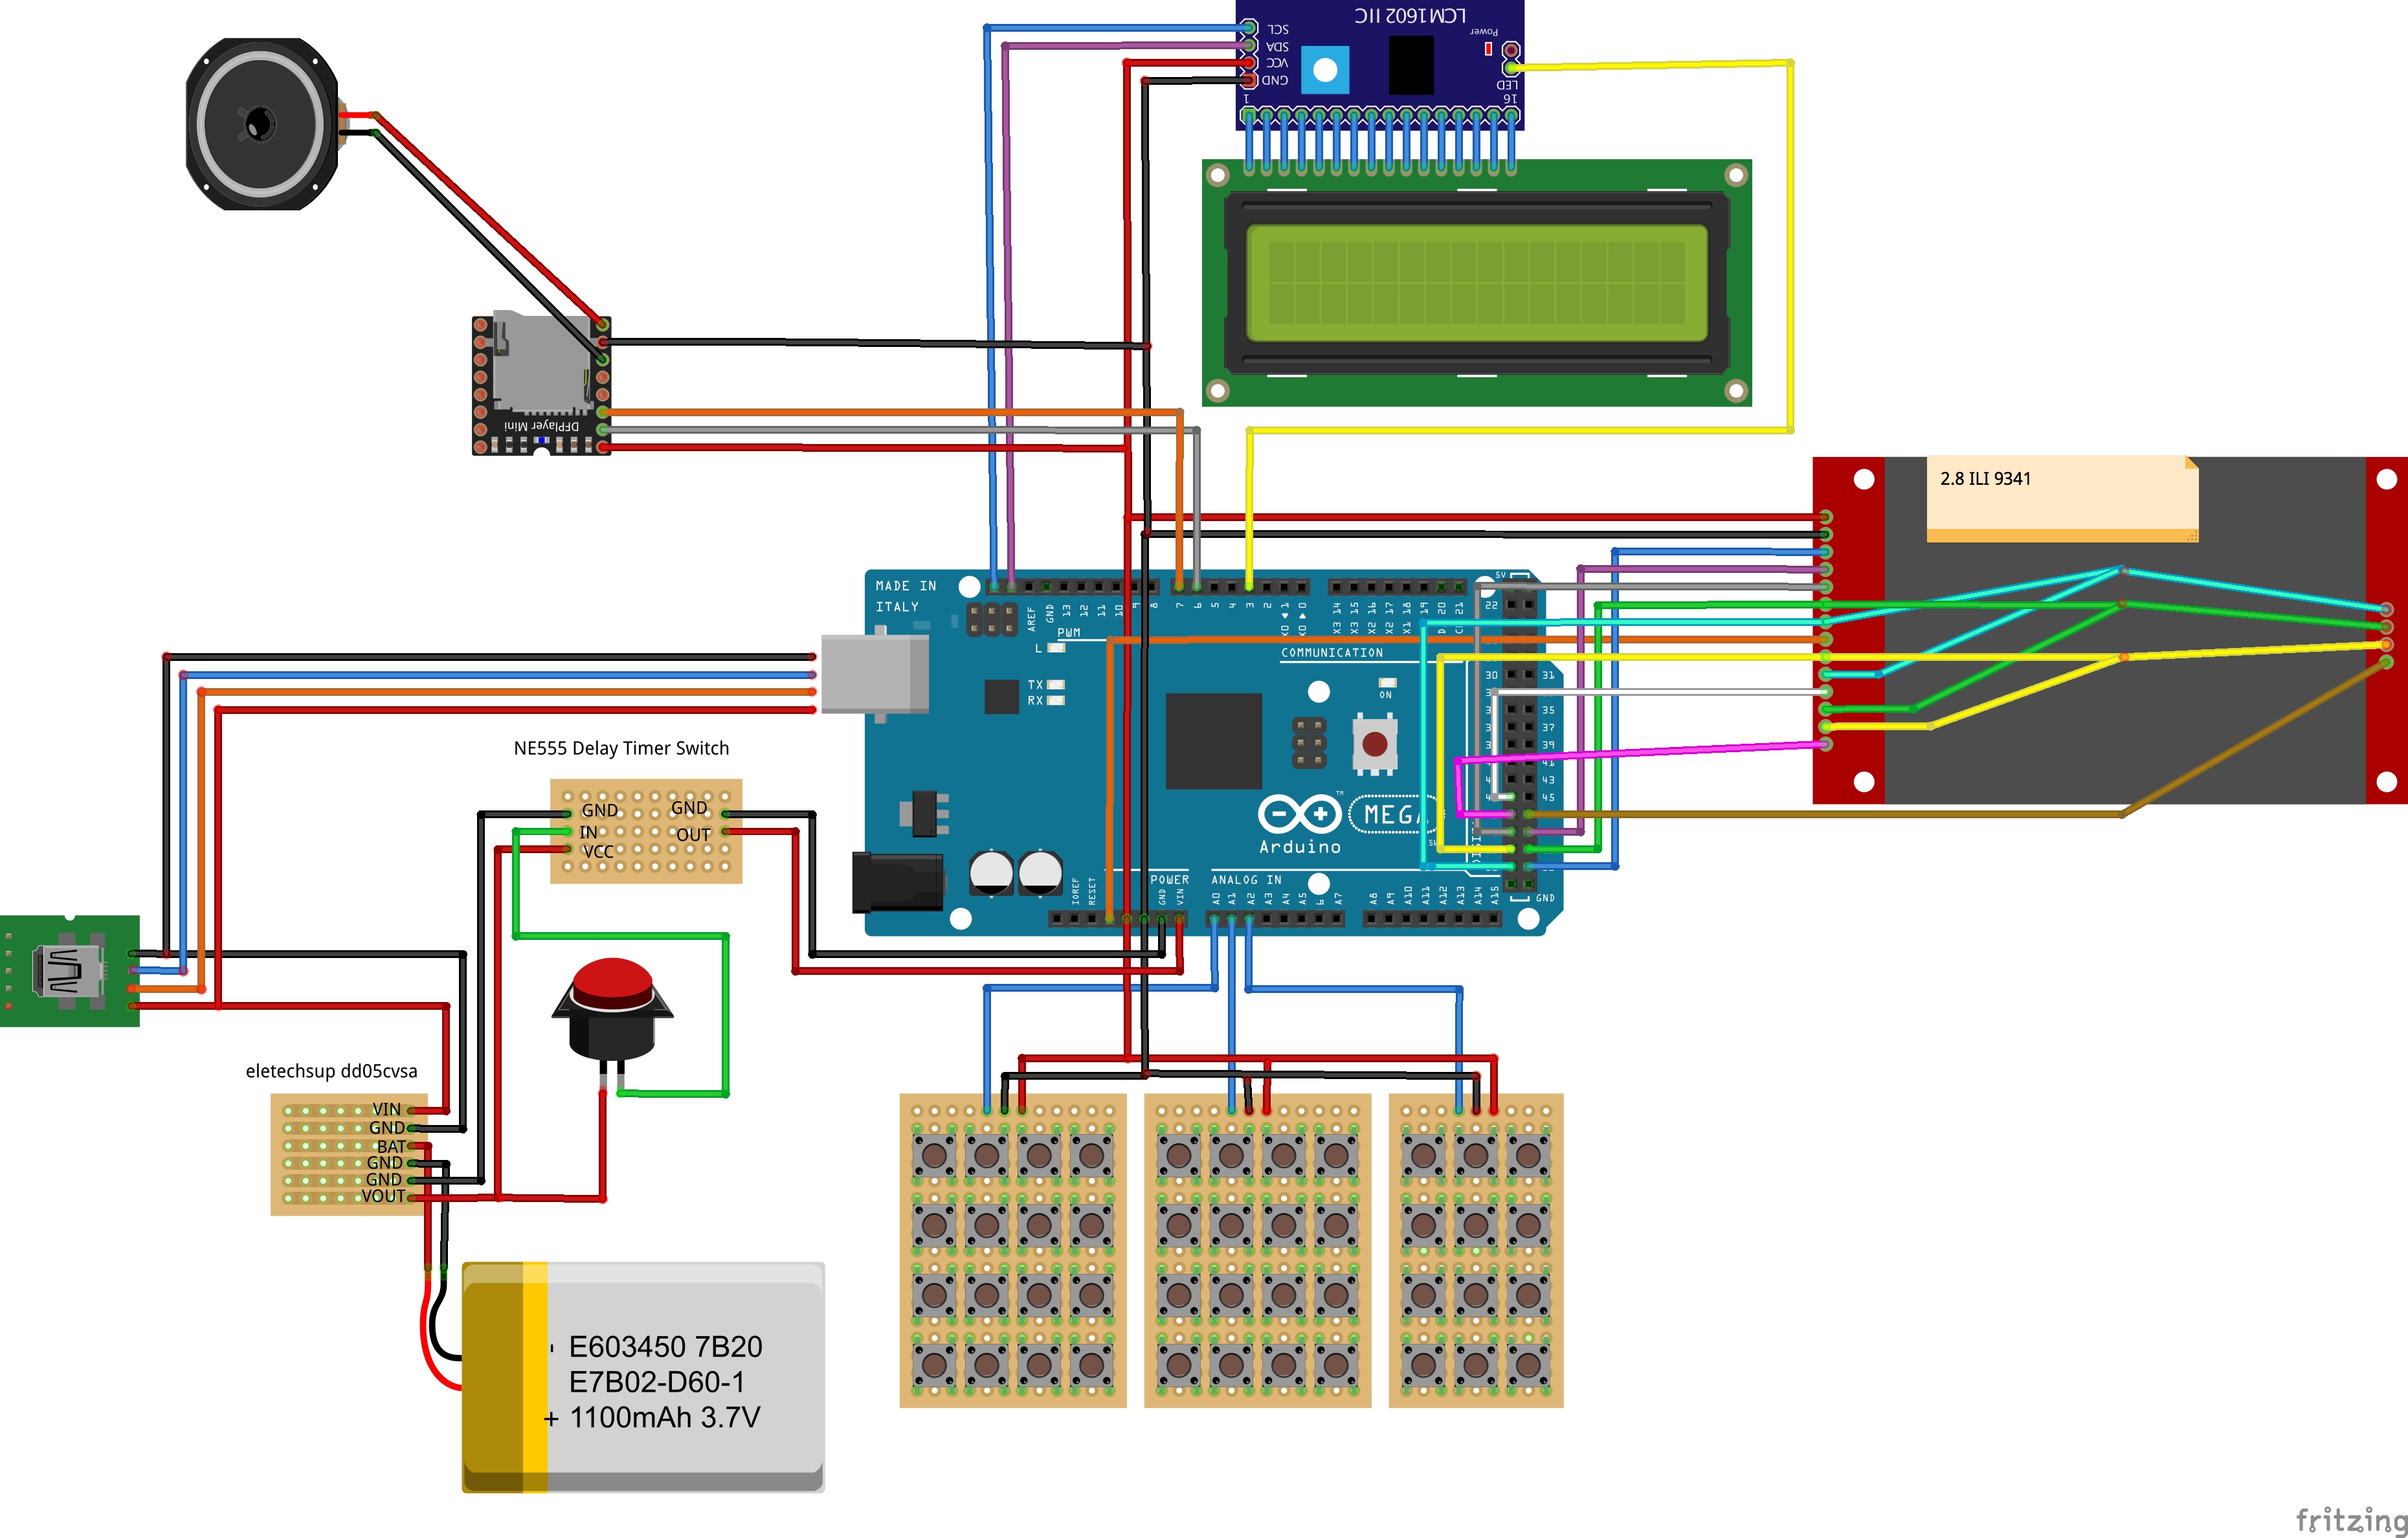
This is a long project, I will divide it into small bits so people can take pieces and set up their own. I also recommend seeing my previous projects to understand how I got here, especially the "tutorial for ILI9341 (part 1, 2, 3, and 4), as it uses some modified libraries that I would not explain here.
I dived the project into (power supply, MP3, LCD's, keyboard, and software)
The software is an on-going project, I would be adding different programs my daughter gets different interests.
Keyboard:
I used 2 keypads 4x4 and one 3x4 to make a 40 key keypad this brand makes a keypad that allows me to have that many keys with only 3 pins
THE LCD 16 x2
This part of the project displays words and whatever you type on the keyboard
PIN3 controls the brightness of the screen, this level is control from the keypad
LCD TFT SD CARD
This one is the messiest part of the whole project, but if you prepare the jumper wires in advance it makes a big difference at the very least consider preparing the wires for (MISO, MOSI, and CLK)
The SD Card is prepared with Images to show all of them are BMP (320 x 240) RGB
I use also the TFT Capabilities, for now is only showing one new picture when you touch the screen, but I wanted all prewired because come of the next program will include the touch-screen
MP3 DFR0299
This is a prepared MP3 Module that plays the files in order, you find all the details at dfrobot.com, so the big idea is to get all the sound bites you need, and then process them to have the same volume and then save them all numbered 0000.mp3 and so.
This module has many other options but I decided only to use those basic ones for this project.
The power supply.
All this part of the project can be just skipped if you are nor interested in making it work with batteries, I wanted to create a toy for my daughter and I wanted to be able to work with its own battery and not to need to always be connected.
First I have a wire with a USB female at the box from the female there is a wire direct to the USB entrance in the Arduino Mega that allows to program the box without having to open it but also splits to the battery charger
The charger I use is this one that allows me to connect any battery plus it suplies regulated output to the Arduino
Then it goes to a timer switch. This timer switch in conjunction with a push switch allows to keep the project going for 30 minutes a t a time so it will shut off after 30 minutes of being turn on, On the future I plan to connect the switch also to one of the Arduino Pins to turn off after 10 min of inactivity instead of 30 minutes after turning on ( I will post the diagram and the software adjustments to it)
The battery is just a 3, 7 lithium battery.
I hope you like it I will update and add comments later on


_wzec989qrF.jpg?auto=compress%2Cformat&w=48&h=48&fit=fill&bg=ffffff)


Comments
Please log in or sign up to comment.