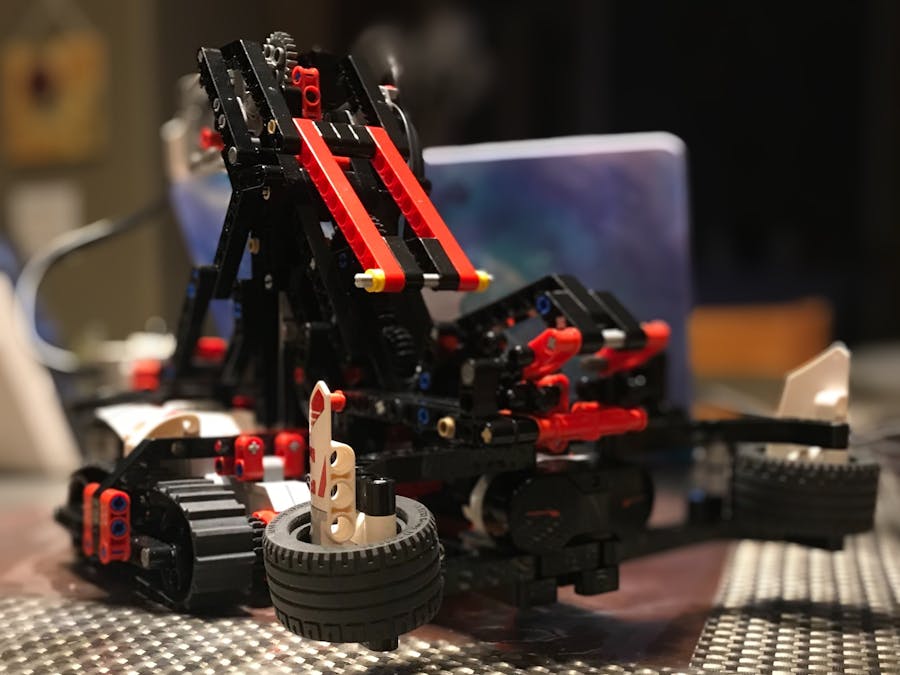
GRASP3R is a LEGO EV3 autonomous tank-drive robot with a multi-stage robotic arm. The drivetrain is built in a way that maneuvering and drive capability is as precise as possible. Further, the robotic arm mounted on the chassis is supported by a series of gears to ensure grip and retention in the supporting beams.
- Ensure the EV3 Brick has 6x AA batteries
- Build the robot using the EV3 Brick, 2 Large Motors, 1 Medium Motor, 1 Touch Sensor, 1 Color Sensor, and 1 Ultrasonic Sensor
- Connect sensors with respective wires to the EV3 Brick (Note: Ports A-D are on the top and Ports 1-4 are on the bottom)
This configuration is a part of the building schematics and instructions
Alexa Skill Programming1. Sign up or log in to the Amazon Developer Console at https://developer.amazon.com
2. Navigate to Alexa Skills Kit in the top header
3. Click Create Skill and enter the following:
- Skill Name: Enter the name of the robot
- Default Language: Select preferred language
- Model: Select Custom
- Backend: Select Alexa-Hosted (Node.js)
- After clicking Create Skill, Hello World Skill as the template
4. Navigate to the Interfaces menu and toggle on Custom Interfaces Controller (Make sure to click Save Interfaces)
5. Download the source code from the GitHub repository
6. Select JSON Editor and drag and drop model.json from the skill folder of the repository into the editor (Make sure to click Save Model and Build Model)
7. Select Code from the header and modify index.js, util.js, and package.json to include the respective code from the GitHub repository. Create a file called common.js and copy the respective code from the source files.
8. Click Save and Deploy
EV3 Programming1. Flash the latest ev3dev image from https://www.ev3dev.org/downloads/ to a micro SD card and insert into the SD slot in the EV3 Brick and insert USB Wi-Fi dongle
2. Log in to the Amazon Developer Console Amazon Developer Console at https://developer.amazon.com and navigate to Alexa Voice Services in the top header
3. Click Create Product and enter the following:
- Product Name: Enter the name of the robot
- Product ID: EV3_01
- Product Type: Alexa Gadget
- Product Category: Animatronic or Figure
- Description: Enter a description of the robot
- Skip the image field and make sure to select No for commercial release and intended for users under 13
4. Select the new product and copy the Amazon ID and the Alexa Gadget Secret into grasp3r.ini in the repository
5. Power on the EV3 Brick to boot the robot up
6. Navigate to Wireless and Networks, select Wi-Fi, then make sure the Powered box is enabled. Select Start Scan and connect to your local Wi-Fi network. When the robot is online, there should be an IP address in the top left corner.
7. Return to Wireless and Networks, select Bluetooth, then make sure the Powered box is enabled.
8. In Visual Studio, open the repository and install ev3dev from Extensions. Click Connect to a Device to connect to the EV3 Brick. Select the arrow to Send the Workspace to the Device
9. Navigate to grasp3r.py, right-click, and select Run. The VS Code terminal should display a message that says Gadget is ready to pair.
10. Connect via Bluetooth in the Amazon Alexa app or device screen (if applicable)
Operation1. Say "Alexa, open GRASP3R"
2. Commands include:
- "grab"
- "let go" or "release"
- "move forward"
- "move backward"
- "turn right"
- "turn left"


_dyynx0bnuf_8u4Xi07d4z.png?auto=compress%2Cformat&w=48&h=48&fit=fill&bg=ffffff)

Comments
Please log in or sign up to comment.