This is a simple project to teach basic usage of Ultrasonic sensor with Servo motor to kids. The project is simple in terms of code, circuit & implementation.
Step 1: Material Required- Arduino Nano/Uno/Mini
- SG-90 Servo motor
- HC-SR04 Ultrasonic sensor
- Jumper Cables
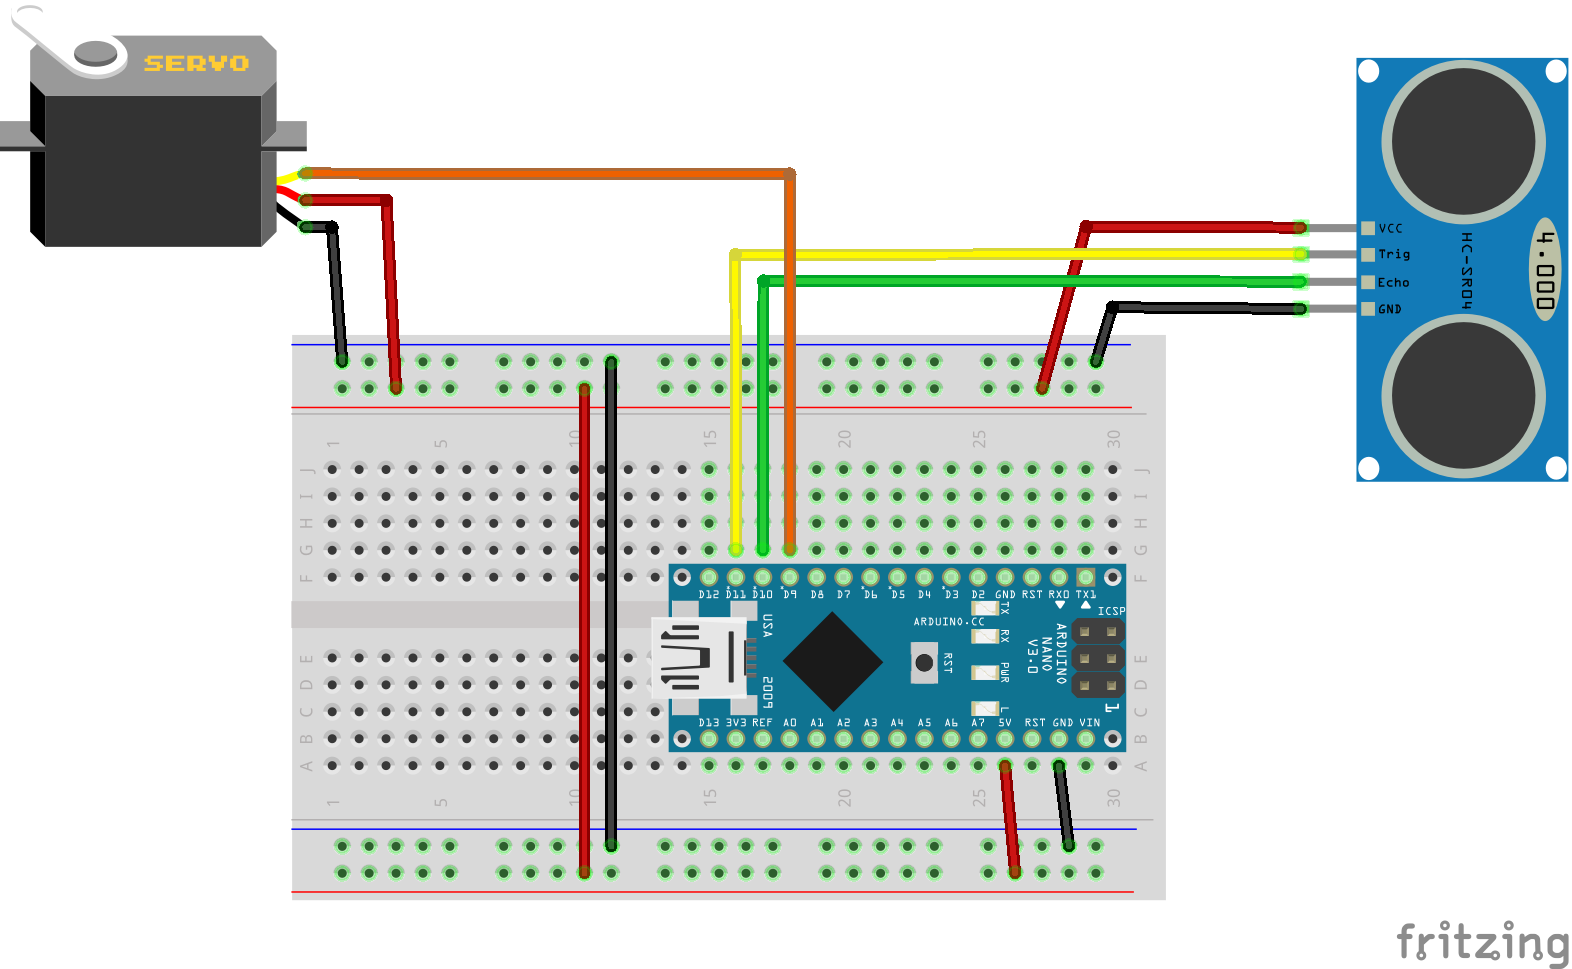
Step 2: Making the connections
There are only a few connections to be made, follow the steps below:
- Attach the Arduino board to a breadboard.
- Connect 5v & GND to the side power rails of the breadboard.
- Connect the VCC & GND of Servo motor & Ultrasonic sensor to the power rails.
- Connect the Orange wire(Signal) of the Servo motor to pin 9 of Arduino.
- Connect the Trigger pin of the Ultrasonic sensor to pin 10 of Arduino.
- Connect the Echo pin of the Ultrasonic sensor to pin 11 of Arduino.
Step 3: Let's Code
Explanation: This code uses the simple Servo library.
- Four variables were declared initially.
- In the setup part, the Servo pin is declared as 9. Trigger pin is declared as output & Echo pin is declared as input.
- In the Loop section, a function named Ultra was called & then the servo was made to rotate for 0 degrees.
- If Case checks the presence of the hand in front of ultrasonic sensor & hence rotate the servo to 90 degrees.

_6t0fIYR0tT.gif?auto=format%2Ccompress&gifq=35&w=400&h=300&fit=min)


Comments
Please log in or sign up to comment.