Security surveillance systems are expensive to purchase and install. The goal is to build an effective and cost efficient security system from a Raspberry Pi and a camera module that can immediately alert your mobile device with images of the intruder.
Cost$35 Raspberry Pi
$25 Raspberry Pi Camera Module
$6 Raspberry Pi Power Adapter
$15 MicroSD card (16GB) - system drive
$10 Enclosure – could use cardboard box
Total Approximate Cost = $100
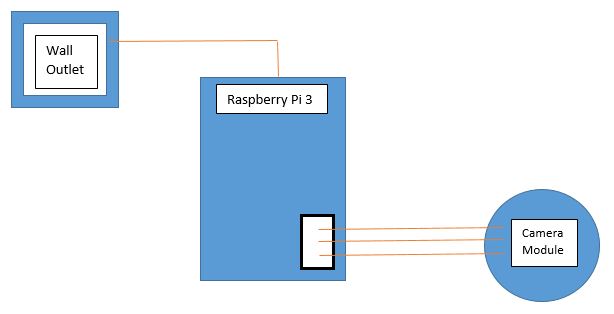
How it WorksThis surveillance system is to be placed in front of the users front door approximately 5 feet away so as to capture the best and most full image of the intruder. The system utilizes a camera module controlled by the Raspberry Pi and is triggered by motion to start recording. Once the images are recorded they are immediately sent through the home WiFi connection to Dropbox. The Dropbox app on the users mobile device will send a notification when a new image is uploaded.
-The Raspberry Pi (RPI) is not hot-swappable. You must unplug the RPI power adapter to disconnect any accessories (keyboard/mouse, camera, USB drives, HDMI). Burn‘t Pi will result in not powering down properly.
-RPI Introduction lesson
https://www.raspberrypi.org/help/
https://learn.adafruit.com/series/learn-raspberry-pi
Lessons 1-3 & 6 will help with this project.
Steps:
1. Configure microSD card for RPI operating system
a. Download NOOBS setup from https://www.raspberrypi.org/downloads/noobs/
b. Download “offline and network” installation package, unzip
c. Copy NOOBs files to blank SD card formatted for a Fat32 file system
2. Hardware
a. Insert microSD card into RPI
b. Connect monitor or TV
c. Connect keyboard and mouse
d. Connect to wired LAN
e. Connect Camera
3. Initial setup
a. Connect RPI power adapter and it will boot to an operating system selection screen
b. Select Raspbian
c. Raspbian will install and the system will reboot
4. Initial login
a. Default login account is: pi
b. Default password is: raspberry
5. Initial configuration
a. Command to boot into a GUI environment is: startx
b. Configuration (menu > preferences > RPI configuration)
i. On system tab
1. Set account to autologin (saves time during setup, auto start after power outage)
2. Change password
3. Set RPI host name for RPI application (CondoDrCam, DrivewayCam)
ii. On Interface tab
1. Enable camera
2. Enable SSH (remote access)
iii. On localization tab
1. Set keyboard to USA
2. Set time zone
3. Select keyboard
4. Set WiFi country
6. Update RPI
a. Update RPI: sudo apt-get install rpi-update
b. Update firmware: sudo apt-get dist upgrade -y
c. Download package list: sudo apt-get update
d. Apply package update: sudo apt-get upgrade -y
e. Remove packages no longer supported: sudo apt-get autoremove
7. Helpful Commands
a. To edit files: sudo nano "filename" - nano is a built in RPI text editor
i. Save the configuration file and exit the text editor by pressing Ctrl-o then enter and then Ctrl-x
b. To reboot: sudo reboot
c. To shut down: sudo shutdown –h now
d. To make a "filename" executable, navigate to folder: chmod a+x "filename"
e. To run a python script, navigate to folder: sudo pythonX "filename" (X=Python version "2" or "3")
f. To stop a Python script: Cntl+C
g. To play videos, navigate to folder: omxplayer "filename" -o hdmi
h. Troubleshooting with RPI system log: tail -n50 /var/log/syslog (this will show you the last 50 lines of the syslog file)
8. Setup Bluetooth and WiFi
a. Install RPI Bluetooth software: sudo apt-get install pi-bluetooth
b. Update Bluetooth firmware: sudo apt-get install bluez bluez-firmware
c. Install graphical tool to use Bluetooth software: sudo apt-get install blueman
and sudo apt-get install bluetooth bluez blueman
d. Reboot
e. Run “Update RPI” steps again
f. Reboot
9. Configure Wireless LAN
a. Hover mouse over WiFi signal icon (by clock in GUI) to see associated WLAN name and IP address
b. Edit WiFi settings in GUI > Wireless > wlan0 > select SSID > set static IP address (outside of your router's DHCP range) for remote access
c. To troubleshoot WiFi settings, edit these files
d. SSID and password: sudo nano /etc/wpa_supplicant/wpa_supplicant.conf
e. IP addresses: sudo nano /etc/network/interfaces
10. To setup remote command line access from a Windows PC to RPI
a. Download putty from http://www.chiark.greenend.org.uk/~sgtatham/putty/download.html
b. Set session to RPI IP address
c. On connection folder, set delay to 30
d. Save as RPI host name (CondoDrCam)
e. Click connect and login to command line of RPI
11. To test camera setup
a. Command: raspistill -o cam_test.jpg
b. Note - wide angle lens for camera - http://www.amazon.com/Leegoal-Detachable-iPhone-Camera-Smaller/dp/B005C3CSXC
12. Setup a free Dropbox user account and create a user application
a. Click “create an account” at https://www.dropbox.com/developers/apps and follow prompts.
b. Click Create App
i. Under Choose an API, select Dropbox API
ii. Under Choose the type of access you need, select Full Dropbox
iii. For Name your app, enter a unique name for this application (username_project)
iv. Save the following information
1. App name "username_project/" (/ is necessary so files are stored to a folder not a file)
2. App key
3. App secret
13. Install Dropbox Uploader commands
a. sudo apt-get update
b. sudo apt-get install -y curl
c. cd ~
d. git clone https://github.com/andreafabrizi/Dropbox-Uploader.git
e. cd Dropbox-Uploader
f. chmod a+x dropbox_uploader.sh
g. sudo cp dropbox_uploader.sh /usr/local/bin/dropbox_uploader
14. Run Dropbox Uploader command
a. dropbox_uploader
15. Configure Dropbox Uploader to talk to Dropbox.com
a. dropbox_uploader upload
b. When prompted: enter App key and App secret
c. Permission type is “f” for full access
d. “Y” to confirm and a dropbox.com web page with success should appear
e. Go back to script and press enter to continue
f. A setup complete message should appear, if not, repeat configuration
16. Allow the dropbox_uploader to be readable by all users (motion for this project)
a. chmod a+r ~/.dropbox_uploader
17. Manual test of Dropbox Uploader
a. dropbox_uploader upload README.md “username_project/"
18. Setup RPI Camera (add Kernel Module so the piCam will work with Motion)
a. sudo nano /etc/modules
i. Add to the bottom of the file: bcm2835_v4l2
b. sudo reboot
c. Verify setup: ls -l /dev/video*
i. Reply message should have “/dev/video0” at the end for the on board piCam
19. Install Motion and Configure
a. sudo apt-get update
b. sudo apt-get install -y motion
c. Make a directory for photos: sudo mkdir /var/lib/motion
d. Set ownership: sudo chown motion:motion /var/lib/motion
e. Edit motion configuration: sudo nano /etc/motion/motion.conf
i. # Image width (pixels). Valid range: Camera dependent, default: 352
width 1280
ii. # Image height (pixels). Valid range: Camera dependent, default: 288
height 720
iii. # Threshold for number of changed pixels in an image that
# triggers motion detection (default: 1500)
threshold 3000
iv. # Picture frames must contain motion at least the specified number of frames
# in a row before they are detected as true motion. At the default of 1, all
# motion is detected. Valid range: 1 to thousands, recommended 1-5
minimum_motion_frames 1
v. # Use ffmpeg to encode movies in realtime (default: off)
ffmpeg_output_movies off
vi. # Target base directory for pictures and films
# Recommended to use absolute path. (Default: current working directory)
target_dir /var/lib/motion
vii. # Command to be executed when a picture (.ppm|.jpg) is saved (default: none)
# To give the filename as an argument to a command append it with %f
on_picture_save dropbox_uploader -f /home/pi/.dropbox_uploader upload %f "username_project/"
20. Manually test picture upload to Dropbox
a. sudo motion –n
b. cntl+c to stop
21. Set Motion service to run on boot
a. sudo nano /etc/default/motion
i. Change the start_motion_daemon=no line to yes
22. Enable motion service with OS
a. sudo systemctl enable motion
23. Remote command line tools to test setup
a. View motion's log: sudo journalctl -u motion
b. Status of motion service: sudo systemctl status motion
c. Stop motion until next boot: sudo systemctl stop motion
d. Permanently disable motion: sudo systemctl disable motion
The major error present in the system was with the infrared module that we attempted to first use. The infrared module had a two second delay so by the time someone broke through a door and the camera started, they would be past the monitoring zone. To fix this the PID infrared module was bypassed and not used in the project at all.
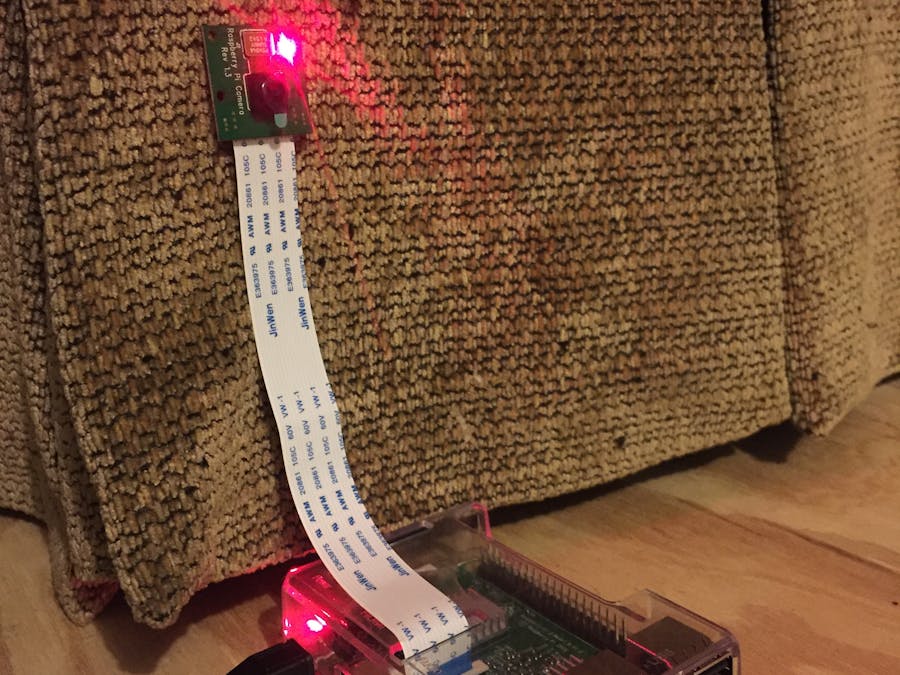
LimitationsThe Pi camera module is connected to the Raspberry Pi with a ribbon cable. Due to power limitations, the camera does not have lighting. Nighttime images are very dark. In most situations, it would be better to use a commercially available USB camera that could be placed in outside environments and have an external power source for infra-red lighting for nighttime use.
If the WiFi or internet connection is lost, no notification will be received.
If the cloud storage location is full, new photos will not be uploaded to Dropbox. This will prevent notifications to my iPhone that new surveillance photos are available.
Commercial ValueA system similar to this could be camouflaged and used when traveling to monitor your motel room. Make it look like some type of phone charger stand. It’s plugged in and connected to the motel WiFi for reporting.
It would be great to sit on the balcony in Hawaii and let it record video of the beach all day to an external USB drive. Play it back later at home on the big screen TV as background audio/video.
More features could be added to make a pet feeding station. It could monitor their movement.
If waterproofed, it could be used for many external applications. Deer cam, bird feeder cam, package delivery cam, nanny cam, house cleaner cam, etc…
SummaryThe first thing that we would change differently if we were to do it again would be to spend more time researching exactly how to build the system before making any purchases and starting the project. We learned from our failures, but it would be cheaper and more time efficient to learn from other’s experiences with similar projects.
Some things that we had to adapt to and overcome are as follows...
1. Slow reaction time of the infrared sensor
2. Learning that pixel detection is better through software and no infrared module to buy and connect
3. Camera is always recording so you can program to save video seconds before the event occurs, through the event, and seconds after
4. The Pi cannot power enough IR lighting to really be effective. Other USB cameras could be a better choice with integrated lighting, wide angle lenses, resolutions…
5. Dropbox has a free limitation of 2GB while Google Drive has a free limitation of 15GB. Google drive is also easier to use and incorporated into my Gmail and calendar system.


Comments