


Hardware components | ||||||
_zhWsCcSEcl.jpg?auto=compress%2Cformat&w=48&h=48&fit=fill&bg=ffffff) |
| × | 1 | |||
 |
| × | 1 | |||
 |
| × | 1 | |||
 |
| × | 1 | |||
Software apps and online services | ||||||
 |
| |||||
As Particle introduced their third generation of hardware. The Particle Argon, Boron, and Xenon are Particle’s latest offering in the world of IoT dev boards, and this time they add mesh networking. The three new boards are all built around the Nordic nRF52840 SoC and include an ARM Cortex-M4F with 1MB of Flash and 256k of RAM. This chip supports Bluetooth 5 and NFC. Breaking the new lineup down further, the Argon adds WiFi with an ESP32 from Espressif, the Boron brings LTE to the table with a ublox SARA-U260 module, and the Xenon with WiFi and Cellular, relying only on Bluetooth, but still retaining mesh networking.
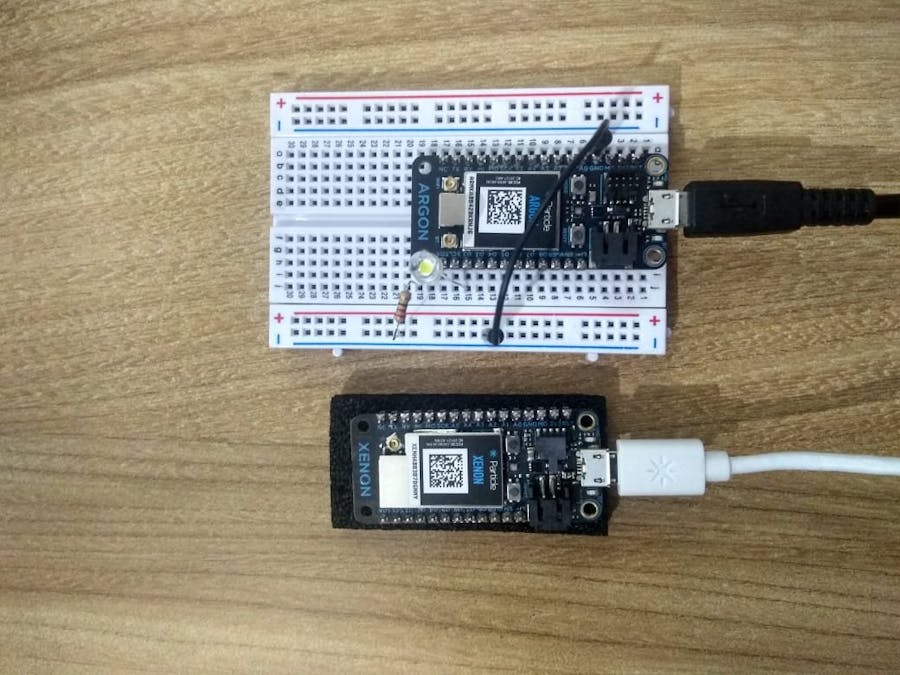
In this I am just demonstrate how to use Argon and Xenon. Firstly, we will setup our Argon and then Xenon.
Particle ArgonThe Argon is a powerful Wi-Fi enabled development kit that can act as either a standalone Wi-Fi endpoint or Wi-Fi enabled gateway for Particle Mesh networks. It is based on the Nordic nRF52840 and has built-in battery charging circuitry so it’s easy to connect a Li-Po and deploy your local network in minutes.
Features
1. Espressif ESP32-D0WD 2.4Ghz Wi-Fi coprocessor
- On-board 4MB flash for ESP32
- 802.11 b/g/n support
- 802.11 n (2.4 GHz), up to 150 Mbps
2. Nordic Semiconductor nRF52840 SoC
- ARM Cortex-M4F 32-bit processor @ 64MHz
- 1MB flash, 256KB RAM
- IEEE 802.15.4-2006: 250 Kbps
- Bluetooth 5: 2 Mbps, 1 Mbps, 500 Kbps, 125 Kbps
- Supports DSP instructions, HW accelerated Floating Point Unit (FPU) calculations
- ARM TrustZone CryptoCell-310 Cryptographic and security module
- Up to +8 dBm TX power (down to -20 dBm in 4 dB steps)
- NFC-A tag
3. On-board additional 4MB SPI flash
4. 20 mixed signal GPIO (6 x Analog, 8 x PWM), UART, I2C, SPI
5. Micro USB 2.0 full speed (12 Mbps)
6. Integrated Li-Po charging and battery connector
7. JTAG (SWD) Connector
8. RGB status LED
10. Reset and Mode buttons
11. On-board PCB antenna
12. u.FL connector for external antenna
13. Meets the Adafruit Feather specification in dimensions and pin out
14. FCC, CE and IC certified
15. RoHS compliant (lead-free)
Block Diagramof Argon
PinMarkings
PinDiagram
PinDescription
1. Li+ ==> This pin is internally connected to the positive terminal of the LiPo battery connector.
2. VUSB ==> This pin is internally connected to the USB (+ve) supply.
3. 3V3 ==> This pin is the output of the on-board 3.3V regulator.
4. GND ==> System ground pin.
5. EN ==> Device enable pin is internally pulled-up. To disable the device, connect this pin to GND.
6. RST ==> Active-low system reset input. This pin is internally pulled-up.
7. MD ==> This pin is internally connected to the MODE button. The MODE function is active-low.
8. RX ==> Primarily used as UART RX, but can also be used as a digital GPIO.
9. TX ==> Primarily used as UART TX, but can also be used as a digital GPIO.
10. SDA ==> Primarily used as data pin for I2C, but can also be used as a digital GPIO.
11. SCL ==> Primarily used as clock pin for I2C, but can also be used as a digital GPIO.
12. MO, MI, SCK ==> These are the SPI interface pins, but can also be used as a digital GPIO.
13. D2-D8 ==> These are generic GPIO pins. D2-D8 are PWM-able.
14. A0-A5 ==> These are analog input pins that can also act as standard digital GPIO. A0-A5 are PWM-able.
How to setup ArgonThere are many ways to set up Particle devices. The easiest way to set up Argon is using mobile phone (Andriod or iOS) and a connection to the internet. Here, I am using Andriod phone.
1. Plug Argon with USB of your computer make sure blue led will blink (Listening mode). When Argon is in Listening Mode, it is waiting for you to configure your mesh network. If it is not blinking blue, to put your Argon in Listening Mode, hold the mode button for three seconds, until the RGB LED begins blinking blue.
2. Open Particle app in your phone. If you don't have download it from play store.
3. Login to your particle account. After login, in "your device" window you will see "+" button to add new device. Press "+" button you will see 4 options select set up a mesh device.
4. Then it will ask for turning Bluetooth ON then choose choose device we want to setup ( we are setting up Argon). Select Argon
5. Next, it will ask whether you have connected antenna to Argon or not. If you already connected tick the box and press next.
6. Then, it will ask you to scan barcode on the device(Argon). After that, It will start pairing with your device and after pairing it will pop up window as shown below.
7. After that, it will start updating Firmware.One updated it will ask you whether you wanna use it in mesh network or not (I have selected yes).
8. Then, it will ask you to connect with WiFi. I am facing some issue with connecting with WiFi network with security (will be fixed in upcoming firmware). So I created a network without security.
9. Once connected it will ask you to give a device name.
10. Next, it will ask you to give a network name and set a password. Once you set password it will create a network.
After setting up gateway you will see a window as show shown below
You can set up more device or select I'm done. Our Argon is now ready. You can see name of your device.
We have successfully set up our device.
11. Now go to Particle IDE
Login to your account. Now, we are going to program our Particle Argon. First select your device(Argon) by click on star. You can see I already selected Argon as shown below
We are using led test example. Go to code section and you will see examples app.
Select blink an LED, to use this app click on use this example.
To upload a code, select a board and then click on flash.
Connections
Particle Argon
GND ==> LED(-ve)
D2 ==> Led(+ve)
Once flashed you will see D2 and D7 led will start blinking.
Particle XenonThe Xenon is a low cost mesh-enabled development board that can act as either an endpoint or repeater within a Particle Mesh network. The Xenon is mesh only and designed to function as the endpoint of your IoT network. It is based on the Nordic nRF52840 and has built-in battery charging circuitry so it’s easy to connect a Li-Po and deploy your local network in minutes.
Block Diagram
Pin Marking
PinDiagram
PinDescription
1. Li+ ==> This pin is internally connected to the positive terminal of the LiPo battery connector.
2. VUSB ==> This pin is internally connected to the USB (+ve) supply.
3. 3V3 ==> This pin is the output of the on-board 3.3V regulator.
4. GND ==> System ground pin.
5. EN ==> Device enable pin is internally pulled-up. To disable the device, connect this pin to GND.
6. RST ==> Active-low system reset input. This pin is internally pulled-up.
7. MD ==> This pin is internally connected to the MODE button. The MODE function is active-low.
8. RX ==> Primarily used as UART RX, but can also be used as a digital GPIO.
9. TX ==> Primarily used as UART TX, but can also be used as a digital GPIO.
10. SDA ==> Primarily used as data pin for I2C, but can also be used as a digital GPIO.
11. SCL ==> Primarily used as clock pin for I2C, but can also be used as a digital GPIO.
12. MO, MI, SCK ==> These are the SPI interface pins, but can also be used as a digital GPIO.
13. D2-D8 ==> These are generic GPIO pins. D2-D8 are PWM-able.
14. A0-A5 ==> These are analog input pins that can also act as standard digital GPIO. A0-A5 are PWM-able.
15. D4 ==> TX for Serial2. Can be used as GPIO if not using Serial2.
16. D5 ==> RX for Serial2. Can be used as GPIO if not using Serial2.
17. D6 ==> CTS for Serial2. Can be used as GPIO if not using Serial2.
18. D8 ==> RTS for Serial2. Can be used as GPIO if not using Serial2.
How to setup Particle Xenon (Adding a Xenon to an existing Particle Mesh network)1. Firstly, set up Xenon as we did for Argon. In "your device" window you will see "+" button to add new device. Press "+" button you will see 4 options select set up a mesh device.
Select Xenon
2. After that it will ask you to scan barcode. Scan the code and it will start pairing.
3. Once pairing is done, it will start updating firmware. After update it will search for mesh network (Name you gave to your mesh network while setting Argon).
4. After selecting mesh network(name you gave while setting mesh network in Argon). To add Xenon to mesh network it will ask you to hold mode button to make it in listening mode.
5. Once your Argon is in listening mode press next. Then, it will ask you to scan barcode on Argon.Once it is paired with Argon it will ask for mesh network password.
6. After that it will start joining Xenon to mesh network.
7. Once it joins the network give name to a device.
We are done with setup of Xenon.
8. Now, open particle IDE. Select Xenon and flash the same blink an led example.
In this we are going to make two programs one is in particle IDE and second is in HTML to control LED from web. In this I am using Particle Argon.
For controlling LED from the cloud we have to use particle.function()
The Particle framework automatically creates a REST based API for us or a structured way to call it via the internet. To access the function, we make a HTTP POST request as follows
/v1/devices/{DEVICE_ID}/{FUNCTION}
Particle.function allows code on the device to be run when requested from the cloud API. Up to 15 cloud functions may be registered and each function name is limited to a maximum of 12 characters. Only use letters, numbers, underscores and dashes in function names.
Syntax
bool success = Particle.function("functionKey", functionName);
// Cloud functions must return int and take one String
int funcName(String extra)
{
return 0;
}
In order to register a cloud function, the user provides the functionKey, which is the string name used to make a POST request and a functionName, which is the actual name of the function that gets called in your app. The cloud function has to return an integer; -1 is commonly used for a failed function call.
Program used in Particle web IDE.
//Program for controlling LED from the cloud
int led1 = D2;
void setup()
{
//Pin configuration
  pinMode(led1, OUTPUT);


// Declare a Particle.function so that we can turn the LED on and off from the cloud.
  Particle.function("cloud_led",ledToggle);
// When we ask the cloud for the function "cloud_led", it will employ the function ledToggle() from this app.
// Make sure both LEDs are off when we start
  digitalWrite(led1, LOW);

}
//Since we're waiting for input through the cloud this time,
//we don't actually need to put anything in the loop
void loop()
{
  // Nothing to do here
}
// We're going to have a super cool function now that gets called when a matching API request is sent
// This is the ledToggle function we registered to the "cloud_led" Particle.function earlier.
int ledToggle(String command) {

  /* Particle.functions always take a string as an argument and return an integer.Since we can pass a string, it means that we can give the program commands on how the function should be used. In this case, telling the function "on" will turn the LED on and telling it "off" will turn the LED off.Then, the function returns a value to us to let us know what happened. In this case, it will return 1 for the LEDs turning on, 0 for the LEDs turning off,and -1 if we received a totally bogus command that didn't do anything to the LEDs.
   */

   if (command=="on") {
       digitalWrite(led1,HIGH);

       return 1;
   }
   else if (command=="off") {
       digitalWrite(led1,LOW);

       return 0;
   }
   else {
       return -1;
   }
}
Now, its time to check our new function. The best way is from the console.
It is look as shown below
Go to devices tab in console, click on the row for the device(Argon) you just flashed your code to.
You will see tab like as shown below
On the right-hand side of the screen is a box for functions. There should be one labeled "cloud_led".
- If you type "on" (without the quotes") and click the call button the LED will turn on.
- If you type "off" and click the call button the LED will turn off.
If your LED on and off using console we are done with checking.
Before moving to HTML part we need to things.
1. Device ID ==> find in device section
2. Access Token ==> find in settings section.
As we have device id and access token now we can proceed to html file.
Open notepad, write code in that and save it as an.html file. Replace your device ID with your actual device ID and your access token with your actual access token.
Program
<!DOCTYPE>
<html>
<head>
<meta name="viewport" content="width=device-width, initial-scale=1.0">
</head>
<body>
<img src="index.png" style="max-width:100%;height:auto;">
<br>
<center>
 <br>
 <br>
 <br>
 <form action="https://api.particle.io/v1/devices/device_id/cloud_led?access_token=token" method="POST">
   Control LED from the cloud<br>
   <br>
   <input type="radio" name="arg" value="on">Turn the LED on.
   <br>
   <input type="radio" name="arg" value="off">Turn the LED off.
   <br>
   <br>
   <input type="submit" value="Submit">
 </form>
 </center>
 </body>
</html>
What you have to do is open html file using browser. You will see page like as shown below
After some modification.
I have made simple login page which will redirect to main control page after successful login.
program for login page
<html>
<head>
<title>Login Page</title>
<meta name="viewport" content="width=device-width, initial-scale=1.0">
<link rel="stylesheet" href="https://cdnjs.cloudflare.com/ajax/libs/font-awesome/4.7.0/css/font-awesome.min.css">
<link href="https://fonts.googleapis.com/icon?family=Material+Icons" rel="stylesheet">
</head>
<body bgcolor = #40E0D0>
<i class="fa fa-mobile" style="font-size:48px;color:red"></i>
<i class="fa fa-wifi" style="font-size:48px;color:red"></i>
<i class="material-icons" style="font-size:48px;color:red">bluetooth_connected</i>
<i class="fa fa-cloud" style="font-size:48px;color:red"></i>
<br>
<form name="loginForm" method="post" action="Particle.html">
<table width="20%" bgcolor="0099CC" align="center">
<tr>
<td colspan=2><center><font size=4><b>Login Page</b></font></center></td>
</tr>
<tr>
<td>Username:</td>
<td><input type="text" size=25 name="userid"></td>
</tr>
<tr>
<td>Password:</td>
<td><input type="Password" size=25 name="pwd"></td>
</tr>
<tr>
<td ><input type="Reset"></td>
<td><input type="submit" onclick="return check(this.form)" value="Login"></td>
</tr>
</table>
</form>
<script language="javascript">
function check(form)
{
if(form.userid.value == "default" && form.pwd.value == "default")
{
	return true;
}
else
{
	alert("Error, Enter valid Username or Password")
	return false;
}
}
</script>
</body>
</html>
Thanks to Joe and Particle team for the Hardware


Comments
Please log in or sign up to comment.