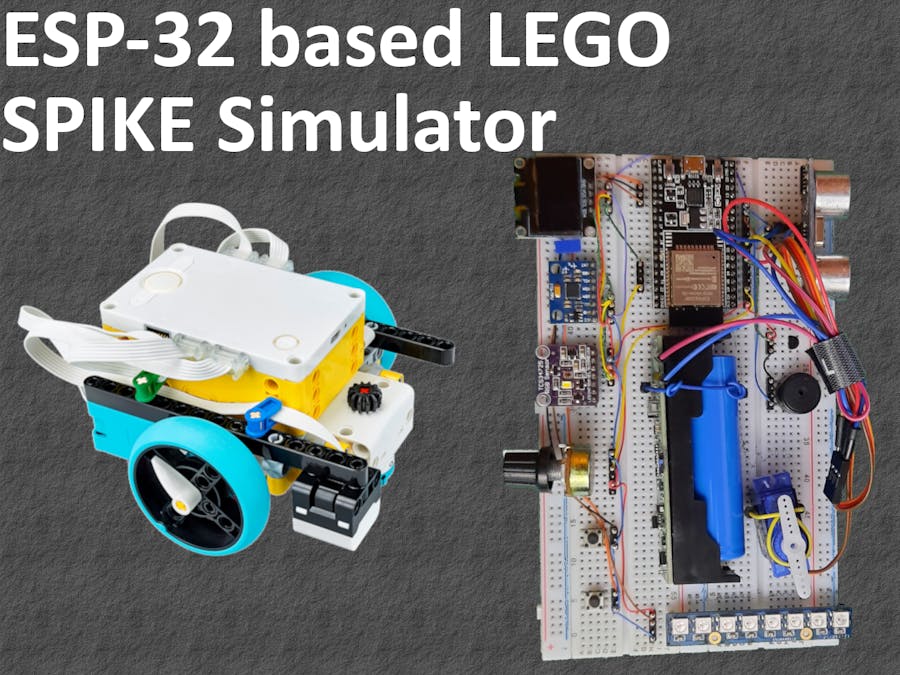
LEGO SPIKE is a great educational system for kids to learn the secrets of programming and robot building. The only problem with this educational system is that the code cannot be debugged. The ESP-32 based unofficial LEGO SPIKE simulator is born to make the life of the young developer easier. The code written in the LEGO SPIKE environment can run without modification on an ESP-32 based development board and the entire program running process can be traced and the robot's behaviour can be modified.
Here is a video, how to build, install and use the unofficial LEGO SPIKE simulator:
External peripherals (i.g.:sensors, motors, LEDs) can also be connected to the ESP-32 microcontroller to test the program in a real-life situation. The simulator is not a substitute for a LEGO robot, but it gives you a cheap alternative to try out the LEGO environment. The program is open source. Some functionalities are not fully implemented.
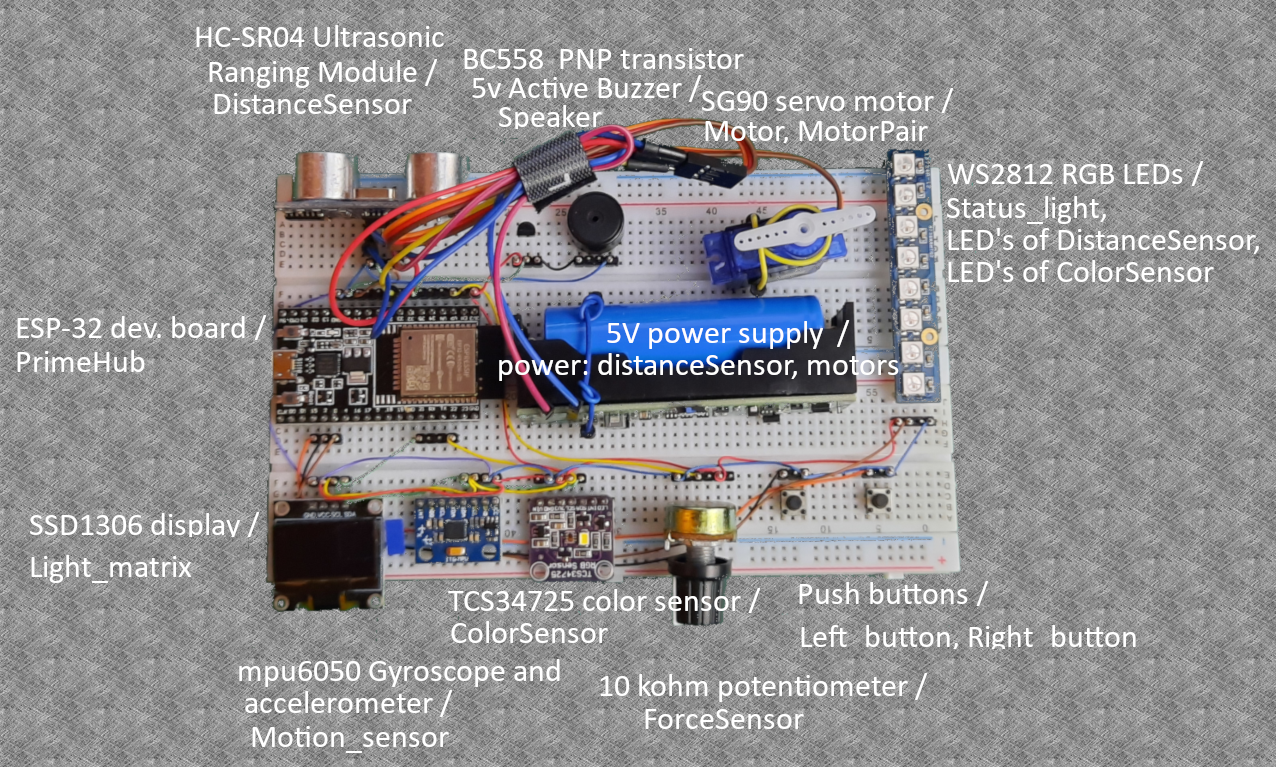
The environment can presumably be used on other microphone compatible boards. The current program is developed on an ESP-32 WROOM board. The PIN assignments for each peripheral can be modified in the python file for that module. Before anyone starts using other boards, check that they support micropython and have enough memory. My first try was an ESP-8266 development board, which I soon found out does not have enough memory (80 kByte) and is therefore not suitable for running this simulator. The board I am currently using (ESP-32 WROOM) has 520 kbyte RAM capacity, but I recommend the ESP-32 WROVER module, which has 8Mbyte of PSRAM (that should be enough). The peripherals have been chosen to be nearly identical in functionality to the peripherals used by LEGO, but there are some significant differences. For example, the force sensor has been replaced by a potentiometer.
1. Hardware assembly
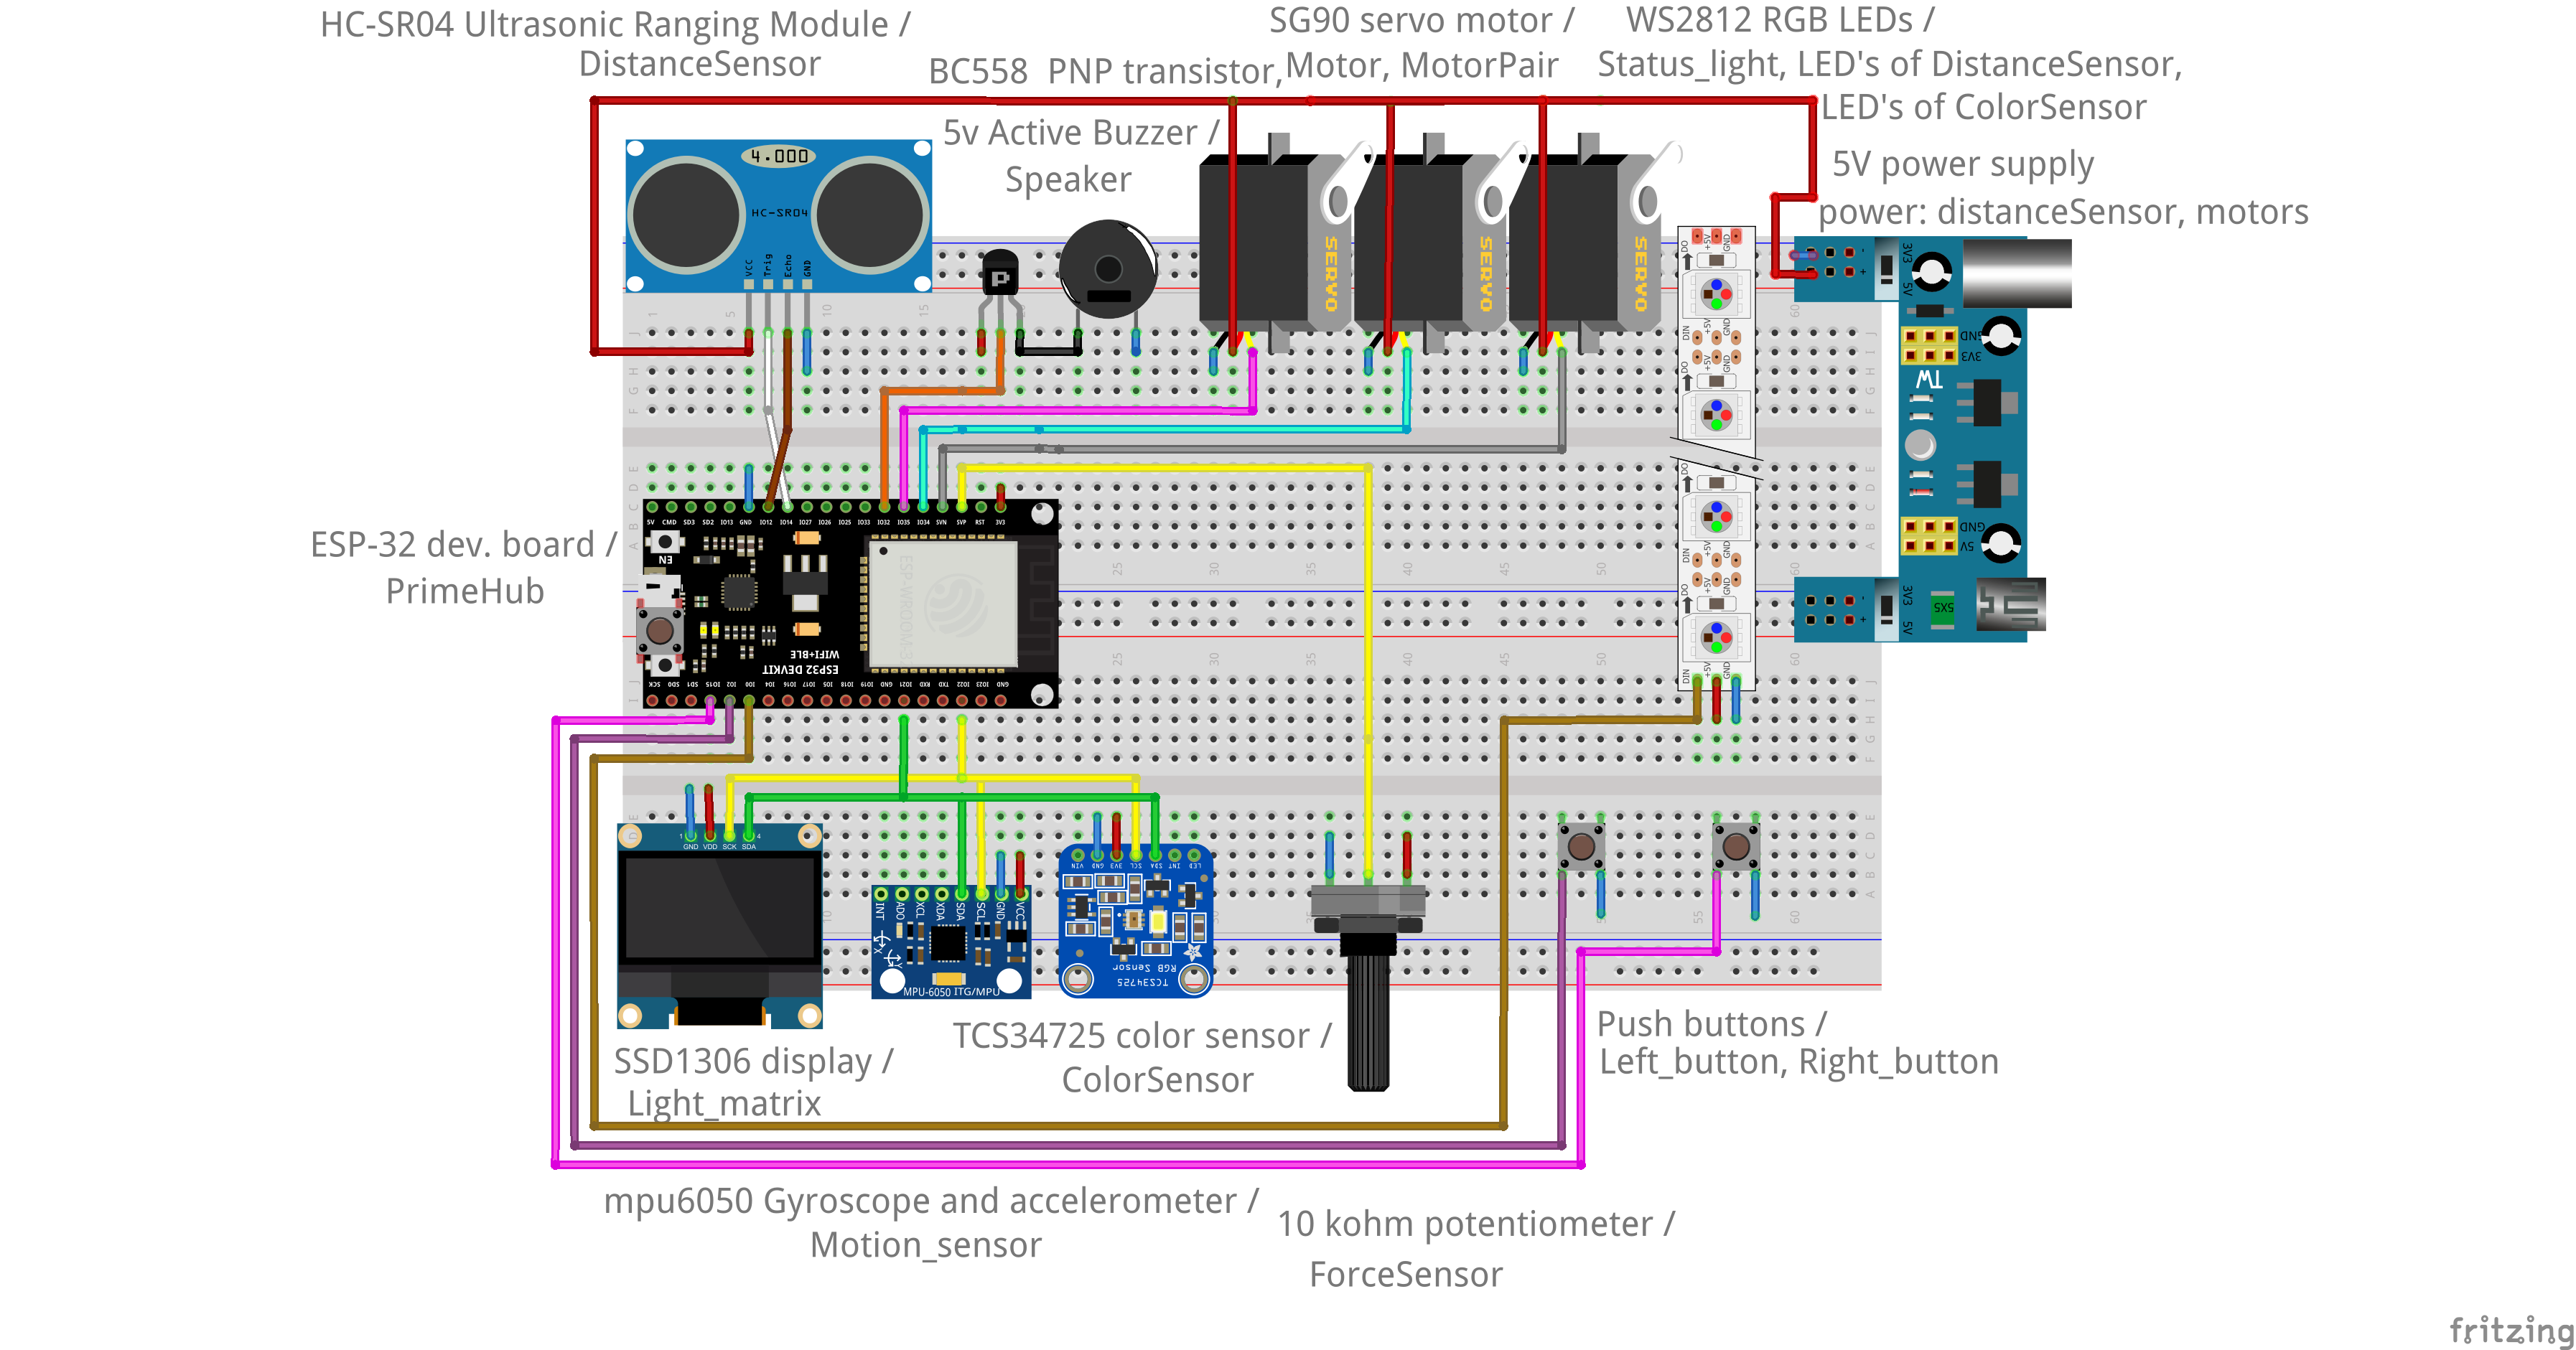
You need to build the electrical circuit as on this schematic to make it work.
The data lines of the peripherals can be connected to different PIN's of the ESP-32 board, but then you have to change the PIN numbers in the python file for the specific peripheral. If you want to use a different peripheral, that is also possible. In the python code for the module, you have to replace the handler functions.
The peripherals used here behave similarly to LEGO peripherals, but there are many differences. The goal was to make the code testable.
2. Software installationConnect the ESP-32 board to the computer with the micro USB cable. In the Windows Device Manager, check the number of serial ports on which the ESP-32 board appears. E.g. Silicon Labs CP210X USB to UART (COM3). If there are multiple serial ports and you can't decide which one belongs to the ESP-32 board, unplug the ESP-32 board from the PC and write down the number of existing serial ports. Reconnect the ESP-32 board, one extra serial port will appear, the new serial port number belongs to the ESP-32 board. Make a note of the serial port number, later you will need it.
Download the latest stable version of the micropython firmware for your ESP-32 board. In my case, I used the esp32-20210902-v1.17.bin
https://micropython.org/download/
Download the latest version of the Thonny Integrated development environment (IDE) and install it. Ex: thonny-3.3.13.exe
Download the ESP LEGO SPIKE Simulator (ESP-LEGO-SPIKE-Simulator-main.zip) and extract it to the directory where you want to work with it. E.g.: D:\ESP-LEGO-SPIKE-Simulator-main\
https://github.com/rundhall/ESP-LEGO-SPIKE-Simulator
Start the Thonny Integrated development environment (IDE). In the Tools->Options... menu, under the Interpreter tab, install the firmware using the install or update firmware button. Select the port of the ESP card and the downloaded micropython firmware e.g.: esp32-20210902-v1.17.bin. Install the firmware and then copy the entire simulator directory (D:\ESP-LEGO-SPIKE-Simulator-main\) using the upload function of Thony. The upload function can be reached by pressing the right mouse button on the directory you want to upload and selecting the "Upload to /" menu item. This directory structure should be visible on the ESP-32 device:Micropython Device->spike, example, hw_test
After copying the libraries to the ESP-32 board the simulator is ready for use.
3.How to use
To use the simulator, start the Thonny IDE program. Then open an existing.py sample file or copy code from the LEGO SPIKE environment or simply start a new file and write your custom code. You can then run the code by pressing the green play button or the F5 key. You can track the results on the console or on the peripherals themselves. You can modify the behaviour of the simulator by modifying files in the spike directory under Micropython Device.
By default, the debug function is enabled, i.e. all events are printed to the console to help debugging, but this can be disabled at each module.py file by setting the ISDEBUG variable to False.
If you don't want to build hardware you can just use the simulator. This version of the simulator can run on a PC without the ESP-32 board. You can read how to use it here:
https://www.instructables.com/Unofficial-PC-Based-LEGO-SPIKE-Simulator-in-Python/
4.Summary
The ESP-32 based LEGO SPIKE simulator in a micropython environment allows you to test the code written for a LEGO robot and create a special test environment that would be difficult to do with a real LEGO robot. The code for the simulator program is far from complete. A lot of functions are only partially implemented, e.g. the motion sensor does not handle different events at all. The simulator could be improved a lot.
The ESP-32 based LEGO SPIKE simulator system can be improved in many ways:


Comments
Please log in or sign up to comment.