What is Alphanumerical LCD
Alphanumerical LCD's is pretty old but still good to use devices. They can display basic alphabetical characters, numbers but also you can upload your own characters in their memory and use them for special stuff.
You can get them from variety of sources (for example on Adafruit) in different number of characters, with different number of lines and variety of colors and with or without back-light.
Almost all of them use communication based on old HD44780 chip and consists 0.1" row so is easily to use and easy to solder. In real world you need only LCD, Raspberry, one potentiometer and couple of wires.
Why I should use such obsolete technology ?
Well, this technology is far from obsolete. And how you can use it ? Here is just few samples :
Also don't forget that you don't need use green/black display (which looks cheap) but you can use inversion displays with white, blue or red text. They looks really good on any project.
Connection
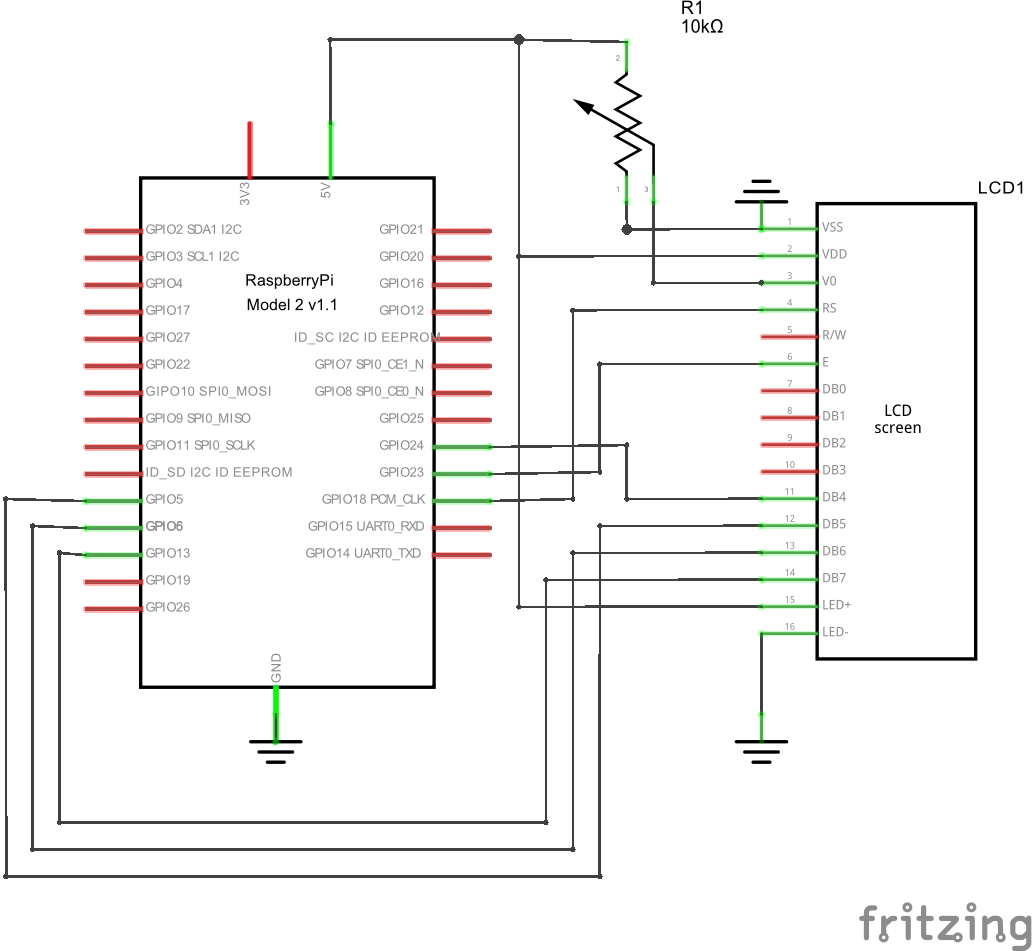
LCD can be connected over 8 data wires or over 4 data wires. Current version of library and this project covers only 4 data wires because speed penalty is not big and you can safe 4 additional GPIO port on Raspi for other hardware. Besides of of 4 data wire you need two additional wires for driving communication. Also 5V, GND and potentiometer to set contrast is needed to be connected as is on following screen.
Warning - Raspi with Win 10 IoT Core will allow you use only selected ports for general IO. Special ports like SPI or I2C is not allowed to be used and you will get exception if you do so.
Warning 2 - After connection you can see two lines filled with blocks. This is normal situation and it is correct. Display will clear after proper initialization from code. Don't worry :-)
LCD size
You can get various of LCDs. Most common size is 16x2 and 20x4. Library supports all modes uses one HD44780 chip. Others sizes are 8x1, 16x1, 16x4 and 20x2 but you can also find some custom version with different sizes.
Schematic
Schematic uses 4 wire data connection, 10k potentiometer for contrast and direct 5V for backlight led on display. Please check your LCD datasheet, there is possibility that your LCD will need resistor in connection just as normal led.
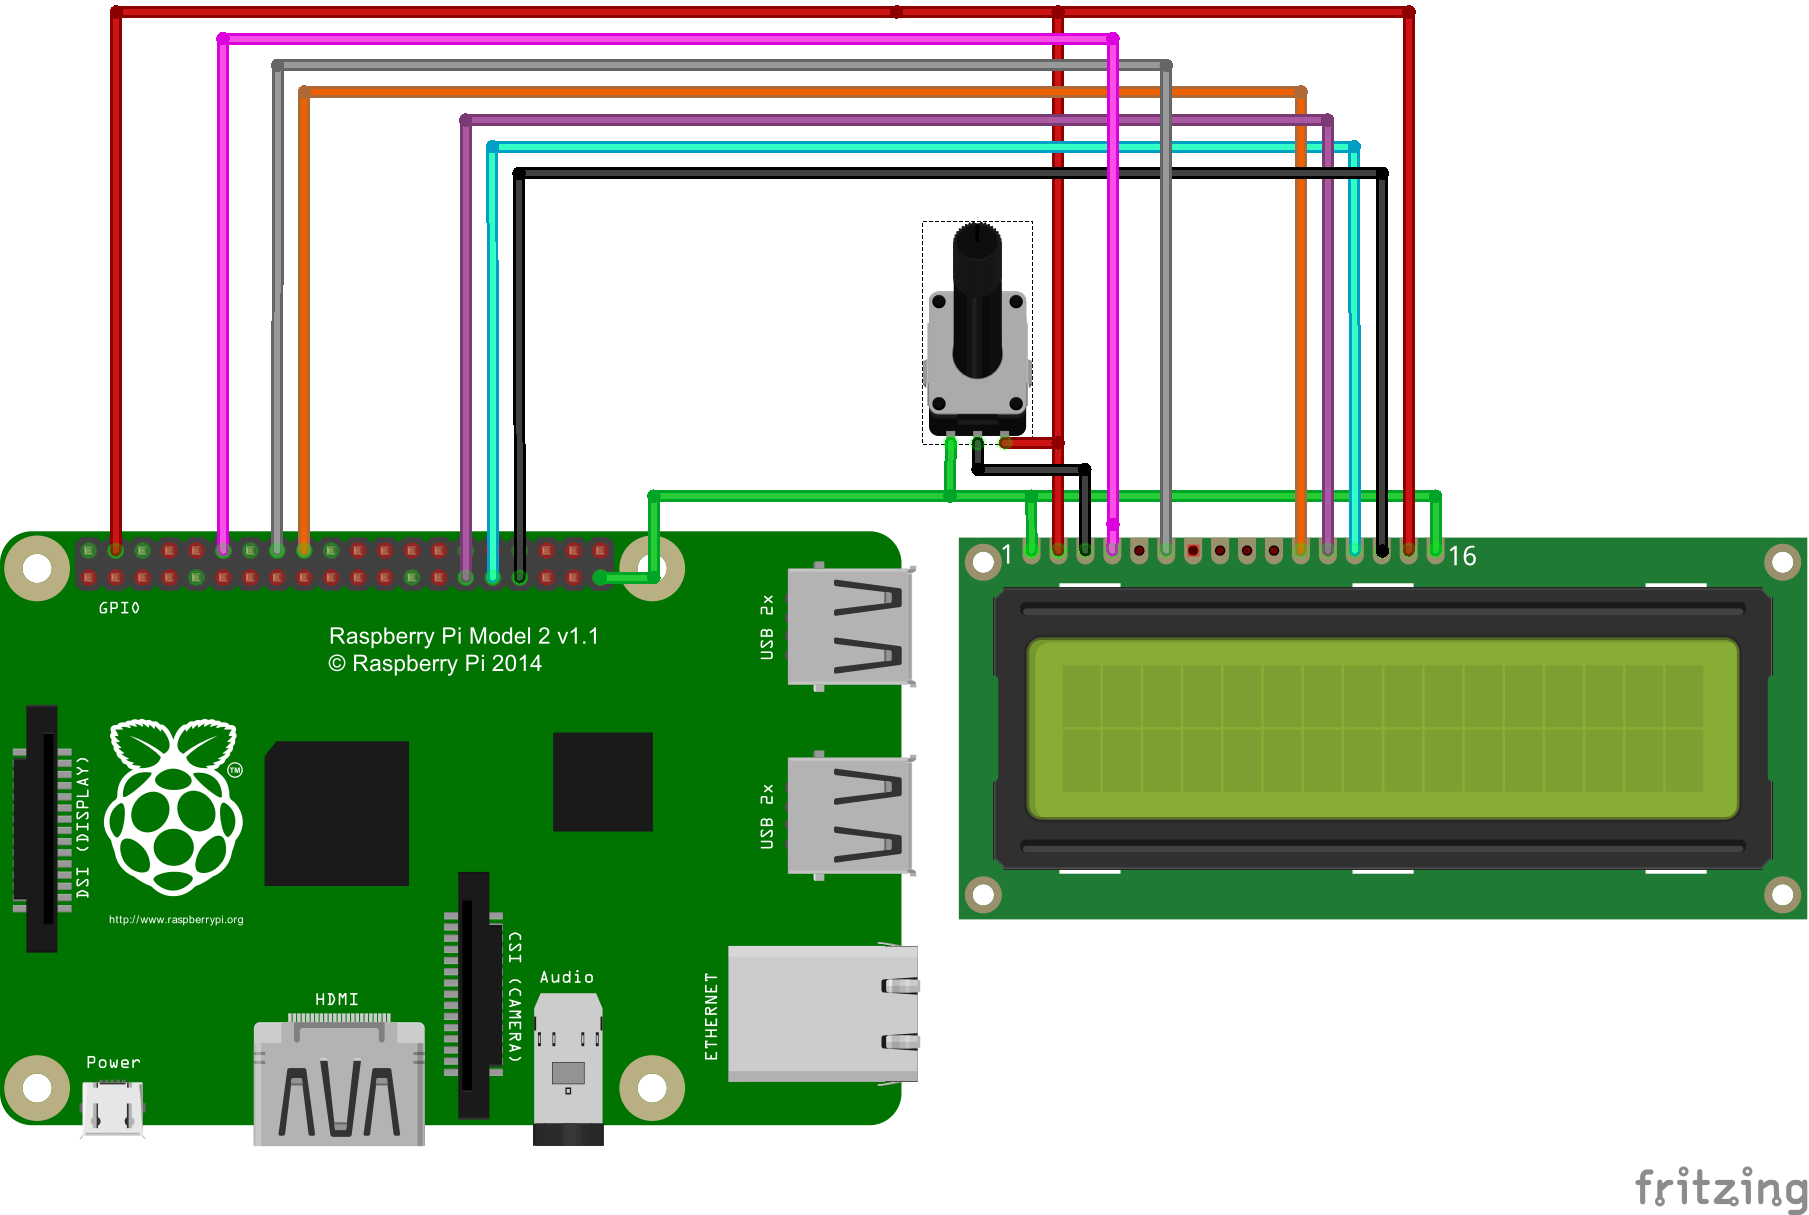
Breadboard like scheme
Here is breadboard like scheme for easier read. Please not 1 and 16 on LCD, it is possible that your LCD will have connection pads located on different place and order of pins will be opposite. Check PCB or datasheet for numbering.
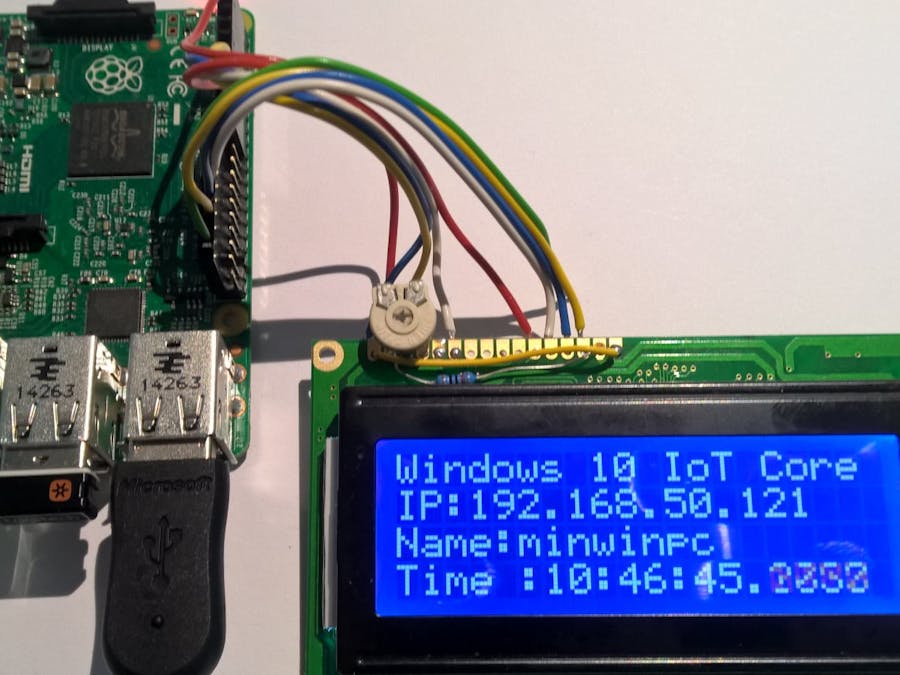
Real world version
Library
Library is based on standard Arduino (thanks guys!) library. Current version supports only 4 wire connections (8 wire not tested now so not released).
Initialization
Sample code is here :
using Win10_LCD;
// cols, rows according to your LCD
var lcd = new LCD(20, 4);
//pin numbers connected to RS, E, D4, D5, D6 and D7. This is for sample schematic
//initialization take some time so it is async call
await lcd.InitAsync(18, 23, 24, 5, 6, 13);
//let's clear screen, also async
await lcd.clearAsync();
Notes : clearAsync() clears screen, clear buffers and also set cursor to home position. Can be used for both modes (see below)
Library can work in two modes of usage :
Text output mode
This is basic and very simple mode of use. All what you need to do is :
- Connect LCD
- Initialize LCD
- Print your string to LCD
Library will take care of rest - will cut your string to proper size (and will scroll it in future releases), scroll strings if you send more strings than you have lines, take care of cursors and positions. Well, you can replace your Console.WriteLine with LCD.WriteLine and you are done :-D
Code looks like :
lcd.WriteLine("Console output 1");lcd.WriteLine("Console output 2");lcd.WriteLine("Console output 3");lcd.WriteLine("Console output 4");//no problem, autoscroll is supported !!lcd.WriteLine("Console output 5");//let's clear it and start again from topawait lcd.clearAsync(); lcd.WriteLine("LCD Rulez :-D");
Direct mode
This is same mode as Arduino library support. You can control text, cursor position, upload special characters and do rest of stuff. Usage is little bit complicated but you have higher level of freedom.
await lcd.clearAsync();
//cursor is on home - 0x0
lcd.write("Windows 10 IoT Core ");
//second line
lcd.setCursor(0, 1);
lcd.write("IP:"+ CurrentIPAddress());
lcd.setCursor(0, 2);
lcd.write("Name:"+ CurrentComputerName());
while (true)
{
//back to line 3 so text will override itself
lcd.setCursor(0, 3);
lcd.write("Time :"+DateTime.Now.ToString("HH:mm:ss.ffff"));
}
Direct mode have one feature which can be unwanted - lines can overload to different one but chip have strange memory layout and so you can see text from first line on 3rd line of 4 line LCD or from 3rd line will text overlap to number 2 and so. Please take care of cutting strings for proper ranges. Text output mode do it for you, direct mode is free and so you have to do it manually.
Warning - Modes are not compatible. Please don't use them at once without deeper knowledge of library internals. Choose which way you want to go and stay on road.


Comments
Please log in or sign up to comment.