Description
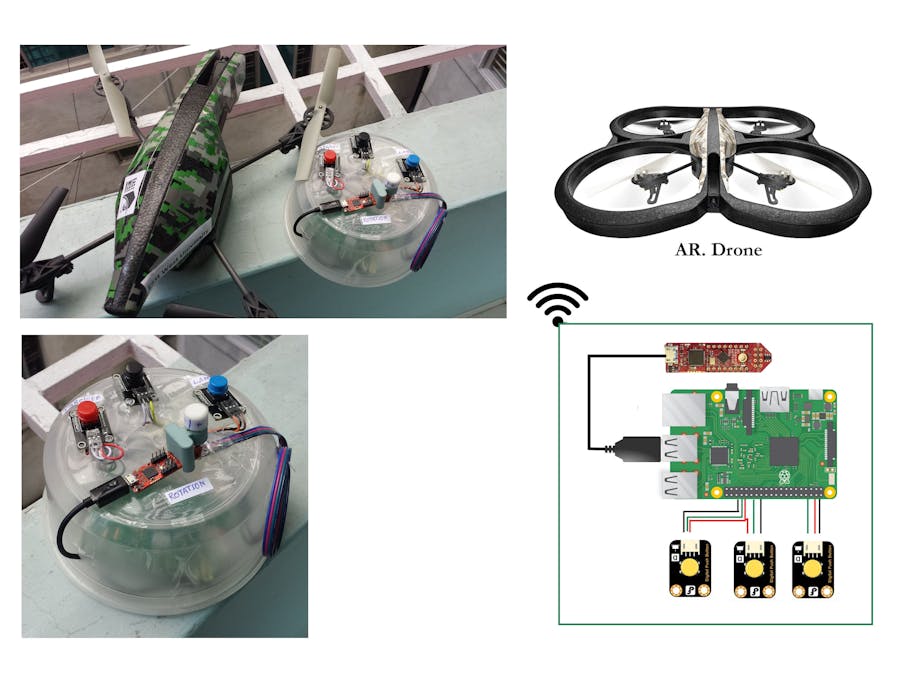
Parrot AR.Drone is a remote-controlled flying quadcopter helicopter built by the French company Parrot. The controlling system of the drone is based on mobile apps. Controlling the drone using apps is not comfortable. With this regard, the project proposed is a portable controlling system for the AR.Drone based on a 3D magnetic sensor.
The drone has linear and rotational movements. Linear movements are left, right, forward, and backward. Rotating-left and rotating-right are the rotational movements. The 3D magnetic sensor is capable for sensing those movements. It can sense the movement of a magnet.
Based on this sensing technique, we have designed the remote control for the AR.Drone.
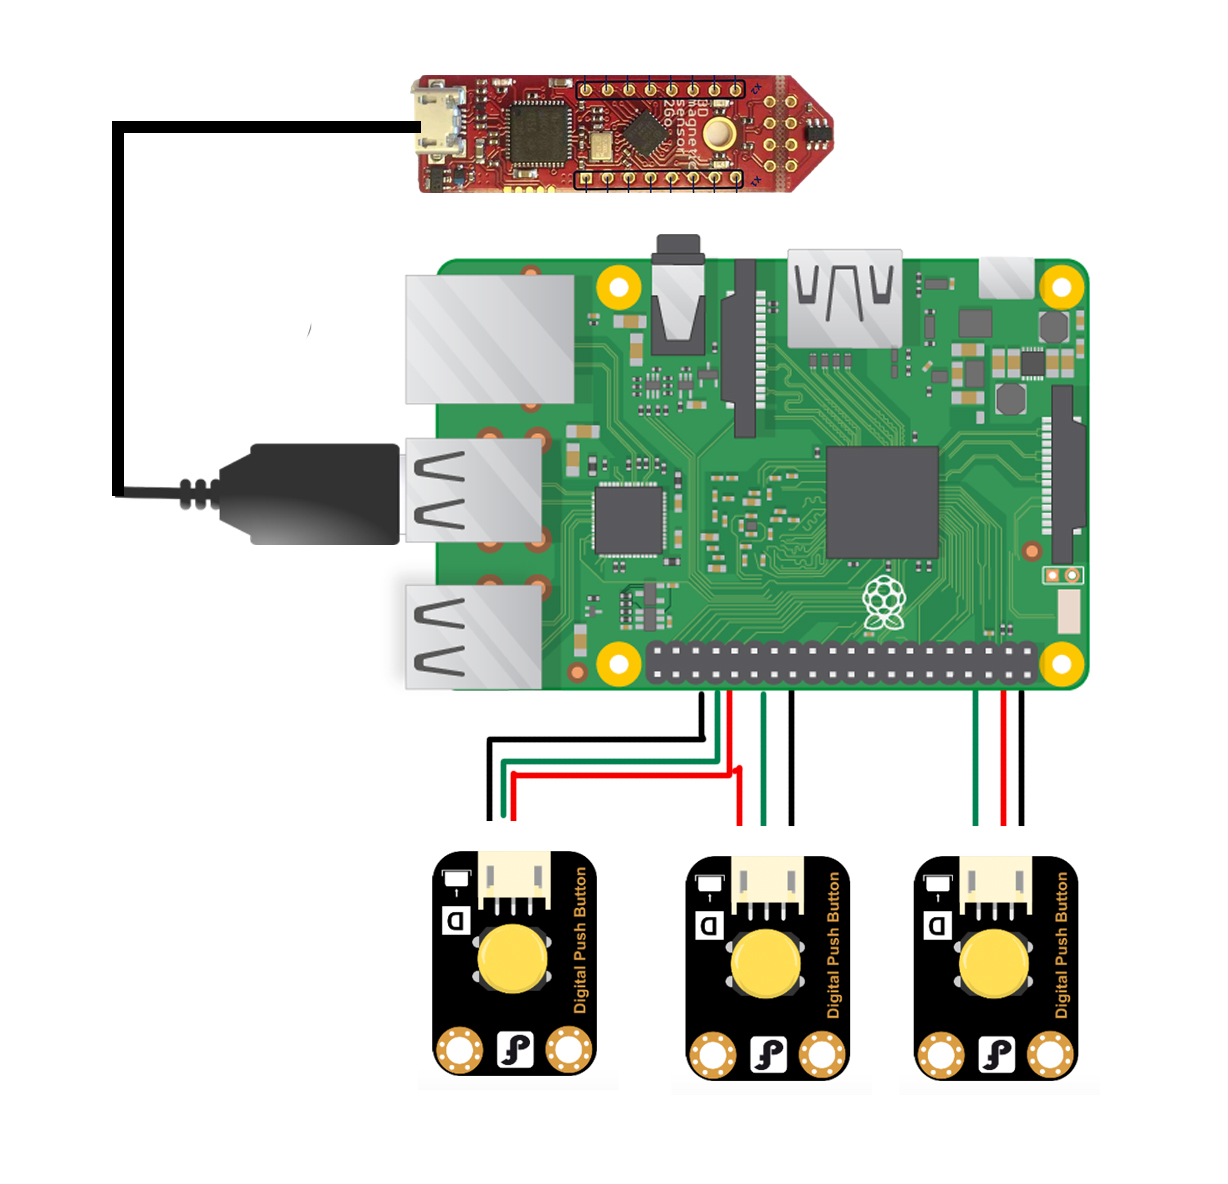
A Raspberry Pi receives the rotational information from the magnetic sensor via serial port. This information are used for rotating the AR.Drone. An open source Python-based SDK is available for controlling the AR. Drone by using a Python script.
The firmware flashing process isn't so difficult. First, we need to set up the Arduino IDE platform for programming the Infineon development board. The preparing process is fairly simpl, and it was nicely described in the link below:
https://github.com/Infineon/XMC-for-Arduino
We also need to add the Arduino library for the 3D magnetic sensor kit. The GitHub repository for the Arduino library is available on Infineon's GitHub page: https://github.com/Infineon/TLE493D-W2B6-3DMagnetic-SensorSo
Now, plug the 3D Magnetic Sensor 2GO kit with USB port and perform the upload firmware operation. The firmware code for this project is available in the source code section.
Setting Up the Raspberry PiThe Raspberry Pi is a single-board computer. The operating system of the Pi is mainly Rasbian. For this project, we need to download and install the latest version of Rasbian OS. Since Raspberry Pi is a headless device, we need to configure it via SSH shell in Linux or PuTTY in windows. We clone the Git repository which contains all the SDK of the drone and source for using our prototype controller.
After that, we just run the Python script for initializing the controller. Before initializing the controller, be sure that the AR.Drone is connected with the Raspberry Pi via WiFi network. Please check the demonstration video for controlling the drone via proposed controller.
Attention: Drones can be dangerous!!!!!!! So, keep suitable space before flying the drone.
DemoDue to some resource limitation, we are unable to implement our conceptual design. Our prototype implementation is little bit different with our conceptual design but the working principle is the same.
Reference


.png?auto=compress%2Cformat&w=48&h=48&fit=fill&bg=ffffff)


Comments
Please log in or sign up to comment.