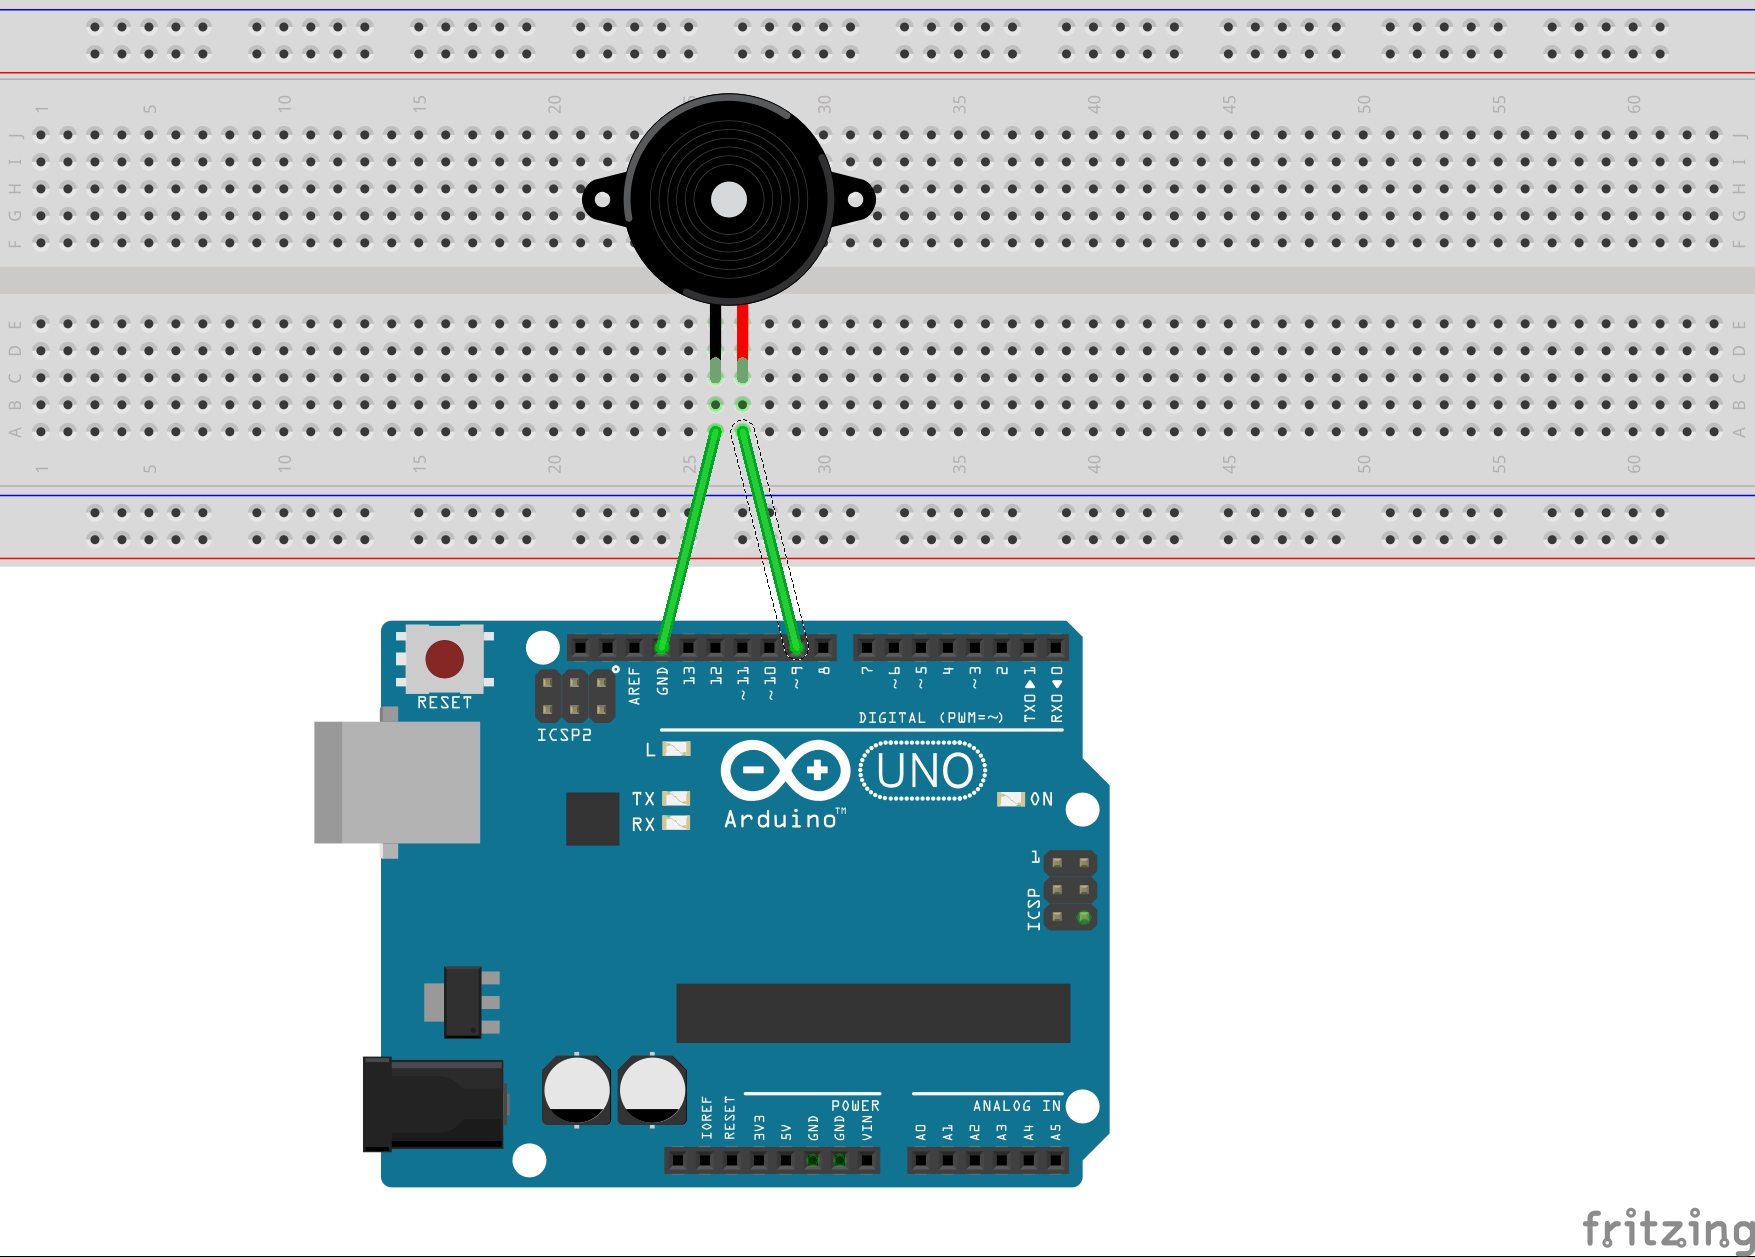
In this project, we will create a wailing alarm sound using a piezo sounder connected to an Arduino. This is a simple yet effective project to learn about generating sound with an Arduino.
What We Will Learn in This Section- How to connect a piezo sounder to an Arduino.
- How to generate varying tones to create a wailing alarm sound.
Learning to generate sounds with an Arduino can be useful for creating alarms, notifications, or simple musical projects. This project provides a basic introduction to using the tone function and controlling a piezo sounder.
First, make sure your Arduino is powered off by unplugging it from the USB cable. Then, follow these steps:
- Connect one pin of the piezo sounder to Digital Pin 8 on the Arduino.
- Connect the other pin of the piezo sounder to the ground (GND) pin on the Arduino.
Once the connections are made, reconnect your Arduino to the USB cable and power it up.
Code Arduino Piezo Sounder Alarmfloat sinVal;
int toneVal;
void setup() {
pinMode(8, OUTPUT);
}
void loop() {
for (int x = 0; x < 180; x++) {
// Convert degrees to radians then obtain sin value
sinVal = (sin(x * (3.1412 / 180)));
// Generate a frequency from the sin value
toneVal = 2000 + int(sinVal * 1000);
tone(8, toneVal);
delay(2);
}
}
- Initialization: The piezo sounder is connected to Digital Pin 8. The
setupfunction sets this pin as an output.
Loop Function: The loop generates a wailing sound by varying the frequency of the tone.
- A for-loop iterates from 0 to 180 degrees.
- The degrees are converted to radians, and the sine value is calculated.
- The sine value is used to generate a frequency that changes over time, creating the wailing effect.
- Loop Function: The loop generates a wailing sound by varying the frequency of the tone.
A for-loop iterates from 0 to 180 degrees.
The degrees are converted to radians, and the sine value is calculated.
The sine value is used to generate a frequency that changes over time, creating the wailing effect.
After uploading the code, there will be a slight delay, and then your piezo will start to emit sounds. If everything is working as planned, you will hear a rising and falling siren-type alarm, similar to a car alarm.
Further LearningThis book will help you gain more knowledge about Arduino: Beginning Arduino.


_ztBMuBhMHo.jpg?auto=compress%2Cformat&w=48&h=48&fit=fill&bg=ffffff)


Comments