


Hardware components | ||||||
_ztBMuBhMHo.jpg?auto=compress%2Cformat&w=48&h=48&fit=fill&bg=ffffff) |
| × | 1 | |||
| × | 1 | ||||
 |
| × | 1 | |||
Software apps and online services | ||||||
 |
| |||||
In this tutorial, you will learn what RFID is, how it works, and how to make an Arduino-based RFID door access control system with counter. You will also see who last gained access. You can watch the following project video!
Overview of RFIDRFID stands for "Radio Frequency Identification" and it is a concept of identification through radio frequency. It is a method of transmitting data via radio waves in magnetic fields wirelessly and without contact. This technology is used for automatic identification of, for example, goods, objects, and people. RFID offers an important platform for identification of objects, data collection and management of goods.
An RFID system consists of two main components, a transponder or a tag which is located on the object that we want to be identified, and a transceiver or a reader. The RFID reader consists of a radio frequency module, a control unit, and an antenna coil which generates high frequency electromagnetic field. On the other hand, the tag is usually a passive component, which consists of just an antenna and an electronic microchip, so when it gets near the electromagnetic field of the transceiver, due to induction, a voltage is generated in its antenna coil and this voltage serves as power for the microchip.
How to Find Out Tag CodeFirst, you will need to download RFID library from GitHub: Click Here
Now you need to upload the “DumpInfo” from example.
Now if you run the serial monitor, you can find RFID tag code.
In this project, you will need:
Hardware
Software
Ardunio
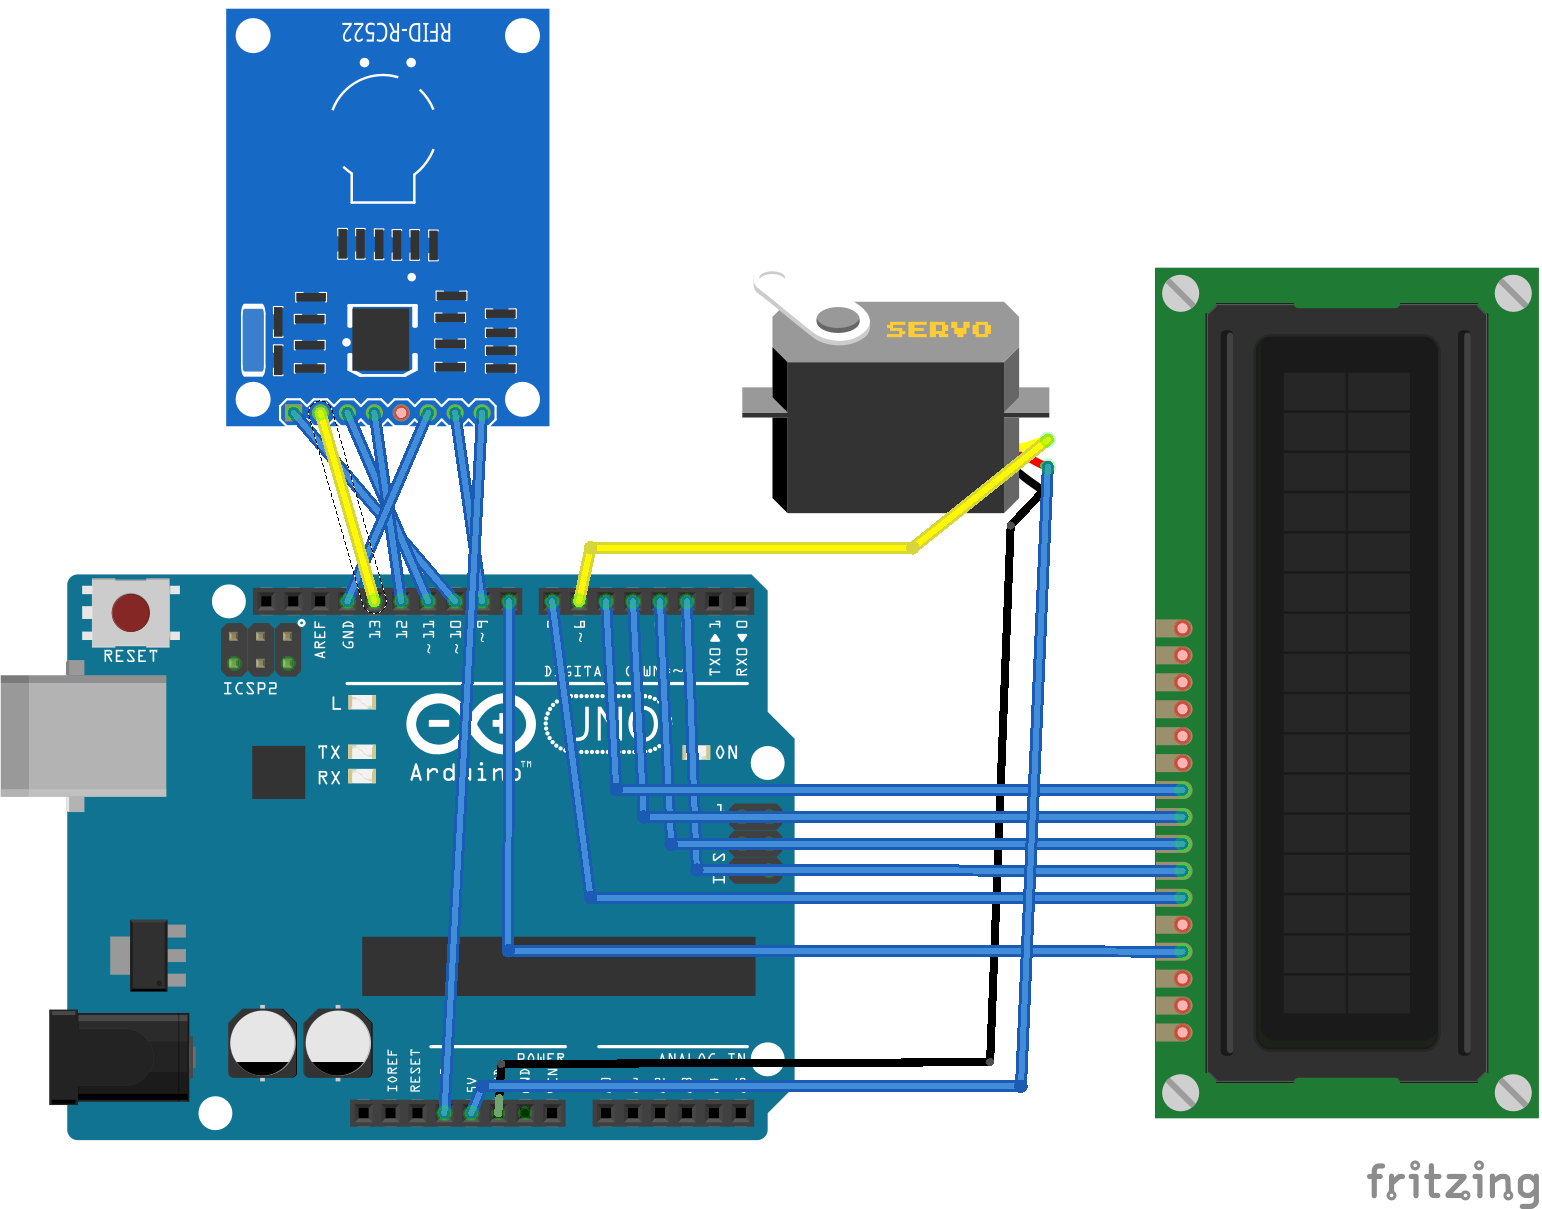
Circuit Diagram
Source code


Comments
Please log in or sign up to comment.