The aim of our project is to monitor the amount of calories burnt during jogging by using pulse and piezo electric sensor via artik cloud and displaying the result using POV display.
It tracks your level of activeness by counting the number of steps walked and monitors your health by continuously plotting heartbeat from pulse sensor. It helps you to know whether you have acheived your fitness target(calories burnt) everyday and motivates you to reach your target the next day by displaying the target to be achieved and your past performance ,as soon as you wake up in the morning because pov display is incorporated onto the fan in your living room
Artik Cloud Setup1. Sign up with Artik Cloud
2. In the dashboard select New device type
3. Enter device display name and unique name
Thus device is created
4. Create Manifest, switch to manifest and select New Manifest
5. Enter field name and description
6. Activate Manifest
7. Create application in dashboard
8. Enter app name and description
9. Assign permission to read
Thus application is made
10. Switch to my devices and connect the device
11. Click the device
12. Once the connections are made,data will be displayed
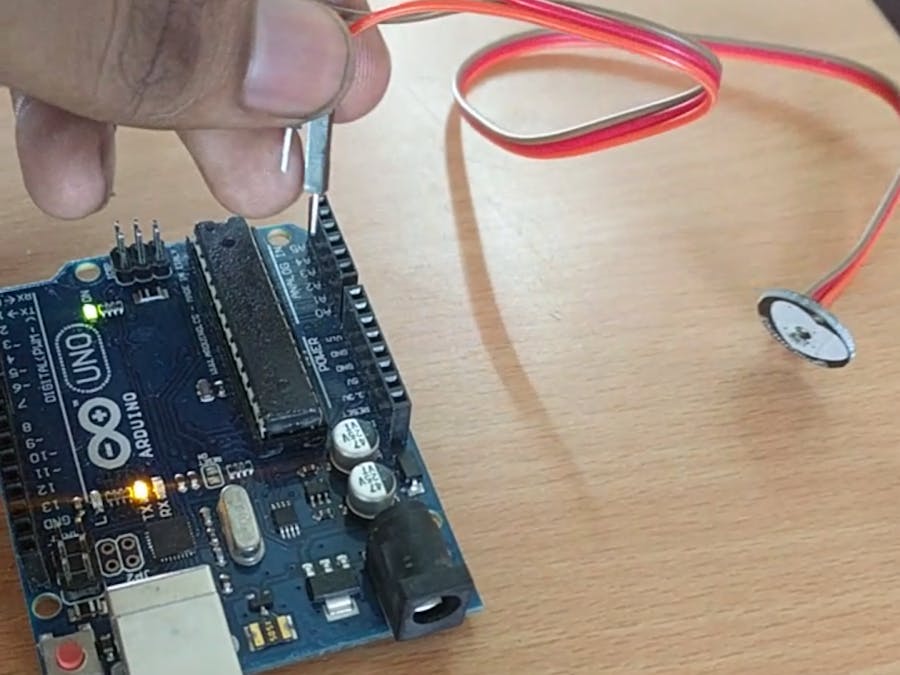
Heart Beat Calculation:The Pulse Sensor Amped is a a plug-and-play heart-rate sensor for Arduino and Arduino compatibles. It can be used by people who want to easily incorporate live heart-rate data into their projects.
You gently place the sensor on any area of skin (such as a finger or earlobe) and it will transmit pulse data to your Arduino for processing. The Pulse Sensor measures changes in light from expansion of the capillary blood vessels to sense your heartbeat.
Pulse Sensor Amped adds amplification and noise cancellation circuitry to the hardware. It’s noticeably faster and easier to get reliable pulse readings. Pulse Sensor Amped works with either a 3V or 5V Arduino.
The sensor is connected as follows, the pulse sensor pin is what is marked on the sensor, I have noticed that some of these use different colour wires
- Pulse sensor pin Arduino pin
- – -----------> Gnd pin
- + -----------> 5v pin
- s ----------->Arduino A0
If you've started a fitness program, a decrease in your resting heart rate over time can mean your fitness level is improving.
2. How hard you should exercise:Exercising within target heart rate zones for fat burning, cardio training and endurance training ensures you're working at the right intensity.
3. How stressed you are:One interesting use for heart rate monitoring devices is to gauge the effectiveness of stress management exercises
Step Count:Here we use a Piezo element to detect sound, what will allow us to use it as a knock sensor. We are taking advantage of the processors capability to read analog signals through its ADC - analog to digital converter. These converters read a voltage value and transform it into a value encoded digitally. In the case of the Arduino boards, we transform the voltage into a value in the range 0..1024. 0 represents 0volts, while 1024 represents 5volts at the input of one of the six analog pins.
A Piezo is nothing but an electronic device that can both be used to play tones and to detect tones. Here we are plugging the Piezo on the analog input pin number 0, that supports the functionality of reading a value between 0 and 5volts, and not just a plain HIGH or LOW.
Practically piezoelecteic sensor can be placed under shoe to detect step count .
CALORIES CALCULATION:
Calories spent during jogging is calculated from this formula and displayed using pov display
cal=((-55.0969+(.6309*heartbeat)+(0.1988*weight)+(0.2017*age))/4.184*60*time
WORKING
Once the data is collected it is displayed through POV
POV:
Persistence Of Vision is the phenomenon of the eye by which an image seen by our eye persists for about 0.04s during which any other images that we see are merged together with this image. This ability can be used to create an illusion of images/characters floating in the air, by rapidly flashing a column of LEDs while moving the display in air. For example:
Thus to make the display we have to do the following
1. Design a circuitry to control the flashing of LEDs in a LED column.
2. Program the circuit to flash in an appropriate pattern.
3. Synchronize the flashing with the motion of the display.
First we constructed POV on a rectangular mica sheet. Due to the connection uneasiness.. then we switched on to a circular mica sheet. The crank and the circular sheet are bolted together.
When data from cloud is not being received i.e other than the time of jogging POV display is converted into a clock:
RESULT
Thus by using this one can keep track of the number of calories burnt(with heart beat count calculated through pulse sensor), distance covered(with help of piezo electric sensor) during jogging. The data displayed through POV could act as a motivator to increase your calories burnt count on a daily basis This would be placed in a great utility in the future. Thank you!


_ztBMuBhMHo.jpg?auto=compress%2Cformat&w=48&h=48&fit=fill&bg=ffffff)


.jpg)


Comments
Please log in or sign up to comment.