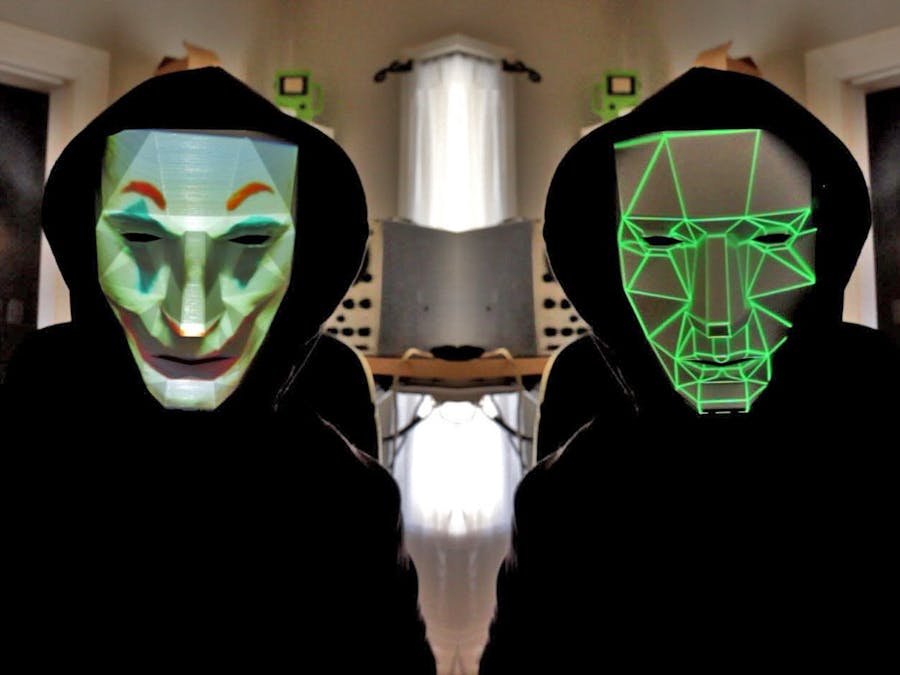
Facial recognition is everywhere. Tracking your movements, actions, everything you do. If this is a concern, this mask is for you. Check out the video below.
This idea has been floating around in my head for some time, and I'm glad I finally get to check it off the list. The way this works is, the mask has a mount that holds a small DLP projector facing back at it, and that projector is connected to a Raspberry Pi. The result is that you can change the way the mask looks by projecting different videos and images onto it. You can do cool animations, or just steal someones face. It's a pretty creepy concept. Also called projection mapping.
The mask itself was designed by Kongorilla on Thingiverse. I remixed the mask by removing a bit of material here and there and adding some mounts for where the rod and projector will go. I stuck it into Fusion 360 and got designing!
I found this really cool Pico DLP projector that is made by Texas Instruments. Its designed to be used with a beaglebone (yeah...) so I had to make a custom PCB to adapt the signal lines to the Raspberry Pi Zero W that I would be using. There is a lot of useful information to get the projector working on your Pi found on this website.
I actually ended up not using half of the circuity shown here. It was designed to make sure the Pi was getting 5V but its not needed. You can download or buy the PCB here: PCBWay. The only thing I did put on (other than the obvious beaglebone and pi headers), was the mosfet (2N7002) for the fan, but the fan isn't needed either! At least not in my cold house. FindChips link with the essential parts.
To give the pi power, just jumper these pads, or follow the traces back to the actual pin headers, if that is easier to solder for you. You will need to also remove one of the pins on the projector from entering the socket due to an accidental ground. Pin 43 of the projector. It won't hurt anything if you leave it, but the projector won't display anything.
Time to 3D print!
I have made all of the files available to download on Thingiverse. You should try to print the 4 mounting pieces in a dark colour or black, then the mask in white. You're going to want to paint all of the non mask stuff a matte black anyway.
You will need to install threaded brass heat set inserts into the parts. The ones in the chin are installed backwards(on the inside, toward your chin). This is to add strength. They would have to pull through the whole part to come out.
With the assembly together, its time to get the pi setup. In the config file, if you followed along with the instructions on the website above, you will need to make a few modifications to turn the screen 90 degrees, and have the correct resolution.
Swap the resolution for framebuffer_width and height, and add display_rotate=1. The config file shown above has the correct settings. Your pi should now be outputting the main video out through the pico projector.
Now is the actually challenging part, being creative. Its time to create some videos that will display on the mask. I made some templates that would mask off the areas you don't want to display. This would make sure that no light escapes the areas you want lit, like the hood or below the chin.
Using these templates and photoshop, you can take images of faces, scenes, all sorts of things and display them on the mask. You will need to skew the faces perspective to have them properly display on the mask. Its explained a little better in the video, so I would consult that.
Once you have some cool animations, displays, videos etc. you need to upload them to your pi, and then run OMXPlayer to play them. This is kind of tricky to do with the mask on, so I found a way to make it much easier. There is an app called RaspController for Android. It allows you to run terminal commands, the same way you would run them in a terminal, but with the press of a button. So after you have a bunch of videos uploaded, you will make a number of different commands corresponding to those videos. The command to run a video is
omxplayer /path/to/video --aspect-mode stretch
The app is pretty intuitive, so play around with it and you'll see how easy it is to implement these commands. The plus is you can access them while wearing the mask, to change different displays while you're wondering around a party. If you want audio, you will need to connect a bluetooth speaker to your pi, but I won't cover that in this. I didn't have the best luck with mine and it would cut in and out, but probably a speaker issue.
If you want to support me and my open source projects, please subscribe to my YouTube Channel (and ring the bell!).
Also, consider becoming a patron on Patreon. My projects will never be behind a pay wall, and my patrons help greatly with that.
Now let's get serious for a moment. I have developed an ARG, this mask inspired it. I have made a few video puzzles that you will need to solve in order to find the treasure. There are some discussions already on reddit about it (avoid it if you don't like spoilers). There is real treasure to be found.
Go to 13thkey.com to start.


Comments