


Hardware components | ||||||
| × | 1 | ||||
| × | 2 | ||||
| × | 1 | ||||
 |
| × | 2 | |||
 |
| × | 2 | |||
 |
| × | 2 | |||
 |
| × | 5 | |||
 |
| × | 2 | |||
 |
| × | 1 | |||
 |
| × | 1 | |||
| × | 1 | ||||
| × | 1 | ||||
 |
| × | 1 | |||
 |
| × | 1 | |||
 |
| × | 1 | |||
 |
| × | 1 | |||
| × | 1 | ||||
Software apps and online services | ||||||
 |
| |||||
Hand tools and fabrication machines | ||||||
 |
| |||||
This project is about how to create IoT automation for water meters. You can read your water meter data using web access, through Blynk application on your mobile device or via e-mail.
The solution has two different layers: the first layer contains the module that reads water meter data and sends it using low-distance transmitter module si4432 to the second-layer module. Each first layer module supports up to 2 water meters. It is supposed that this module can completely manage one input water supply that can contain two water meters: hot and cold water. If you have two or more independent water suppliers, you can install another one first layer module for each water input. It is possible to register up to 5 first layer modules in a single second layer module. First layer modules run on two AA batteries and require battery change every 6 months.
The second layer module based on Wi-Fi capable ESP8266 microcontroller that should be connected to the Internet to send data via Blynk or e-mail. This module also has si4432 receiver to listen for the data from first layer modules. Second layer module requires external power outlet but it can be powered off for some time. The data of the water meters are stored in first layer modules.
First Layer ModuleLet begin with the first layer module. This controller is based on an ATmega328P-PU microcontroller that is running on internal 8MHZ oscillator. Mostly this microcontroller stays in sleep mode to save the battery power. It wakes up, checks the status of the two water meter sensors and sends the actual water meter data to the second layer
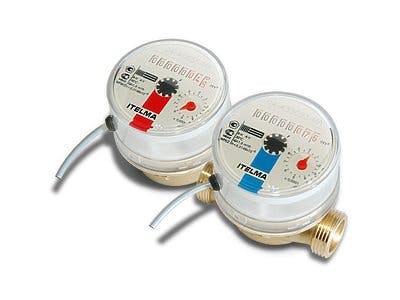
Here you must understand how the water meter works. My variant of the water meter has the reed switch inside. When the last digit of the water meter become zero (0) the reed switch shorts and the resistance between wires become 0. when the last digit goes over 3 or so, the reed switch opens. The first layer module periodically reads the status of reed switch of the water meter and increments internal counter according with reed switch status. Of course, the first layer module knows nothing about initial readings of the water meter, it counts only 'reed switch shorts'. This module transmit this counted amount to the second layer module. To distinguish the first layer modules, each one must have unique ID. You should change this ID inside the sketch loaded to this module.
The push button of the first layer module is used to reset the water meter counters to zero. If you change the water meter, you can reset this data. But it is not necessary as you will see in the next section.
Second Layer ModuleThe second layer module is based on ESP8266 microcontroller. It is compact and can be placed inside old external power supply that will be connected to the power outlet.
This module listens for the water meter data from the first layer module, manages this data and send it via web or Blynk requests.
The ESP8266-12E microcontroller has 4 MB of the flash data that is split between into 2 pieces 1M+3M. The last one should be formatted to hold a file system. Here the configuration data is stored in.json files. You can preload some configuration data for your controller if you wish (see config.json file in data directory) or you can enter all configuration through web interface of the layer two module.
When the second layer module starts it tries to locate the configuration file. If the configuration file not found in the file system, the module will activates the access point "esp8266-wm". You can connect to this access point and point your browser to address 192.168.4.1. The configuration parameters can be entered on the network setup page:
Here you should enter the following data:
- Wifi SSID - SSID of your access point for Internet access.
- Blynk Auth key - this optional key should be obtained on the Blynk site.
- NTP server name - the name of your closest NTP server to get the accurate time data via NTP protocol, not MS windows!
- Greenwich Difference in Minutes - your time zone difference in minutes from Greenwich. In this example 180 is 3 hours for Moscow, Russia.
This page can be accessed at any time later via web interface of the second layer module.
If the configuration file found, the second layer module tries to connect to the access point you have entered in the previous page. If the module failed to connect to access point in 5 minutes, it turns into access point mode again allowing you to correct entered data.
If the configuration file exists and it is correct, the second layer module turns into main working mode. It starts internal web server to reply your queries and makes connection to the Blynk service. If your access point will be switched off for some time or the connection to the Blynk cloud loss, the module will try to connect to them forever. To reconfigure module for another access point, disconnect the module from the power outlet, reconnect again and wait for 5 minutes.
If you connect to the second layer module in main mode you should see the main page. Here you can see the main menu in the upper line of the screen and the registered water meter data in the main part of the screen. The detailed information of the water meter can be accessed by clicking its location name.
Note: The second layer module listens for all first layer module and saves its data. Just wait for one minute the first data uploaded into module.
But the water meters should be registered first. To register new water meter, select Setup menu. For each first layer module you can enter its location, serial numbers of its water meters, actual water meter data, time of the next inspection of the water meter and the most difficult - fraction size of the water meters.
As it was stated before, the first layer modules count the reed switch shorts. Each short per turn of the last digit. The fraction size is the number of the digit in the water meter that are used as a fraction of cubic meter calculated.
In my case you can see in the picture, there are 3 digits after the decimal dot (comma in Russia). But as I have stated, we count the number of the whole turn of the last digit, so in the configuration page we should put 2 as a Fraction Size.
As soon the first layer module stores the number of turns of the last digit, you should enter the actual water meter data for each water meter for the first time.
Also, you can configure e-mail notifications for this system. Enter the Notifications page.
Here you can enter the smtp server data: name, port, user name and password. Also you should enter the e-mail receiver address.
The second layer module can send the following notifications:
- Water meter data periodical notifications (if enabled)
- Warning about the Inspection of the water meter. You can setup the number of the days this notification starts.
- Urgent notification about the water meter inspection.
Note: The ssl is supported by the sketch, but it is unstable in the ESP8266. So it is better to use non-ecrypted e-mail servers.
And you can check the water meter data via Blynk application in your mobile phone. You should create you own Blynk application in you mobile device first. Each first layer module produce the following virtual items in the Blynk application:
- V1 - hot water serial number
- V2 - hot water water meter data
- V3 - cold water serial number
- V4 - cold water water meter data
- V5 - hot water meter inspection time
- V6 - cold water meter inspection time
- V7 - the first layer battery voltage


Comments
Please log in or sign up to comment.