


Hardware components | ||||||
 |
| × | 1 | |||
 |
| × | 1 | |||
 |
| × | 1 | |||
 |
| × | 1 | |||
Software apps and online services | ||||||
 |
| |||||
Have you ever been in a completely dark room and hit your toe on a table or stepped on something like a lego? Or are you concerned about grandparents falling down the stairs to use the restroom because there is no aisle light? I was concerned about all of the above, so I created an Automatic Sensor Crossing Light.
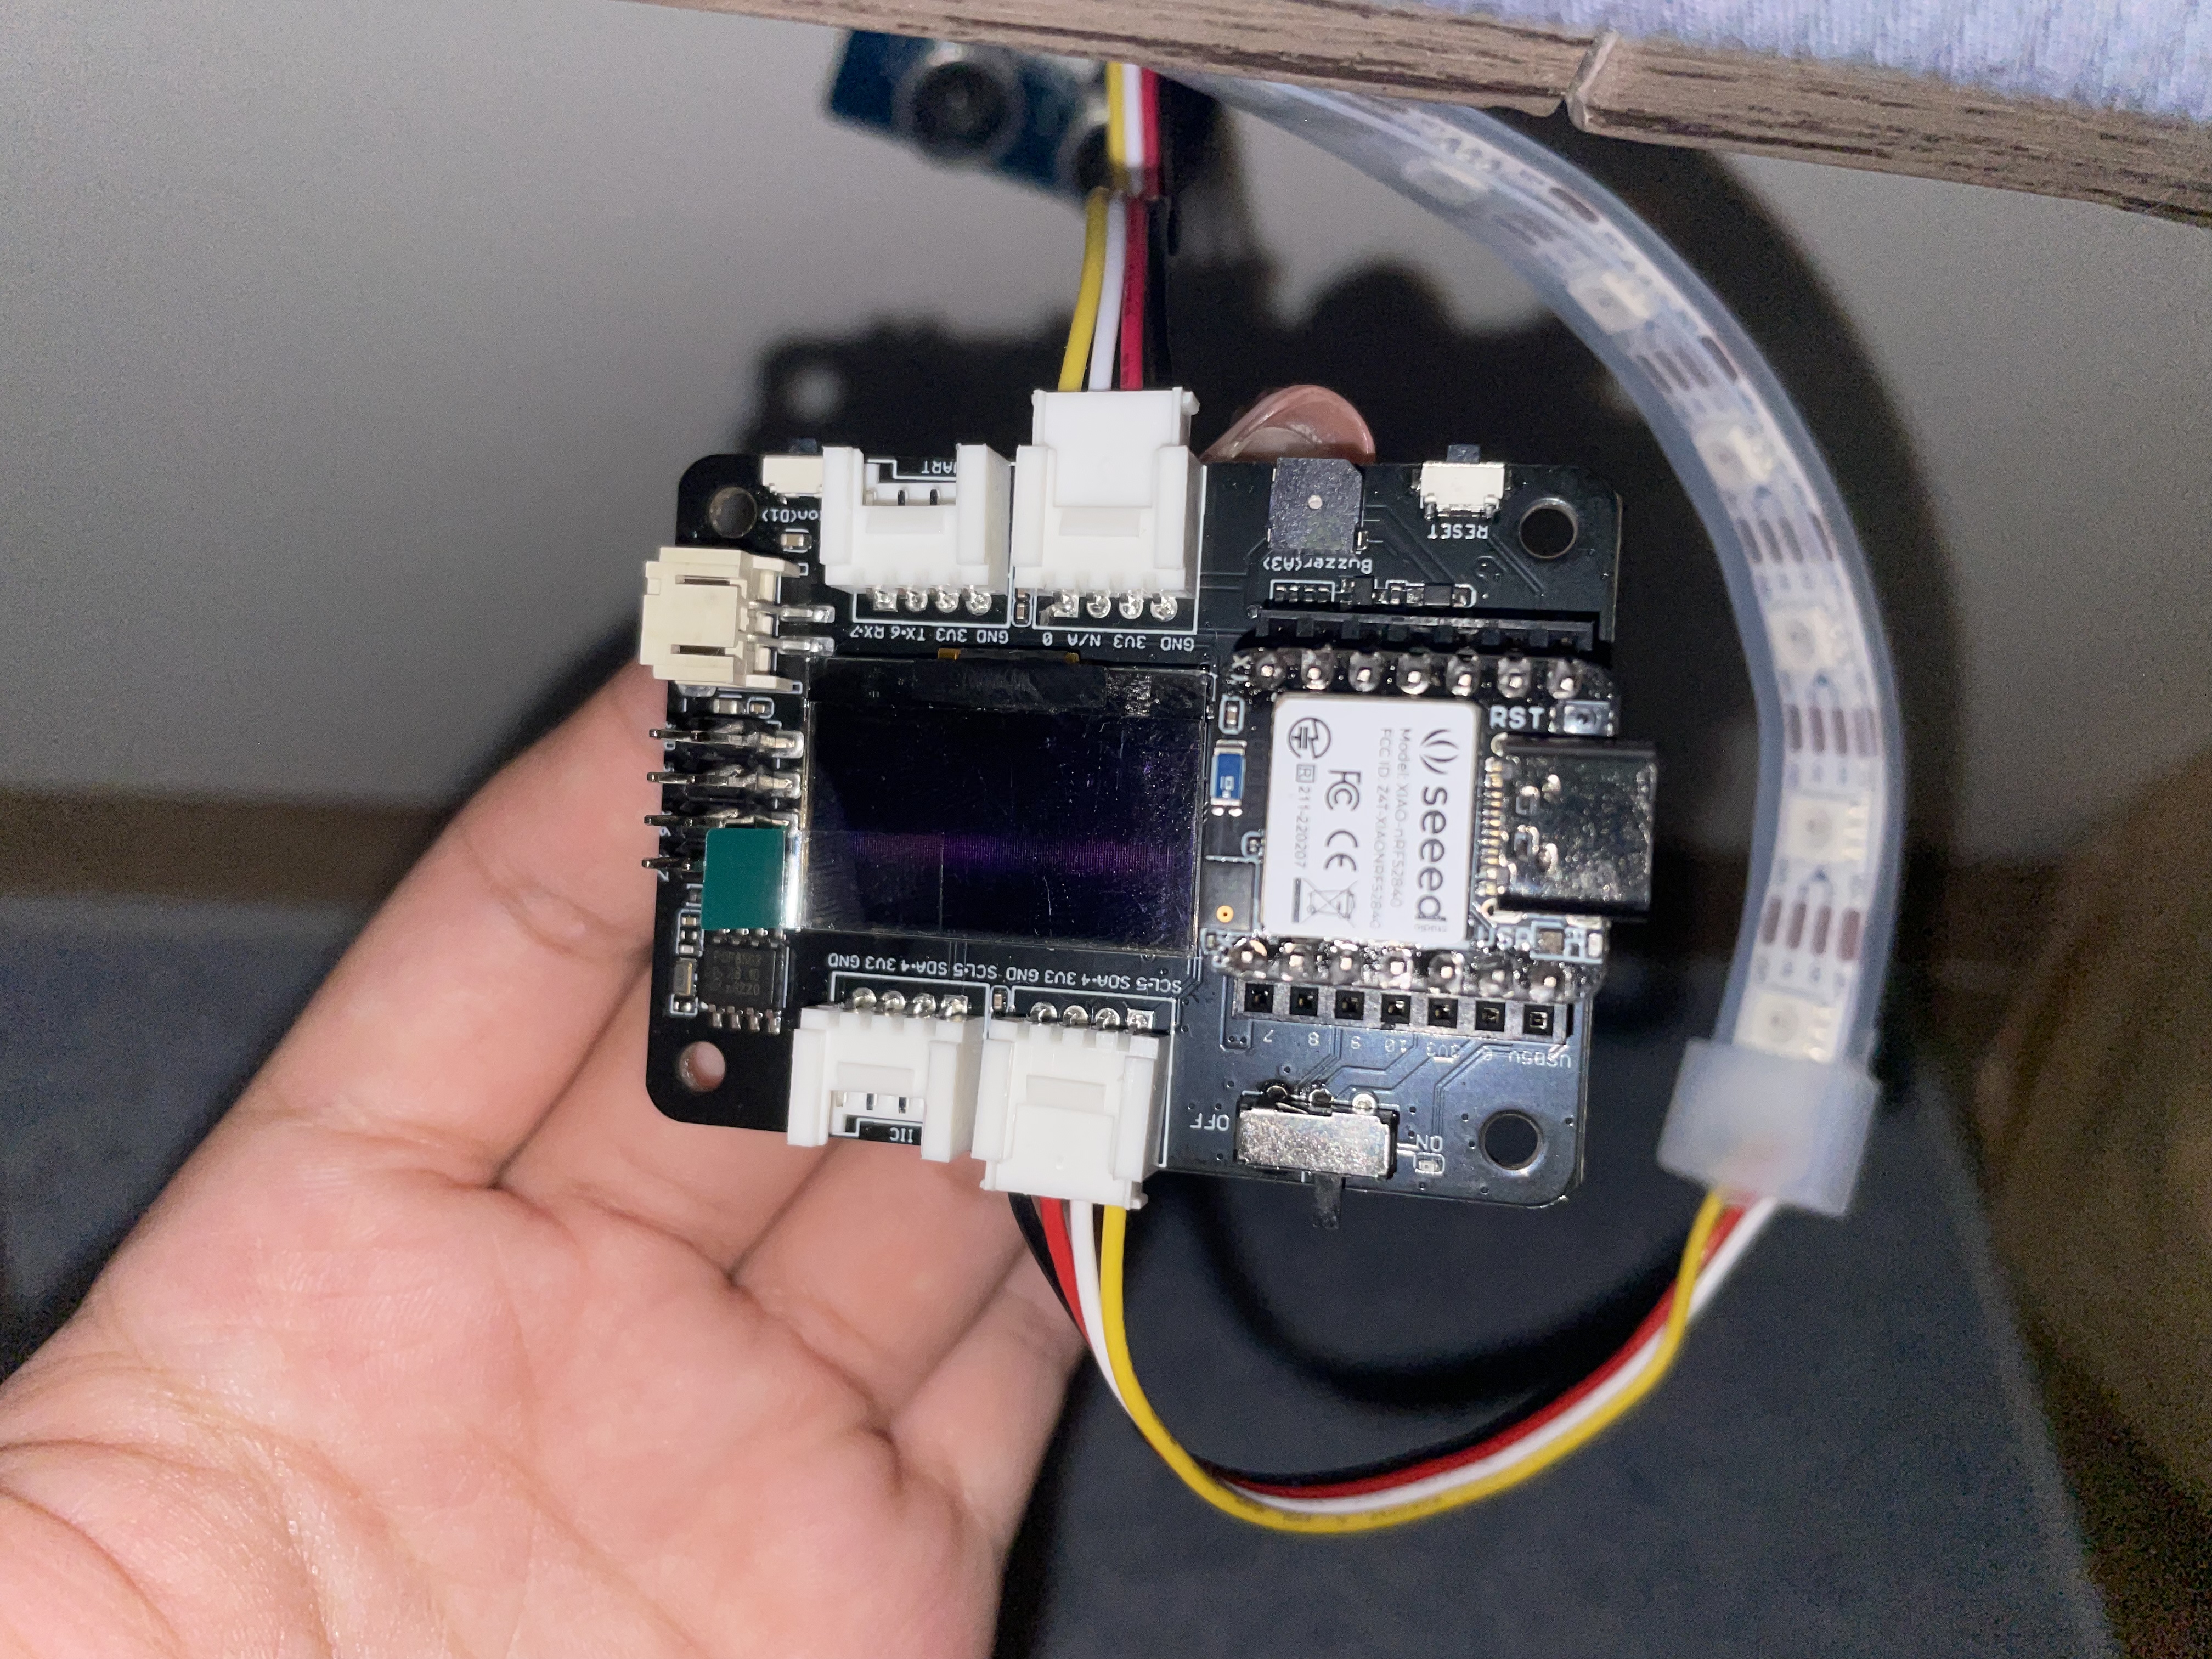
This project is based on Seeed Studio's XIAO as the controller, connecting with the XIAO expansion board, and then using the Ultrasonic distance sensor to sense the distance, allowing the RGB Light Strip to be illuminated to achieve a long-distance automatic light.
The image above shows XIAO connected to the XIAO Expansion Board, which has four Grove ports at the same time. This simplifies the project because all you need to do is plug and play and you're ready to go.
If you don't have an XIAO expansion board, you can connect it with a jump wire. The sensor and RGB Strip Pinout for the XIAO and the project are listed below.
Pinout- To ensure the safety of nighttime walking
- Easy to build with, friendly for beginners.
Hardware required
- Seeed Studio XIAO Series (In my case I use XIAO BLE Sense)
- Seeed Studio XIAO expansion board
- Seeed Studio Grove - Ultrasonic Distance Sensor
- Seeed Studio Grove - RGB LED Strip
Because there is no wiring diagram, pictures must be used to demonstrate how to connect the sensor and RGB light strip.
According to the Seeed Studio page, both products use digital as output and all four ports of the XIAO Expansion Board support digital, allowing you to connect those components to any of the four Grove ports.
InstructionStep 1. Connecting all the components to the XIAO Expansion Board/ XIAO Pinout
Step 2. Download the Arduino IDE
Step3. Please install the Seeeduino XIAO board manager, follow the instruction
Step 4. Adding UltrasonicRanger and RGB Light Strip library install. If you do not know how to install the library. please go to this guide.
Step 5. Copy the code and stick it on the Arduino IDE then upload it.


Comments
Please log in or sign up to comment.