I have recently started preparing for my graduate design and have chosen a topic in the direction of a small six-axis robotic arm. While searching for information, I saw a video that a YouTuber who made a robotic arm by himself and make the robotic arm complete tasks as a human hand. I was surprised and impressed by this video, which provides me with more inspiration for robotic arm learning.
When I searched for "robotic arm, " most of the search results were industrial robotic arms, which were not suitable for my learning purpose. What I was looking for is a small robotic arm for educational use. And my requirements were:
● It can be easily installed.
● High quality with stable movement
● Sufficient information and tutorials that help me in programming
After comparing many products, finally I selected the mechArm 270-M5Stack, a small six-axis desktop robotic arm from Elephant Robotics.The mechArm 270-M5 is a multifunctional robotic arm with six degrees of freedom in an industrial design, and based on the M5Stack-ESP32. It supports connecting LEGO firmwares at the end of the arm and can be equipped with many accessories, such as suction pump and gripper.
Also, I got many information for mechArm 270 and many tutorials for programming the robot from Elephant Robotics. Supporting multiple systems and progamming languages is also an advantage that attracts me
The main purpose of this article is to share my feelings and problems in this learning process. I tried to control the mechArm in ROS, the Robot Operating System, which was well-developed as a good choice in robotics learning. Here is my attempt using the mechArm companion material in ROS.
(Gitbook from Elephant Robotics.)
The environment set up and cases are written in detail in Gitbook, and I wanted to follow the steps on it. When I was installing ROS, it always showed download unsuccessfully, and one solution was changing the download source. Gitbook provided an Ubuntu system with an environment that I could operate directly.
Here is was I did using the gitbook guidance:
First, I used USB Type-C to connect the mechArm to the computer.
Making sure the connection was successful, I entered the command to check.
ls /dev/tty* //Checking the PC serial connectionWhen I saw the '/dev/ttyACM0', I knew I had made it.
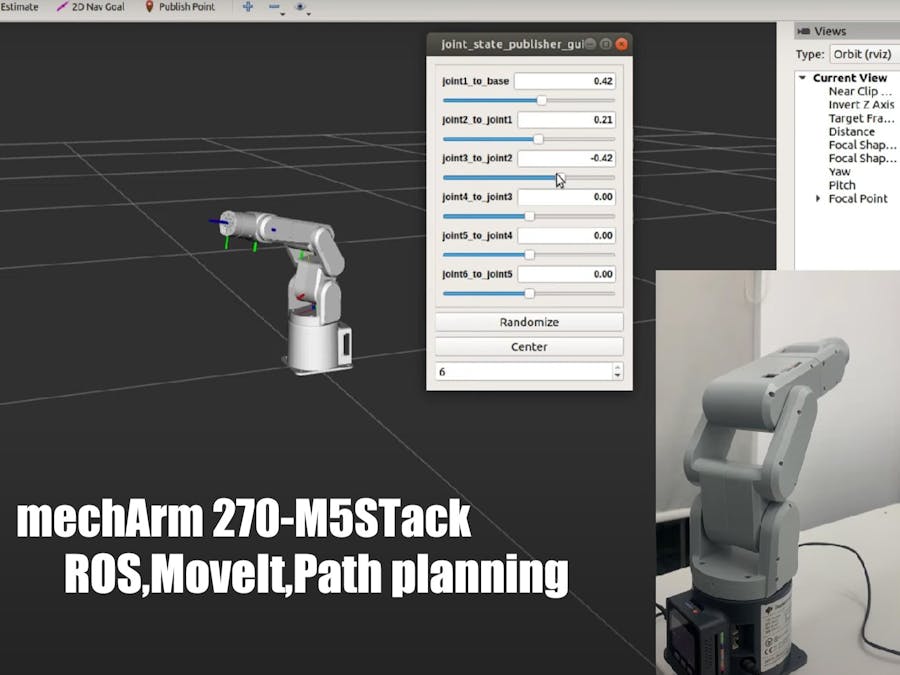
Next, I used the function described in the gitbook, which functions is a slider to control the robotic arm.
In ROS, the Elephant Robotics team has already built the mechArm model and the slider control topic.I only took two commands to make it work.
When I finished running it, I found that my robotic arm did not follow the control slider movement. A 1:1 virtual scene is created in ROS, so another script has to be run to control the robotic arm.
I've made a video to document it.
(The shaking of the mechArm in the video is due to the lack of a fixed base, not a problem with the arm.)
There is also model following, keyboard control, and GUI control.
Slider control, keyboard control, and GUI control are all features of the single-joint control robotic arm, but it is MoveIt that I am most excited about, with its ability to perform motion planning, forward and reverse kinematics, 3D perception, and collision detection.
When I drag the axis at the end of the mechArm, the mechArm follows the overall movement. MoveIt can generate random poses automatically.
I also made a video recording.
My thoughts and ideas:
The configuration of MoveIt can be complicated for those who are new to it and don't know where to start.
When I used mechArm, MoveIt was configured and can be used directly, which brings great convenience for programming.I saw the configuration information of mechArm in MoveIt, which brought me great convenience.
The supporting information and datas in mechArm is an attractive point for me. It is very useful and helpful for individual maker who just starting robotics learning like me. Next, I will try to complete the MoveIt configuration of mechArm independently to start learning.
If you like this article, please give me a like or leave a comment to support it. Thank you!


Comments
Please log in or sign up to comment.