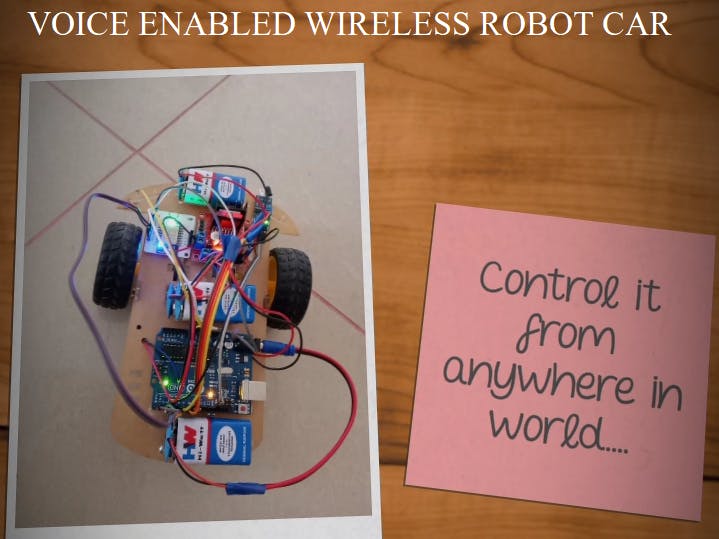
As soon as I started learning from Bolt IOT course, my interest in IOT started developing rapidly. One day while surfing youtube, I saw a video on arduino board. I decided to explore more in IOT field using arduino. From there I decided to make a robot car using arduino.
Stage One: Project Idea- I was sitting and thinking that how to make my car more cool. Here comes idea in my mind that what if I do something and we can control this car wirelessly.
- Here come an idea that BOLT IOT will help me making this project. I decided to make this.
- Next step is to collect and purchase hardware required to make my car cool. Searching online helped me to collect hardware easily.
- Through lot of distractions, I finally purchased some of hardware online and some from local hardware shop. Here is the list......
1. Robot Car Kit
2. Arduino uno Board
3. Motor Driver
4. Bolt Wifi Module
5. Jumper Wires
6. Battery and Connector Clips
After safely bringing hardware to home, now its time to assemble them to make my robot car.
Let's have look on hardware connections.
# Assembling the hardware #
1. Assemble the robotic car chassis and attach the two DC motors using bolts and other stuffs given in kit.
2. Take help of manual given with robot kit to assemble robot car chassis along with wheels.
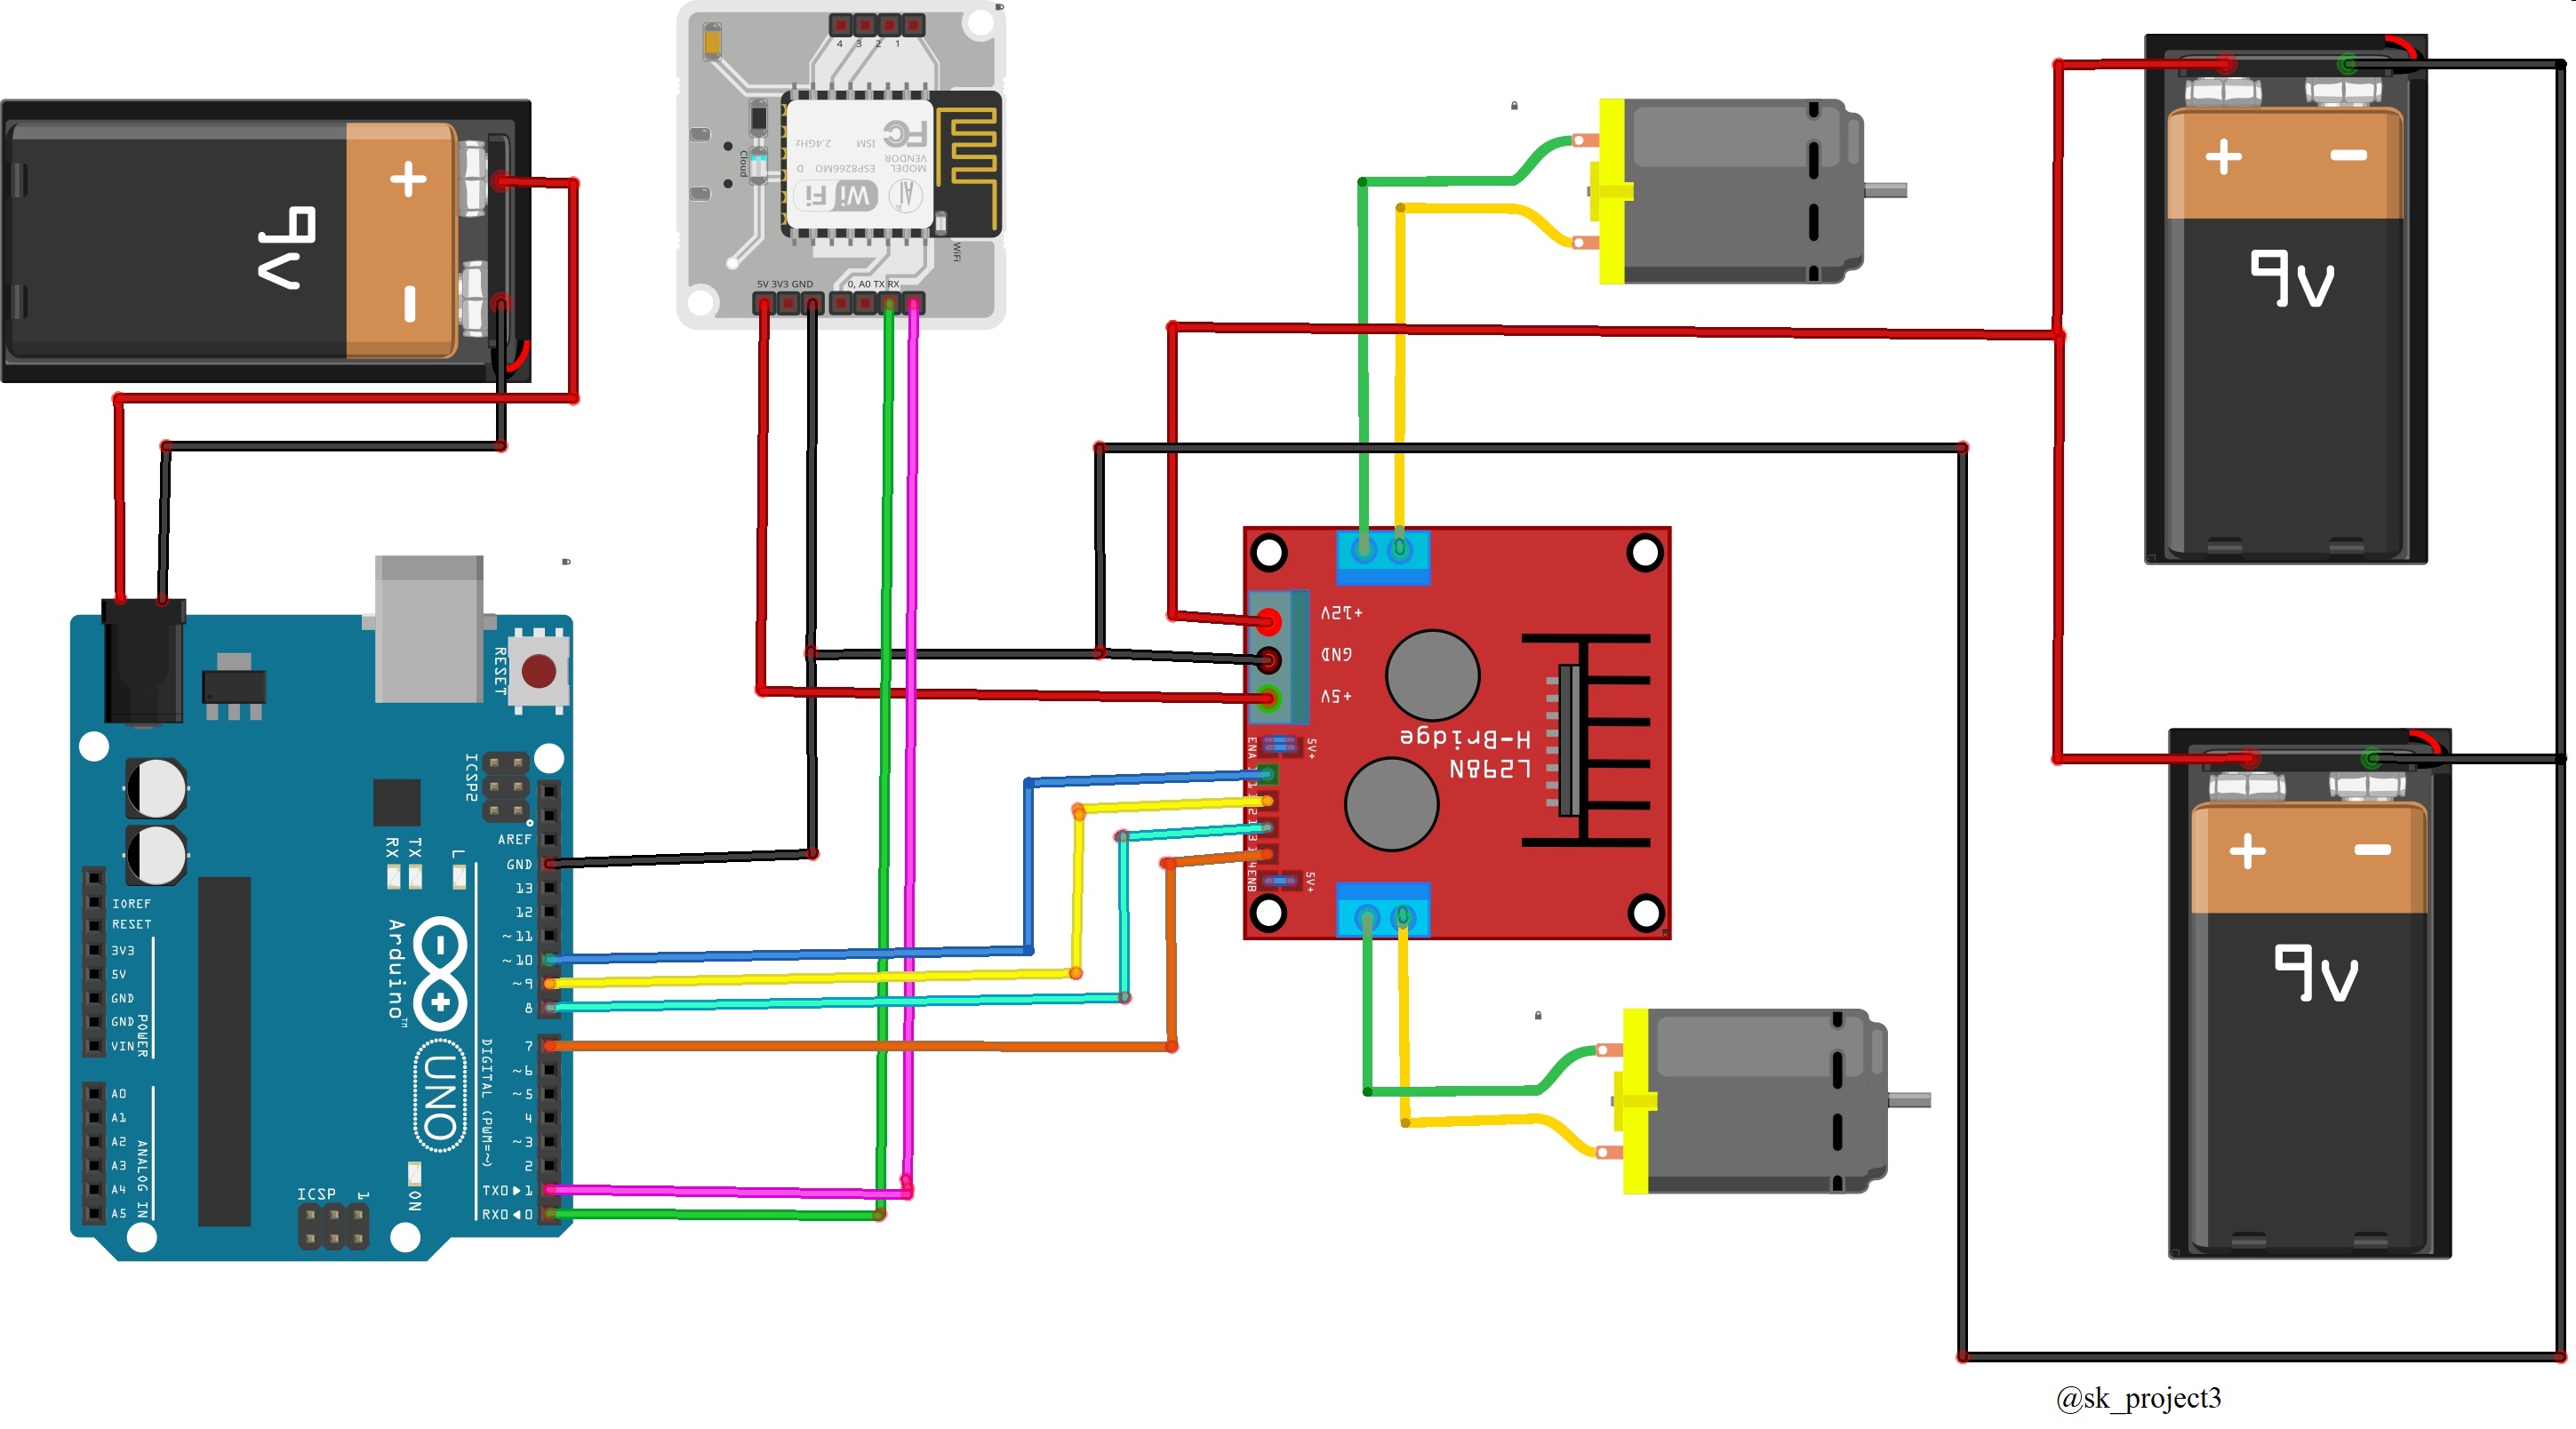
3. Connect wires to motor (It would be better if you solder the wires) and connect another terminal of motor wires to L298N motor driver module as shown.
4. Connect both wires of a motor on same side of motor driver module.
TIP: Take help of Schematic to do circuit connections
5. Connect 9V battery connector clips to 12V terminal and ground terminal of motor driver. Red wire of clip to 12V and Black wire to ground (Refer Schematic)
6. Connect the 5V pin of the motor driver module to 5V of Bolt wifi module.
7. Connect the ground pin of the motor driver module to ground of Bolt wifi module and arduino board.
8. Connect the pins Tx and Rx of Bolt to the pins Rx and Tx of Arduino respectively.
CAUTION: Be careful. We have to connect Tx of bolt to Rx of Arduino
9. Connect the four input terminals (IN1, IN2, IN3, IN4) of motor driver to pins 7, 8, 9 and 10 respectively.
10. Connect arduino power cable to black power jack of arduino. We will connect it to battery for external power supply.
Note: We will take use of Bolt Cloud to complete our project. If you have still not registered on Bolt cloud, Please register and connect your bolt wifi module.
Stage Four: Now Its all about wireless connectivity- Before going to code part, Let's have look at small promo video of robot car.
- Below is code given which you have to upload in arduino board
https://www.dropbox.com/s/1nwnnmmmp3jwgvh/Bolt_car.ino?dl=0
- Upload this code to arduino board.
NOTE: Please disconnect connections of Bolt wifi module with arduino board while uploading code to avoid errors
- Now its time to connect it to google assistant so as to control it with voice commands.
- Go to IFTTT to create a new applet by clicking here
Login using your Gmail account. Make sure you use same account which you'll be using on your mobile to interact with Google Assistant.
- Click on '+This' to create the trigger.
- Choose Google Assistant -> Say Specific Phrase
- Type the phrase you want to trigger the action. Make sure to specify the trigger command in different ways
- Click on 'Create Trigger'
- Click on '+That'
- Select Webhooks and then Make a web request.
- Enter the API URL you got in the txt file. Make sure that you change the API Key and device name as your device name.
https://www.dropbox.com/s/med5oyclpszm5te/VOICE_CAR.txt?dl=0
- Method will be GET
Content type will be Application/json
Here is how your screen will look like
Click on 'Create Action' and then Click on 'Finish'
- Repeat same process for all five commands individually. You need to create total 5 applet.
Now wake your Android phone by saying "OK Google" and say the phrase you had set while creating the trigger to see the magic happen.
- You can also control it with help of html page. Just make simple page and define javascript and call api accordingly. My page looked like:
- You can also make simple app which opens html webpage when launched.
- As there is limited number of api hits, so while making it make sure you did not cross limits. Otherwise you will be blocked for 6 hours. It is better to upgrade to Bolt cloud pro.
- It may happen that Bolt wifi module may not connect to wifi. If this happens, just remove all four wires that we connected earlier and power on bolt device. After it connects to wifi just again connect all four wires.
- If instead of correct code and connections robot car is not moving, then make sure batteries are fine (i.e. not discharged). For me It required total of 3 batteries as one was too discharged.
FINALLY PROJECT IS COMPLETED
Demo Video:


_ztBMuBhMHo.jpg?auto=compress%2Cformat&w=48&h=48&fit=fill&bg=ffffff)


_3u05Tpwasz.png?auto=compress%2Cformat&w=40&h=40&fit=fillmax&bg=fff&dpr=2)
Comments
Please log in or sign up to comment.