The problem we face in our house is two-fold:
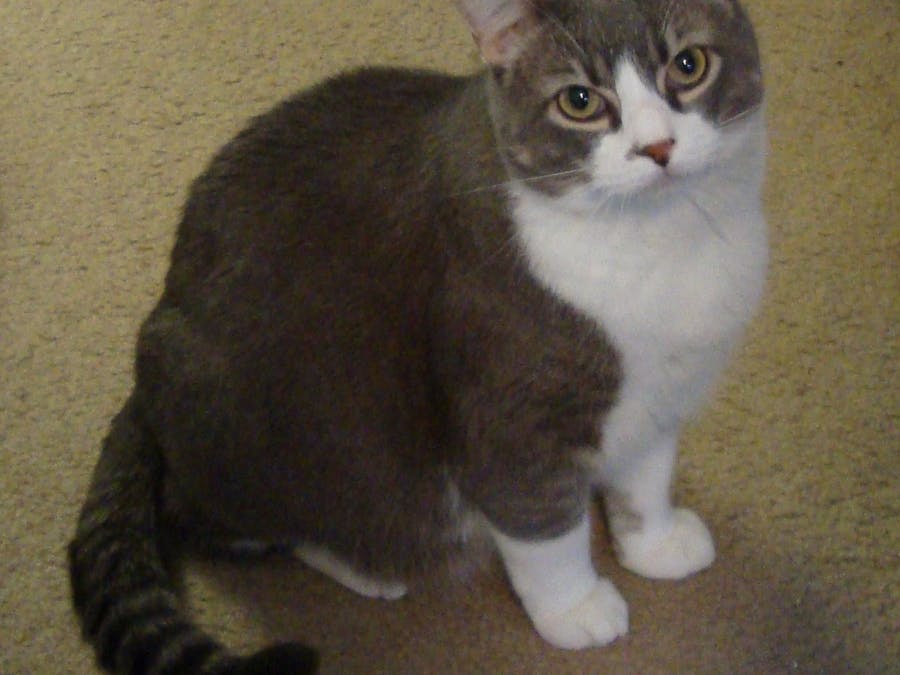
1. Our cats will eat anything at any time as long as it tastes good, which has made them overweight. The vet has expressed a need to feed them less and monitor their food intake.
2. When it comes time to feed them with our monitored schedule they get needy and meow to remind us that the time is approaching even though meal time is hours away. This has created trained cats to meow when they get hungry and has created stress in our family, followed with the cats’ owners ignoring them and forgetting to feed them.
My idea stems from these two problems. I want to build a pet feeder that provides solutions of measured eating, managing food intake, and scheduling food availability. It also provides analytics and information about the habits of the pets in the family by registering when they eat and their attempts to eat.
The first technology that I would use to make this feeder work is RFID, in order to identify the pet. These ID tags are small enough that they could be made in such a way that they can be attached to the collars and the pet can be identified.
The second technology I would use would be servo motors to move a sliding door that would be safe for the pet yet also prevent them easy access to the food. We would want to use a sliding door system to prevent any harm to the pet should they attempt to breakout the food that’s inside. For example, we currently have a tote that holds our food and very early on I had to rescue one of our cats from it because he got his paw stuck in the tote as it closed on him. Then, he couldn’t get his paw out. The sliding door would prevent pet paws getting stuck. In order for each pet to open the sliding door it would require moving the entire series of slats that would be greater than the pet would be capable of opening. In order to ensure the security of pets’ safety with using the feeder the included programming and resistance monitors can reopen the sliding door to release any potentially stuck pets. If any damage would come to any of the slats replacement would be simple. You would only have to replace the damaged slats.
Another feature of this RFID enabled pet feeder would be a weight and measuring system. It is located under the bowl to allow for a monitored and metered presentation of food to the pet. The included metered system, along with the RFID and the door system would allow us to create a schedule for feeding the pet.
For the purpose of reinforcing the pet feeder system into consistency each feeder can be equipped with a camera and a speaker to allow communication between the owner/family with the pets using the feeder. Given the possibility of an unauthorized attempt by the pet to enter the feeder or in some way access the feeder’s contents outside the scheduled limits the camera and speaker will help to redirect the pet. The family can communicate with the pet directly over the mobile device or internet to either send a custom voice message or a prerecorded message to the pet to illicit the desired training effect.
I also want to make this feeder pair-able with other feeders. If your house is a house of multiple pets the feeder would be able to identify the pet via the use of RFID tags (in collars) allowing each a separate schedule and monitoring.
The software that would come with this hardware would be Cloud enabled using Azure websites, Azure SQL to hold a WebAPI, and a website front end allowing you to enroll your pet, set up a schedule, monitor, as well as meter the food presented to your pet, take a picture and store personal information about your pet. This can be useful if your pet ever becomes lost or runs away. Each Feeder would come with its own Web interface allowing it to be autonomous but yet connected should you desire to do so. Certain features such as remote monitoring or other features would not be available if the feeder is not connected to the Internet. I would also make a companion app for the phone using Azure Mobile services to help the family understand the eating habits of their pets, manage their pets, their schedules and other pet-related information.
One question that I keep coming to when designing the automated pet feeder: How do you train your pet when some pets aren’t exactly trainable? Speaking to my own two cats we already trained them to meow when they are hungry. Therefore, there is potential to train them to eat within a reliable schedule dispensing a little food each time they arrive. As soon as the cats show signs of familiarity with their feeding schedule changes can be implemented, such as allowing the intake limits to become more relaxed for reasons of family vacation time where the owners aren’t available to monitor the intake and for a sick pet who needs to be treated differently.
Our cats are competition eaters. When one walks away from eating the other cat will move to the other bowl and start eating from it. That same cat eating from both bowls will return later and guard both bowls in an attempt to prevent the other cat from eating. Here we can solve this problem as well by use of the RFID tags. If one cat has “Checked in” at a different bowl and attempts to check in at another bowl the feeder would close the new bowl they attempt to eat from and leave open the other bowl for a certain period of time. If another cat attempts to check in at the already open bowl and it’s not within their time to eat the bowl will gently close.
Assembly
Order of Implementation
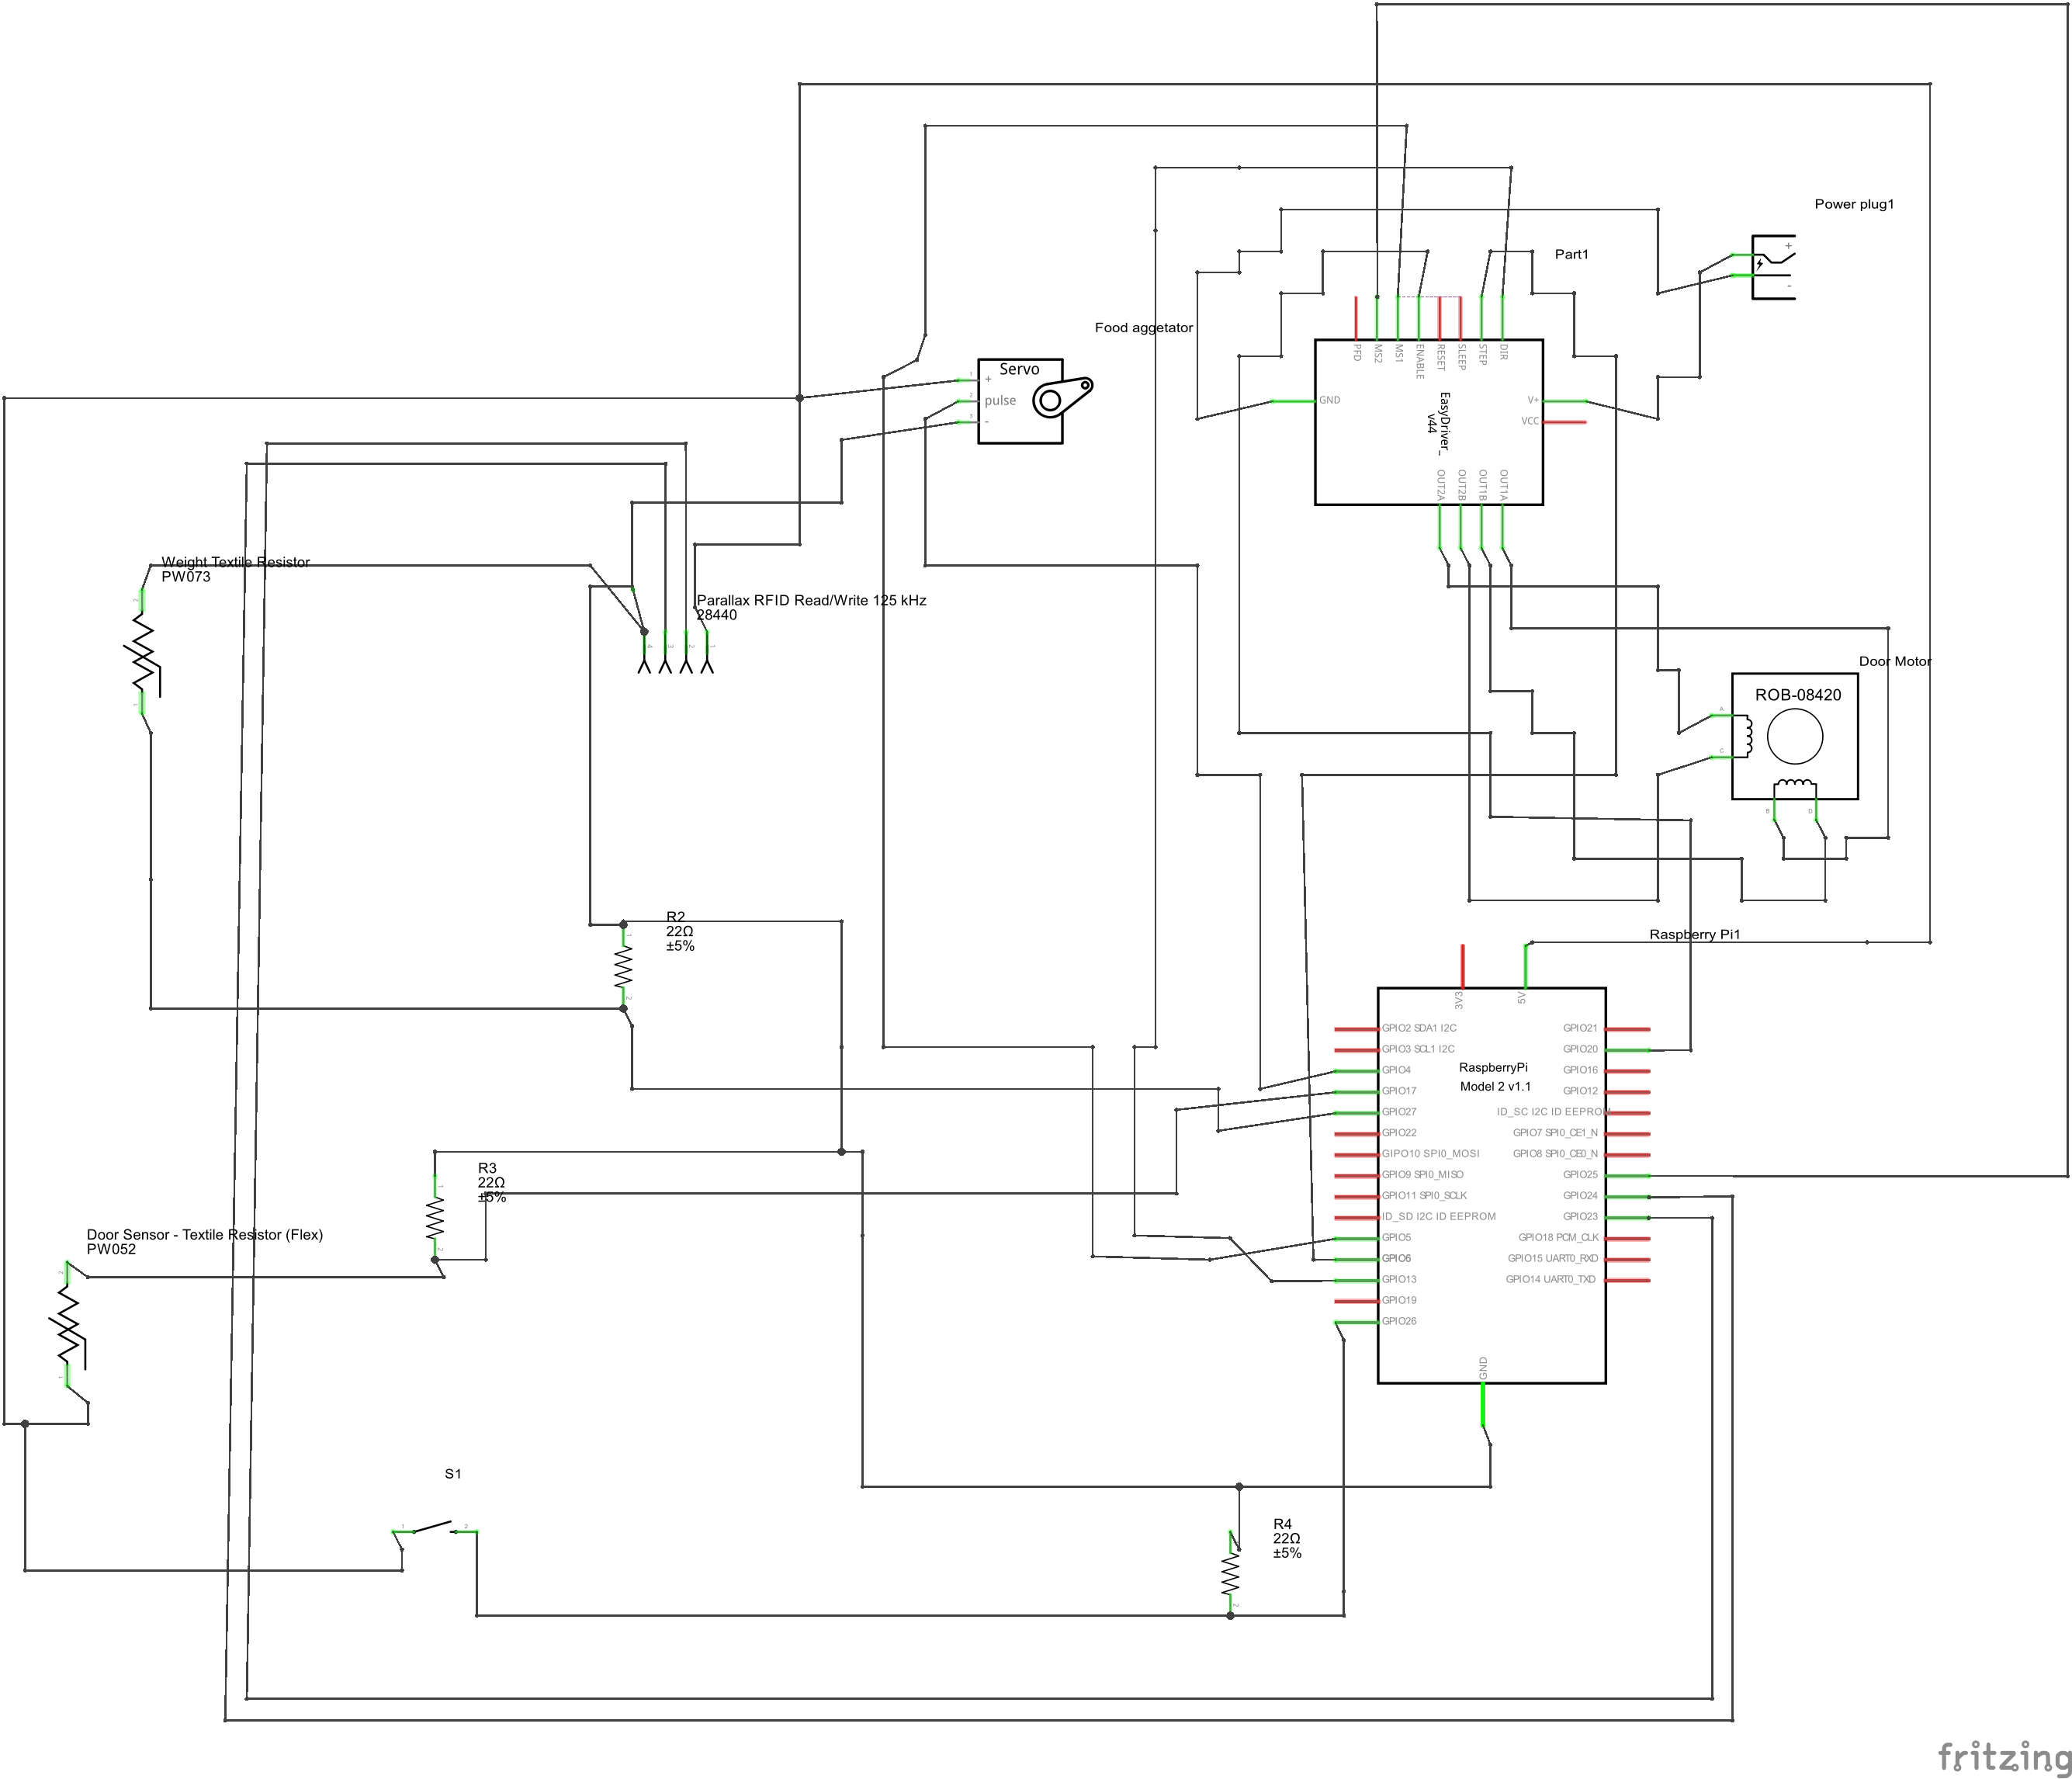
Order of implementation: [Refer to the Schematic for PinOuts]
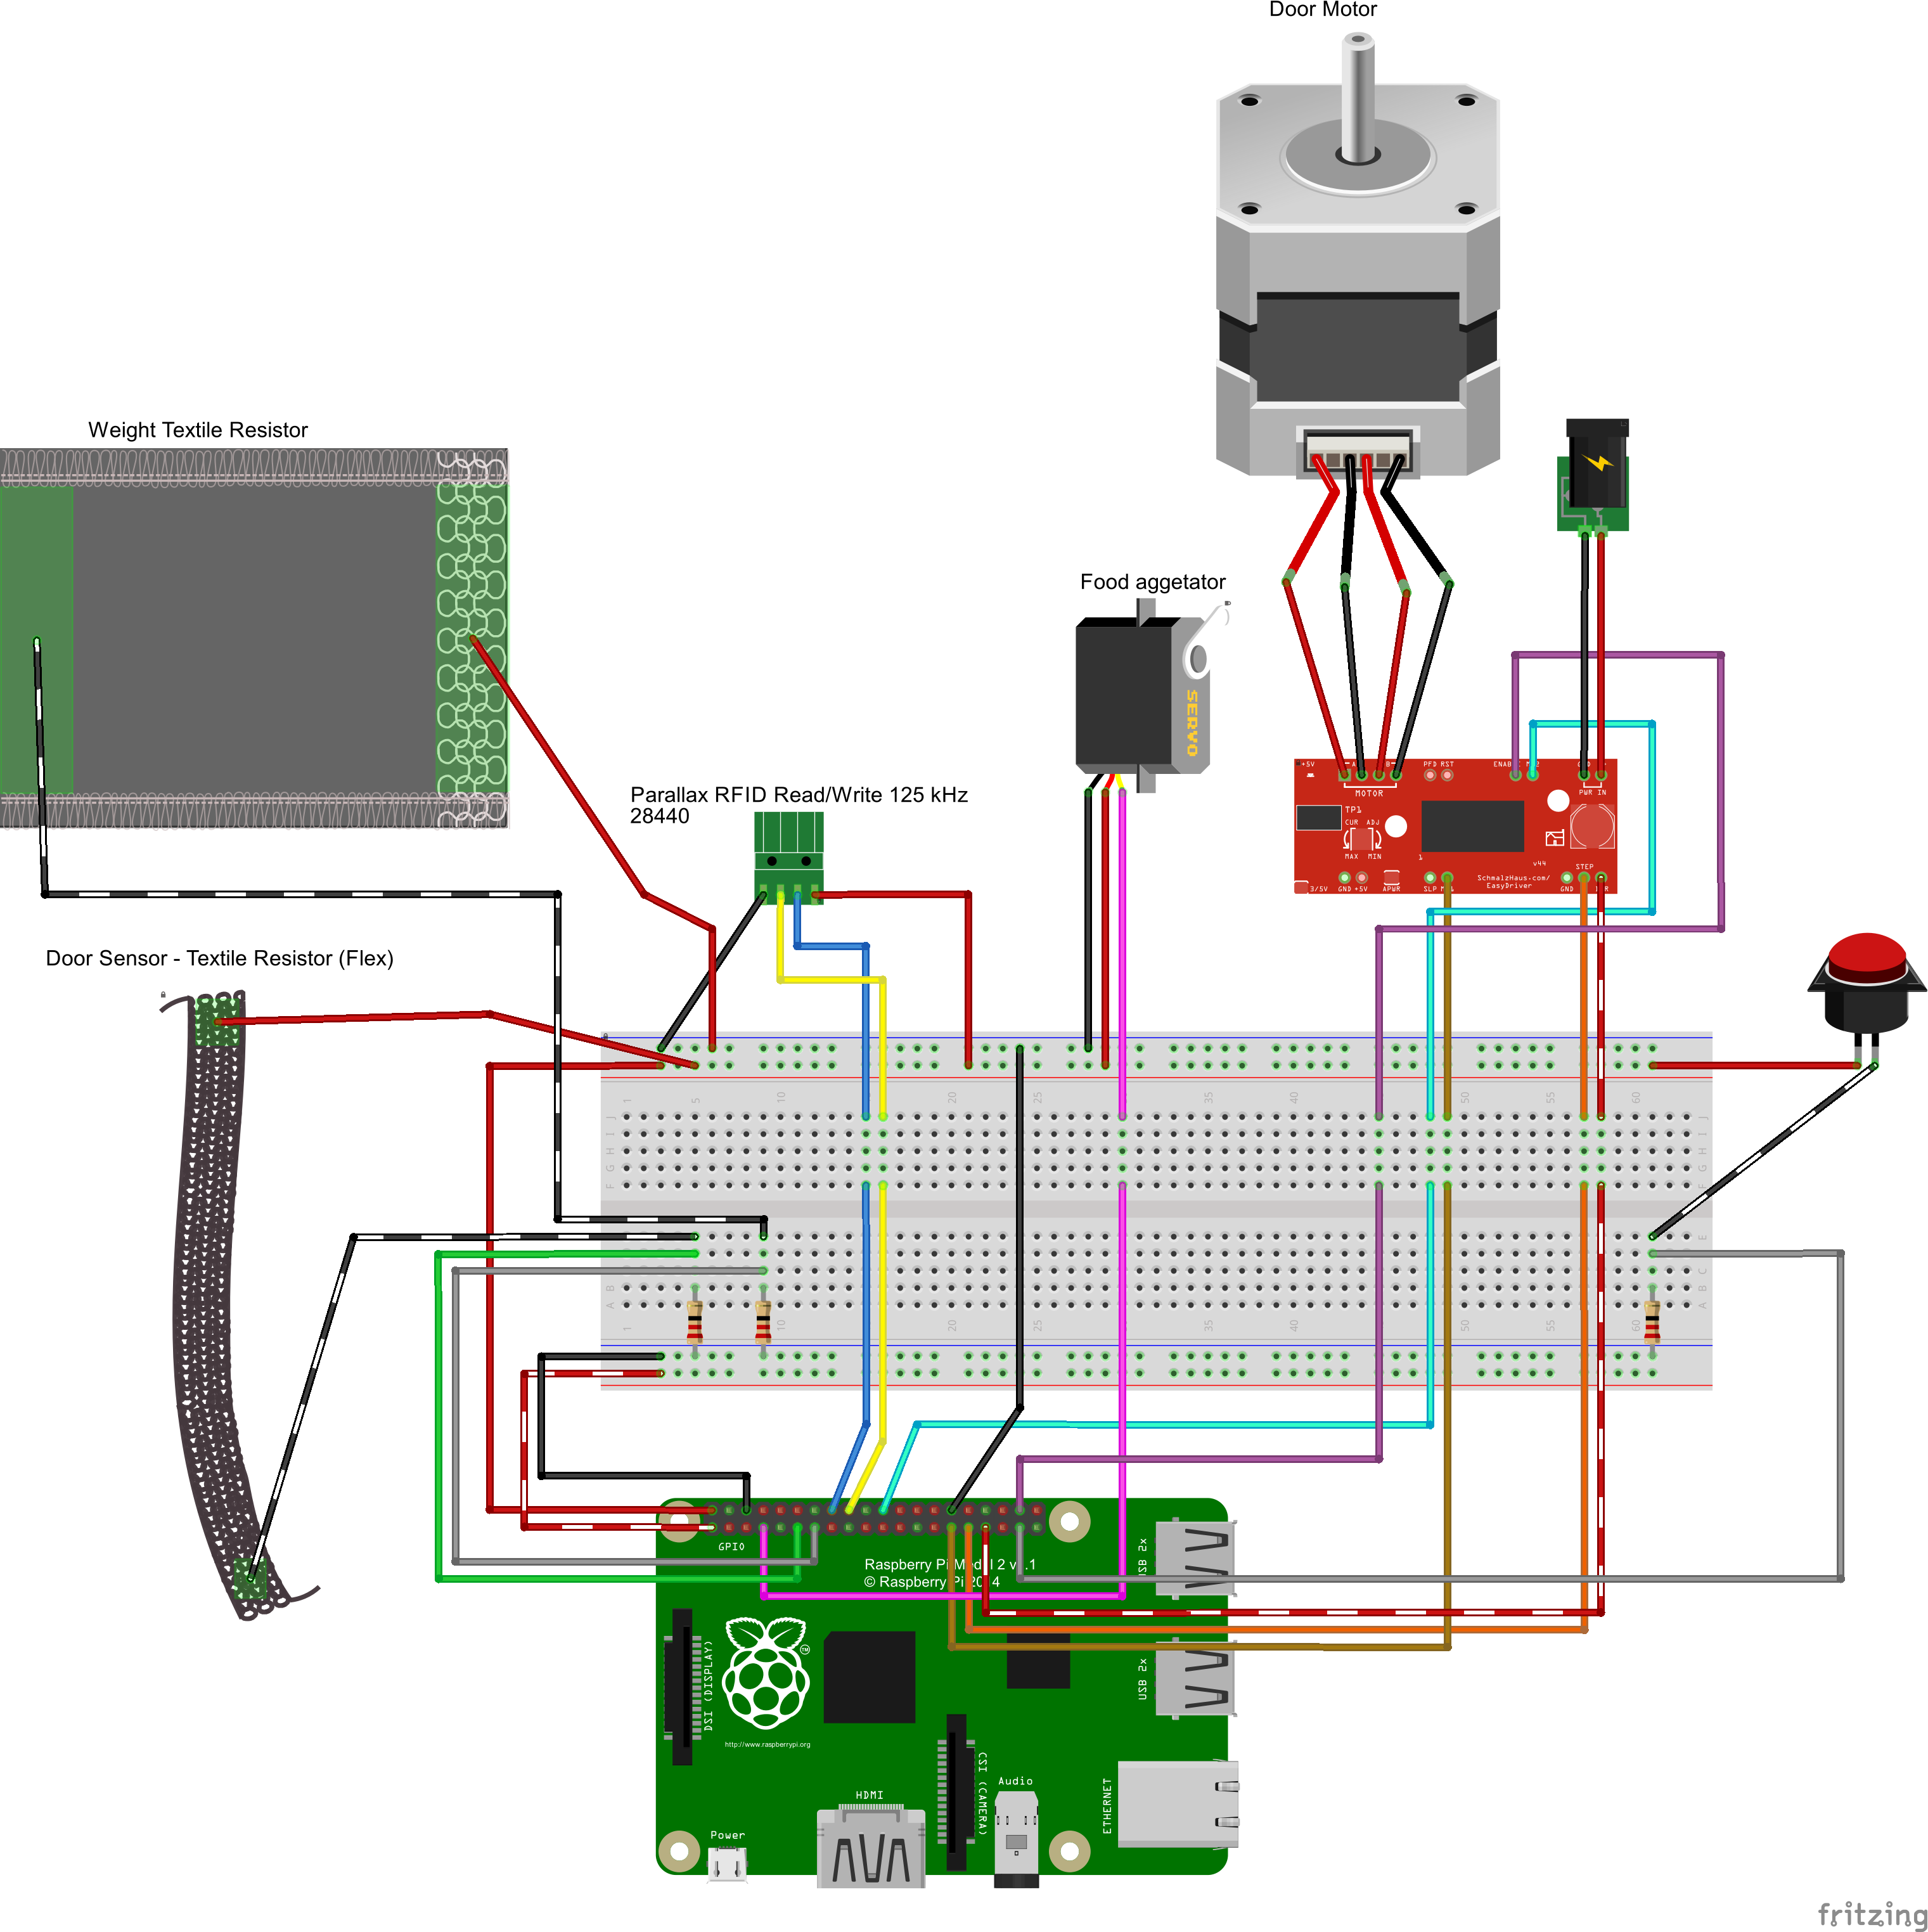
1. Breadboard setup: Affix the power and ground nodes to the rails on both sides of the breadboard as shown in the Full layout diagram above.
2. Resistors: Placing them first gives you the opportunity to make mistakes without having to rip the entire bread board apart to get to them afterward.
3. Attach GPIO pins from RiPI2 to the bread board, (Advice: I would not start attaching other components in this step and do just the RiPi2 wiring because of the very nature of small things in close proximity to one another and breadboards. If you do this things will become disconnected. Spread out, use the entire breadboard as shown in the diagram, and try to keep things organized by function. It will help a lot when trying to Troubleshoot.)
4. Easy Driver: https://learn.sparkfun.com/tutorials/easy-driver-hook-up-guide
(Advice: Easy first is the best way to be frustrated all day, let’s do some of the larger more complicated pieces first that way if we get frustrated we can do something easy to keep us going and achieving) Attach the Easy Driver hookups as shown, (the Red PCB Board below the Door Motor in the diagram) DO NOT hook up the external power to the Easy Driver. Doing so could cause issues, most notably, if the Stepper Motor becomes intermittently disconnected you WILL fry the Easy Driver Board. See Easy Driver’s Spark fun page for more information
5. Stepper Motor:
Whether your using the 4,6,8 Pole Stepper, take the positive leads and negative leads from each coil and attach them to the easy driver as shown. (For safety of the easy driver: Soldering these connections is advisable, or at the very least use screw pins on both ends to ensure the contacts stay connected at all times during operation.)
6. Food Agitator : This simple servo can be connected at any time (unlike the Stepper)
7. RFID Read/Write Module: This is also simple serial interface that you should use extra length cables for. (extra length is for testing)
8. Textile Pressure Resistor and Flex Resistor, for the weighing of the food and the door position respectively.
[Pressure]
9. Push button: this button is for “Override” functionality. It’s intended when pressed to open the door of the feeder for a given amount of time (Seconds to mins) its purpose is to Free an animal or feed them outside of their schedule.
Once i have all the parts I'll update these pictures. I had to replace the Easy Driver and the Stepper motor.
NOTE: The textile resistors are missing from the images.
Enclosure
The enclosure is made of Plastic and involves several components.
1. 3D Printed Door Slats (Crude hand drawings here, I’ve got CAD images ready for 3D Printing coming.)
2. CNC Milled Plastic Panels (Crude Hand drawings here, I’ve got CAD images ready for CNC milling coming.)
Enclosure Assembly
1. Take the slats and lay them out stacked as you would want to see them, (there is no top or bottom, just ensure that the Flex Resistor Slots Lineup on the same side when assembled.) take each slat and slide the slat into the next until you have a series of slats
2. Place one side of the enclosure inside face up, place the Slats in the track. Place the three supporting pieces of Plastic in their respective positions and place the remaining face on the top aligning the track (I know it’s a lot harder than just telling you, but you can do it :) )
3. Take the hardware Tray and place the hardware on it [PCB Board] Attach the power and slide the tray into the now open back of the container.
4. Take the Servo Agitator Assembly and slide t into the Bowl Feed slot
5. Plug in the Servo Agitator Assembly into the hardware tray.
6. Place the stepper motor in the top tray and attach the wind gear to the stepper motor. And to the top end of the slats.
7. Plug the stepper motor into the PCB Board in the lower hardware tray.
Code
[Proposed Functionality : Not Complete]
This is where things get really complicated. And my code is incomplete.
First lets talk about the layout of the project. I’ve attempted to take each individual component and make it work separately while then bringing them all together once each component is working, and I advise you do the same. Have all the components connected but test each one individually for proper functionality prior to running the full program (which is incomplete in my codebase)
I've installed "Application Insights" into the application and I suggest you do the same for Remote Monitoring and Troubleshooting.
Next, Lets tackle the Azure Interfacing. What we are attempting to do is called a Publisher Subscriber interface. Simply put a publisher is created (Azure Service) that contains all the messages from all the Feeders. Messages can contain any information you want your feeder to know, such as if a new animal is available and allowed to eat. A new schedule is available, or updates have been applied. And the Subscriber is the actual Pet Feeder itself, which when properly authenticated and associated with an account will subscribe to the active feed for your “Feeder Group” this will allow you to have many feeders under just one account and will make it simple for you to add, edit, and update all the software associated with your feeder.
IF you choose not to connect the feeder to the cloud services you can still have multiple cat feeders. Though in turn, without the cloud services most if not all analytics will not be available. Even still output of information from the feeders can be made available in CSV form. (Information such as attempts to eat, check-in times[in and last seen], Amount eaten, ect.)
The difference between using the cloud services and not using the cloud services are listed here.
1. Analytics
2. Feeder Group Management ( Without this: you can only one Group available per pair)
3. Internet enabled Feeder Management (Without this : it will only be available from local network)
4. Internet Enabled Feeder (Feeders anywhere)
a. The idea is if you have a farm and you want your pets to eat in certain locations such as a barn or inside the house. You can place your feeders anywhere there’s an internet connection. Be it the house or the barn or a stable.
5. Multiple User : User Management (Without this: One User is authed.)
Now to the dirty code. First a Program Overview.
The application has a UI because of the likelihood that you want to install this on an IOT device with a display (RiPi 2 has an HDMI) and this will also help make setup of the feeder easier but it will require you have keyboard and mouse available.
Initial startup will ask you to connect to the WiFi if you haven’t already, or connect to the Ethernet [WiFi is suggested as you won’t be tethered to the Ethernet cable] Once connected to the internet you’ll be presented with Initial Configuration options for the Cat Feeder Program. Where you’ll choose to register with the online service or pair with another feeder disconnected from the online service.
Once pairing is complete you’ll then be asked to pair your Tags.
You can program the Feeder with a Pill 125khz RFID tag and a computer. The RiPi2 will need to be plugged in and booted to the Cat Feeder Application where you will be presented with the application configuration screen. You’ll need to go through each Pill and register it as a new pet, filling out the forms along the way with basic information (cat name and other Ident information) once you have finished registering each Pill you can attach the pills to the collars of your pets. You can either choose to setup your feeders
schedules or allow your pets to become acclimatized to their new feeders. (Its recommended that you leave the feeders open and continue to feed them as normal for at least one week.) There is going to be a setting where the feeder will randomly make noise to help facilitate acceptance of the feeder to the pets so they don’t become scared of it. The door will not open or close during this time. But it may gitter.
I’ve organized the code into Controllers, Each Controller is an interface for it’s respective Hardware part. So the stepper Motor has a “EasyDriver” Controller (since there’s no direct interface to the stepper motor in the code. And a RFID Serial Controller (as it’s a serial interface) and so on and so forth.
This will allow you to test each component and make adjustments without interfering with other controllers.
I’ve also included my Azure Service Projects. A Worker Project with Queuing enabled. And a Website Project. These will be the interface for registering and continual communication for your pet feeder. Needless to say I have done very little on these but the idea is to use the Publisher Subscriber Method of communication. (so prolonged disconnected feeders can quickly Catch up and share data with other feeders.) This pattern will be duplicated in the feeder to feeder configuration but the information exchanged in that feeder to feeder will be minimal (who and how much, and when)
and lastly, if you have ANY questions, about the feeder or anything please contact me. i'm happy to help and instruct as best as I can.


_3u05Tpwasz.png?auto=compress%2Cformat&w=40&h=40&fit=fillmax&bg=fff&dpr=2)
Comments
Please log in or sign up to comment.