This is about connecting Raspberry Pi to twitter using ARTIK cloud service. Here raspberry forecast weather like weatherman and weatherwoman using wunderground API and send data to ARTIK Cloud. Various rules are defined on ARTIK Cloud to make alert Tweets regarding weather of your city for friends, family and other connected peoples arriving there.
Now let’s go through story behind making this project. In most of countries we know there are three major season’s summer, rain and winter. Due to unawareness of weather situation in other cities where we go, then we face certain difficulty or some time condition may worsen. Such as chance of Heatstroke in extreme summer, rainfall, extreme storm, etc.
With this prototype project such situation can be predicted in advance to take necessary action. We can also share to our friends and family members on social media like Twitter using IoT technology. It enhances chance of awareness as many of us forget to watch weather news report but are active on social media.
Here Project development is divided into 3 major steps:
- Setting up Weather Service (wunderground)
- Setting up Raspberry Pi
- ARTIK cloud setup process
Let's begin...
Step 1: Setting up Weather Service (wunderground) ->Steps are simple to get API, just Sign up to wunderground website (https://www.wunderground.com)
Click on more -> weather API for Developers -> explore my option-> select startus plan(for developer free) and click purchase->Fill details and click purchase -> That’s It (key onscreen)
You can check response by typing (of your city) http://api.wunderground.com/api/YourAPIKeyId/conditions/q/USA/newyork.json
http://api.wunderground.com/api/YourAPIKeyId/forecast/q/India/Mumbai.json
In your browser window, this shows you response in JSON file.
Here are some examples how to extract data from JSON file I have used in code:
var json_data = JSON.stringify(result);
var jsondata = JSON.parse(json_data);
Temp = jsondata.current_observation.temp_c;
var relHumidity = jsondata.current_observation.relative_humidity;
var tomRelHumidity = jsondata.forecast.simpleforecast.forecastday[0].avehumidity;
var tomforcast = jsondata.forecast.txt_forecast.forecastday[0].fcttext;
If you already have raspberry pi with OS install then you can directly move for nodejs installation visit on below website to install OS
https://www.howtoforge.com/tutorial/howto-install-raspbian-on-raspberry-pi/
Below are steps to Install node.js version to your raspberry pi ->
We need to select proper node file corresponding to ARM processor available on Pi. To know regarding your pi model visit -> http://www.makershed.com/pages/raspberry-pi-comparison-chart
OR simply
uname -a
Now download Node.js source for Raspberry Pi Model A, B, B+ and Compute Module as
wget https://nodejs.org/dist/v4.0.0/node-v4.0.0-linux-armv6l.tar.gz
tar -xvf node-v4.0.0-linux-armv6l.tar.gz
cd node-v4.0.0-linux-armv6l
For Raspberry Pi 2 and Pi 3
wget https://nodejs.org/dist/v4.0.0/node-v4.0.0-linux-armv7l.tar.gz
tar -xvf node-v4.0.0-linux-armv7l.tar.gz
cd node-v4.0.0-linux-armv7l
Copy to /usr/local
sudo cp -R * /usr/local/
I have tested setup on raspberry Pi 3 and Pi model B(REV 2), its working fine. After you’re done then verify installation by typing following two commands:
Make separate folder and copy code wundergroundAPITest.js files provided in code section into your folder OR Simply you can git clone as:
git clone https://github.com/BJSingh/WeatherBotTweet-Messenger-Project.git
cd WeatherBotTweet-Messenger-Project
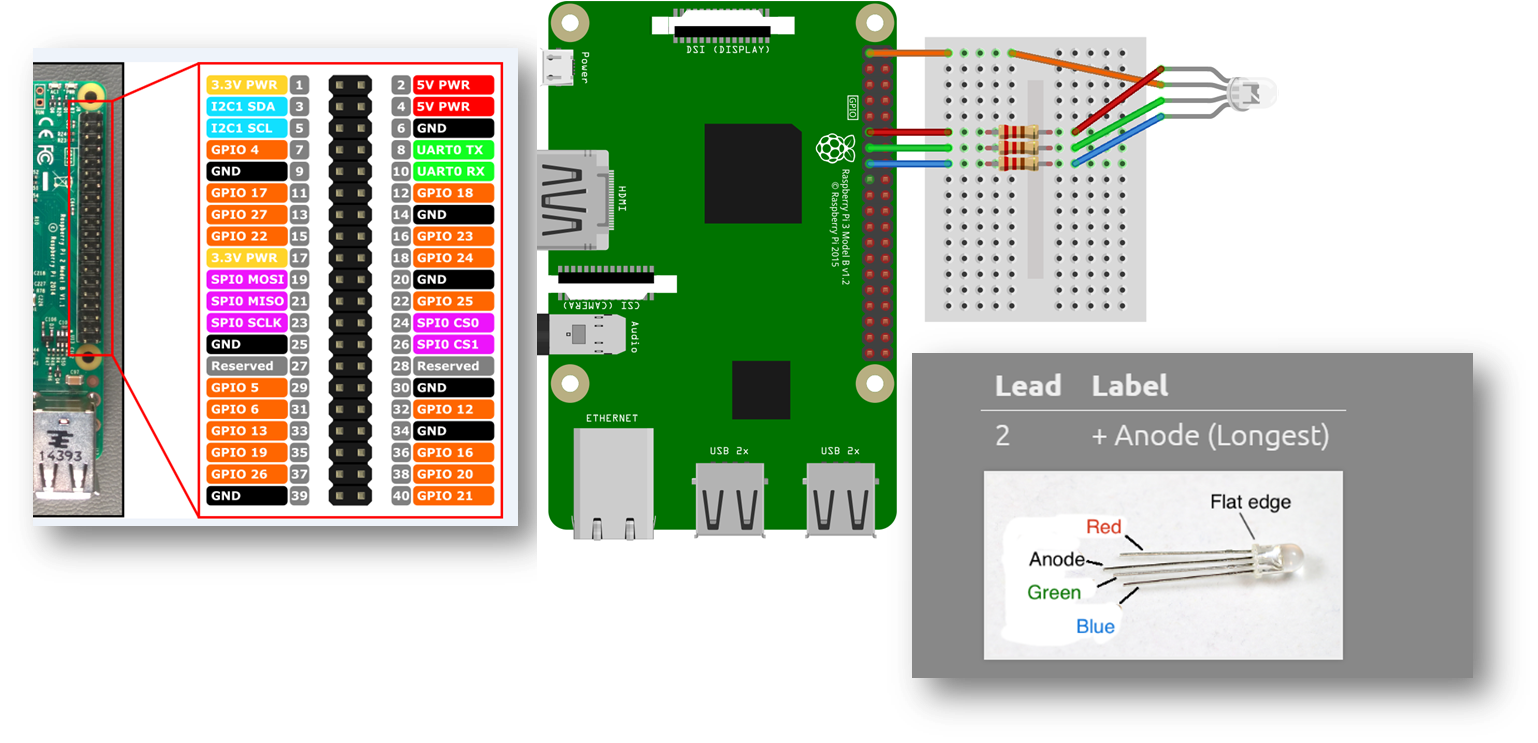
After this you need to install following node module packages (onoff package only needed if using RGB led)
npm install ws wunderground-api-client onoff
Once your done till here, now you can go for first testing of project
Wunderground API test:Add you API key properly in wundergroundAPITest.js code file and run it as
node wundergroundAPITest.js
you can verify response received:
Setup include first creating DeviceType on ARTIK developer portal, next connecting devices and finally adding rules on ARTIK cloud portal shown below
- Steps of DeviceType Creation on ARTIK Developer
- Steps to connect Devices on ARTIK Cloud
- Steps to ADD Rules on ARTIK Cloud
you can get PDF version of above process:
DeviceType Creation on ARTIK Developer.pdf
Connecting_Devices_on_ARTIKcloud.pdf
Now we are ready to WeatherBotTweet Messenger in action.
To run you need to have copy of testCode.js in same folder created earlier.
Make sure you have added your DeviceId and Token key in code file, I have commented where to add. Then just type below command into Raspberry Pi
node testCode.js
Your WeatherBot is ready with minimal Hardware, now you can make changes to testCode and add some more functionality to it as shown in final code file weatherTweetCode.js in code section.
Below I have shown how to add or upload multiple data on ARTIKCloud for processing.
ARTIKCloud Setup:
Working :
Just for demo I have use condition for HIGH temperature and Rainfall, you can defined rule according to your city's weather condition.
Comment if having any queries and Thank You.


Comments
Please log in or sign up to comment.