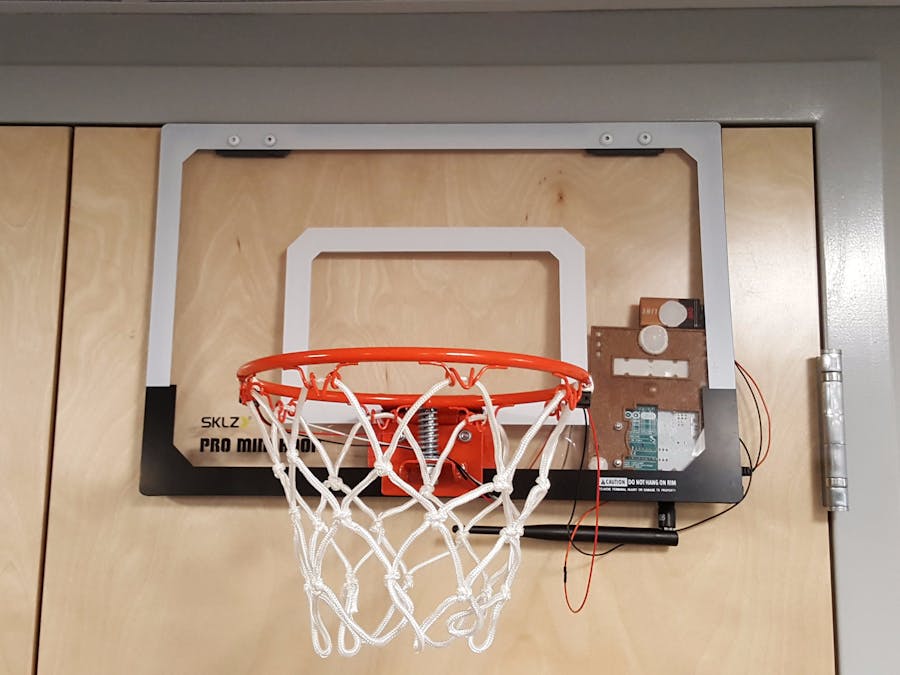
As my first project with Arduino and Sigfox, I decided to create a connected basket hoop that will count how many goals scored every day. The idea was to create a basketball challenge between our different offices in the U.S. using a mini basketball hoop and keeping score using Sigfox network.
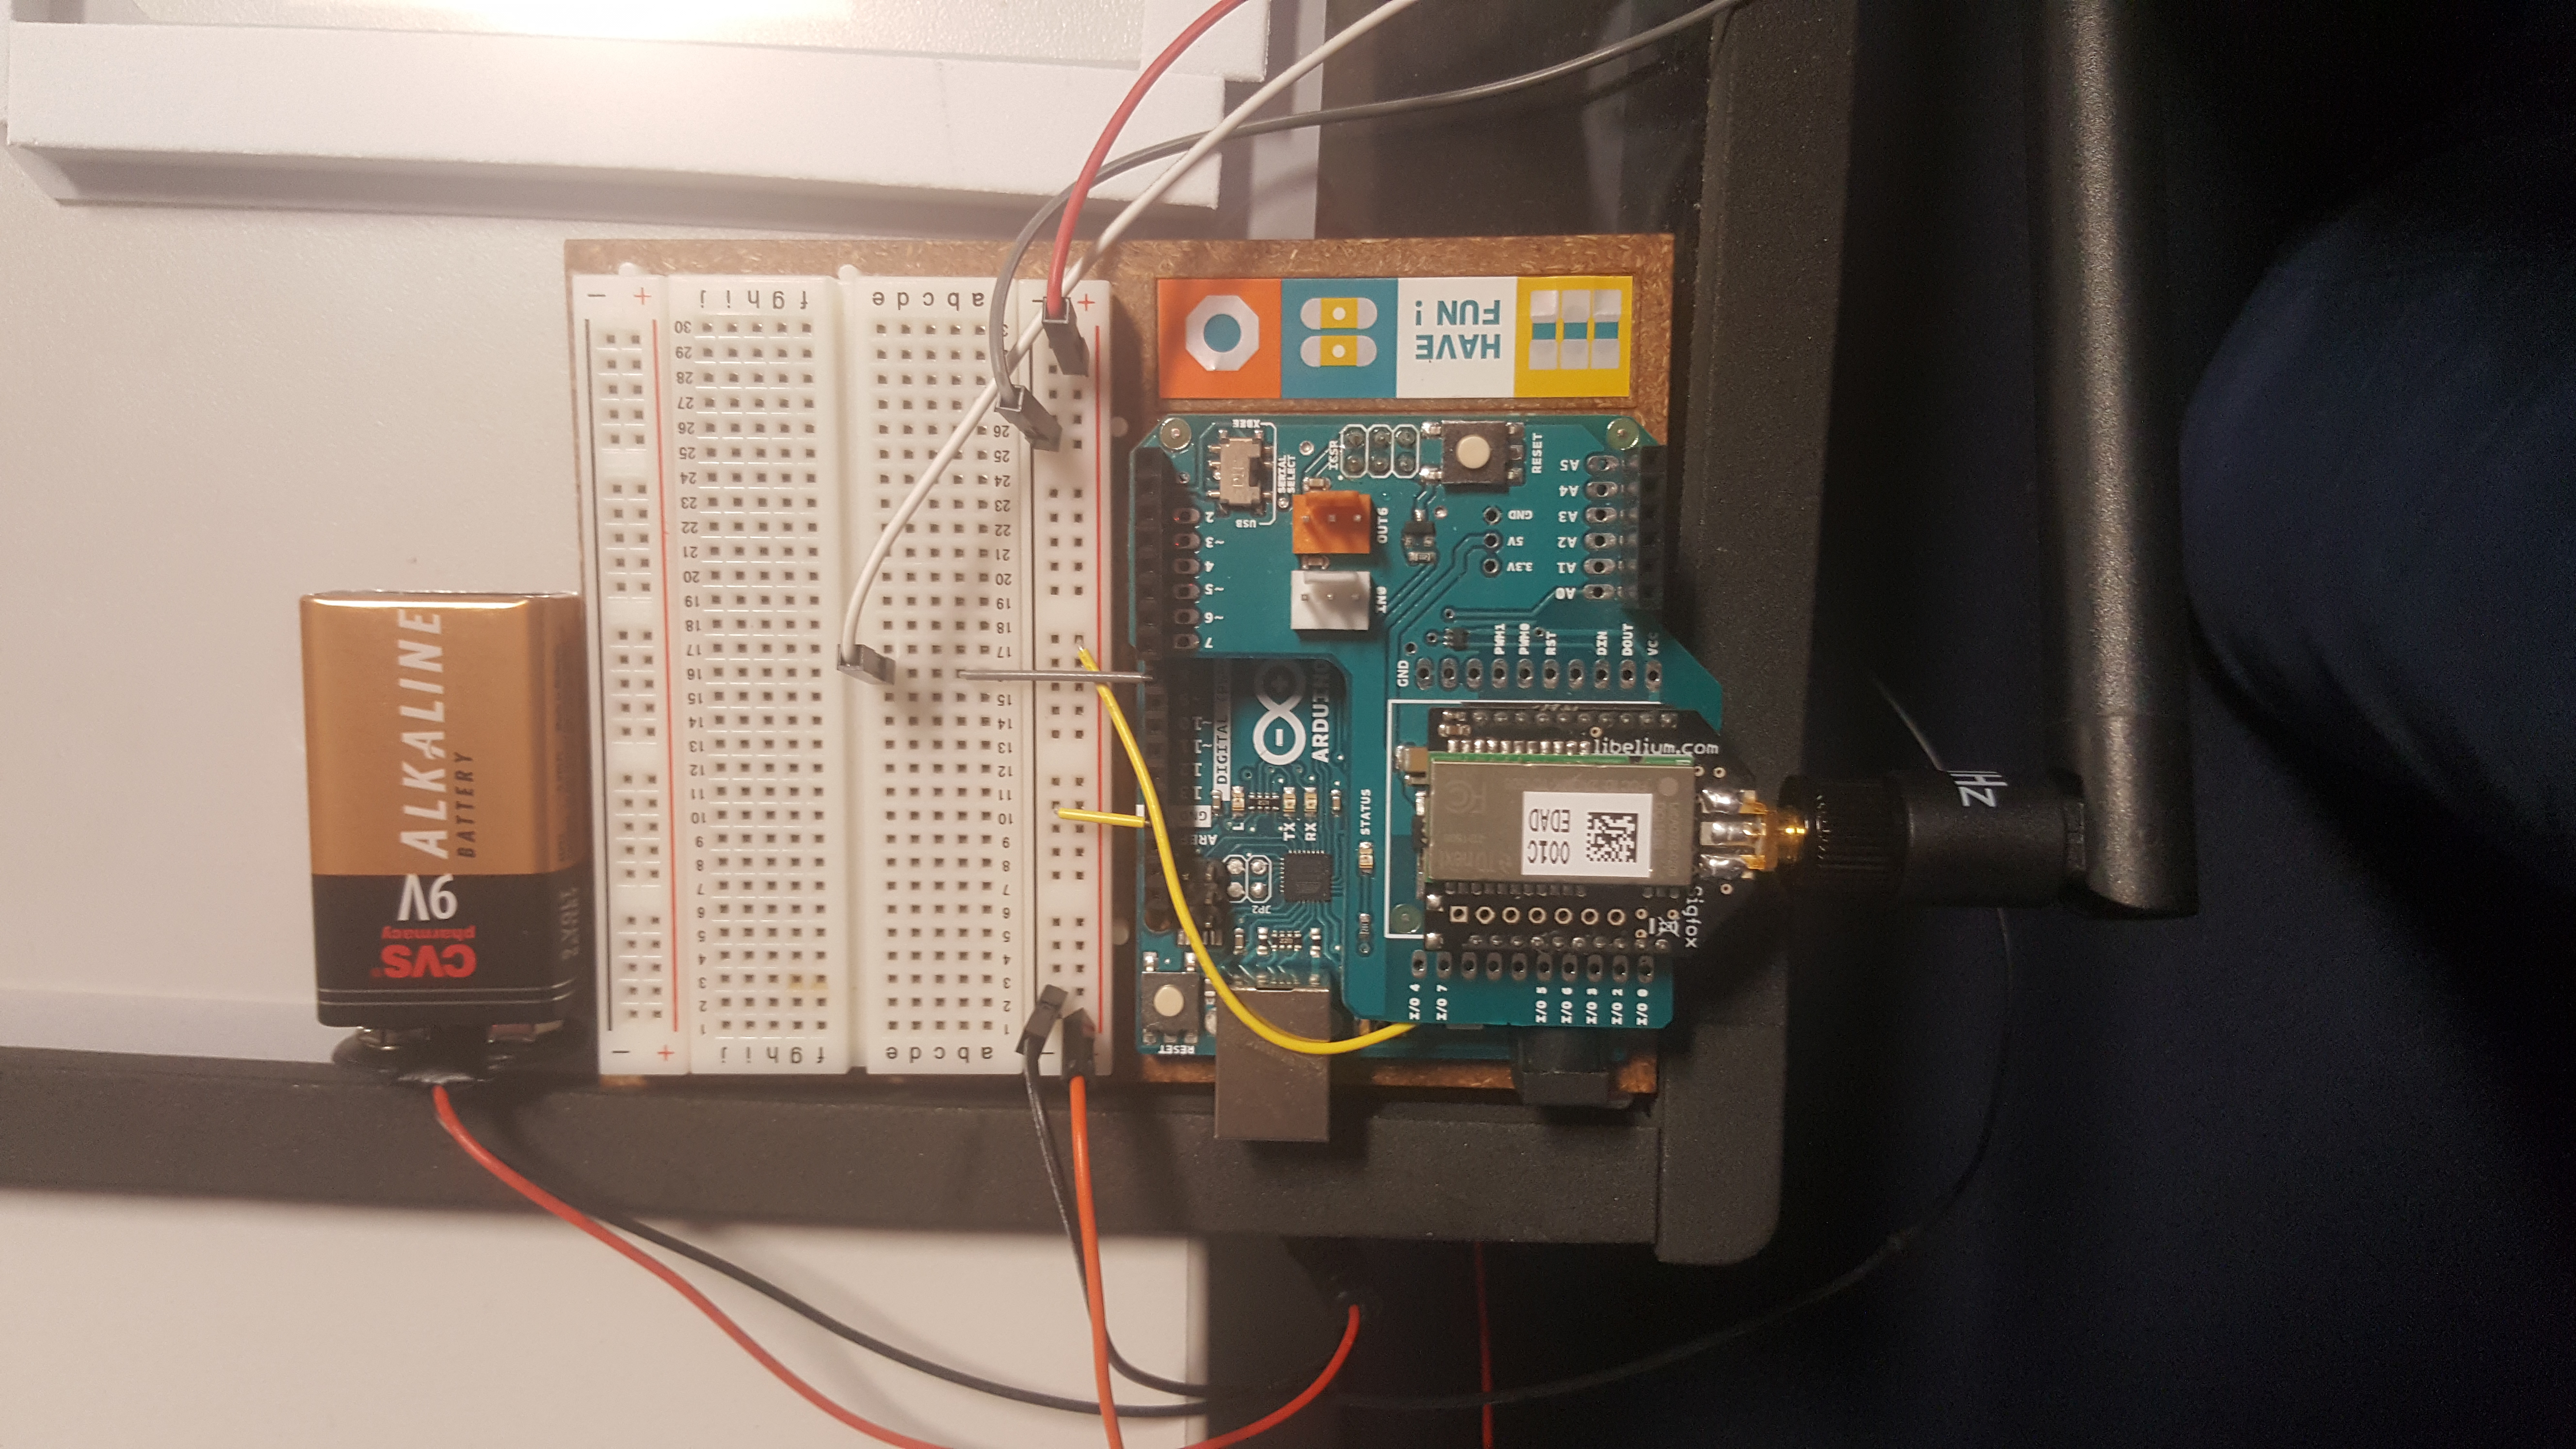
I used an IR break beam connected to an Arduino Uno board to trigger a message each time the basketball goes through the hoop. The board will communicate to Sigfox network using the Arduino Xbee shield from Libelium.
- One Arduino UNO
- One IR Breakbeam 3mm
- One Sigfox Xbee shield + Sigfox module
The IR breakbeam is used to detect the ball going through the hoop. Indeed, the emitter is creating an infrared beam which is received by the receiver on the other side of the hoop. When something passes between the emitter and the receiver, it breaks the beam, and the message is triggered.
Hardware wiringNote: You need to aligned the IR receiver and emitter on each side of the hoop:
Note: Unplug the Xbee shield before uploading the sketch to the board, or it will not upload the sketch. When the sketch is uploaded to the board, disconnect the power to re-plug the Xbee shield on top of the board.
/*
Basketball Goal Sensor
Author: Sylvain D
*/
#include <Wire.h>
// Cooking API libraries
#include <arduinoUART.h>
#include <arduinoUtils.h>
// Sigfox library
#include <arduinoSigfox.h>
//////////////////////////////////////////////
uint8_t socket = SOCKET0;     //Asign to UART0
//////////////////////////////////////////////
uint8_t error;
#define LEDPIN 13
 // Pin 13: Arduino has an LED connected on pin 13
#define SENSORPIN 8
// variables will change:
int sensorState = 0, lastState=0;         // variable for reading the pushbutton status
void setup() {
 // initialize the LED pin as an output:
 pinMode(LEDPIN, OUTPUT);
 // initialize the sensor pin as an input:
 pinMode(SENSORPIN, INPUT);
 digitalWrite(SENSORPIN, HIGH); // turn on the pullup
 Serial.begin(9600);
}
void loop(){
 // read the state of the beam value:
 sensorState = digitalRead(SENSORPIN);
 // check if the sensor beam is broken
 // if it is, the sensorState is LOW:
 if (sensorState == LOW) {
   // turn LED on:
   digitalWrite(LEDPIN, HIGH);
 }
 else {
   // turn LED off:
   digitalWrite(LEDPIN, LOW);
 }
 // Check if the sensor beam is broken
 //If it is, the sensorState is LOW:
   if (sensorState == LOW) {
   // Send message "123456" via Sigfox:
   Sigfox.send ((char *) "123456");
 }
 else {
   // turn LED off:
   digitalWrite(LEDPIN, LOW);
 }
 lastState = sensorState;
}
Connect to the Sigfox Backend to register your device:
- Click on "Cooking Hacks"
- Select your country
- Register your device using the Sigfox ID and PAC# given by Cooking Hacks
Select the device from your Device list, and select “Messages” on the left side to view your messages.
This step will allow you to have a nice and clean dashboard to present the score of your game ! :)
To get started with the IoT platform Losant, create an account on their website, losant.com and follow this tutorial on their blog to integrate the Sigfox callback to the platform. It is really easy and well explained. J
When you are done, you should have in your Losant sandbox a device. Mine is called "Arduino prototype" and the basic Workflow.
Create Losant WorkflowThe workflow will allow us to get the data presented as we want on the dashboard. In our case, we want to decode the payload coming from Sigfox Back End and display the number of goals scored per day and reset the scoreboard every day at 9 am.
Below is the details step by step on how to build this workflow
Get the data from Sigfox message:
First we need to include the webhook block, which will trigger the workfow when it receives a message from the Sigfox backend. The message is stored in the payload : payload.data.body.data
The data sent is : "123456" thanks to our code
Decode the data :
We need to change this data "123456" to "1". 1 will be the value for one goal. To do so we will add the block "Function" to modify the data in the payload and store it under a new path: payload.data.body.goal
:
if(payload.data.body.data==123456){
	payload.data.body.goal=1;
}
else
{
	payload.data.body.goal=0;
}
Select a device :
Add "Get device" block to select the device you want get the payload from.
Select the value :
Now, we need to create a new payload path where we get the value previously stored. Here, we set the key as "goalToday" with the following path, data.body.goalToday
Add goals to your previous score:
We need to add 1 to the payload data.body.goalToday
for every new payload received and store the result back to the payload. The block "Math" will make it:
Expression:
{{data.body.goalToday}}+1
Payload result path :
data.body.goalToday
Store the computed value
We add a Store value block the store the new computed payload under data.body.goalToday.
Define attributes of the device
Here, we want to make sure we define the attributes we previoulsy created, which are:
- goal =
{{ data.body.goal }}
and,
- goalToday =
{{data.body.goalToday}}
Set up the timer
The trigger block Timer allows us to start the workflow at a specific time. We want to set it up to start every day at 9 am. The timer is using Cron format to schedule the time. Find more information on the Cron timer here .
Select the "Cron string" and input the following: 0 9 * * *
Reset the value to 0
Add a Store value block to define the value of the key goalToday to zero:
Define the status of the new attributes
Set the "goalToday" attribute to 0. At this stage everyday at 9am, the payload goalToday will be equals to 0.
Under the Dashboard tab you select the Gauge block
and select the application we just created, and under "Block data" your device, "Arduino prototype".
Finally the attribute you want to display: goalToday. You can label it as "Point(s)" for example.
I hope you like this project! Let me know if you have any question or suggestion on how to improve my first project with Sigfox and Arduino!
Cheers!!


_ztBMuBhMHo.jpg?auto=compress%2Cformat&w=48&h=48&fit=fill&bg=ffffff)


Comments
Please log in or sign up to comment.