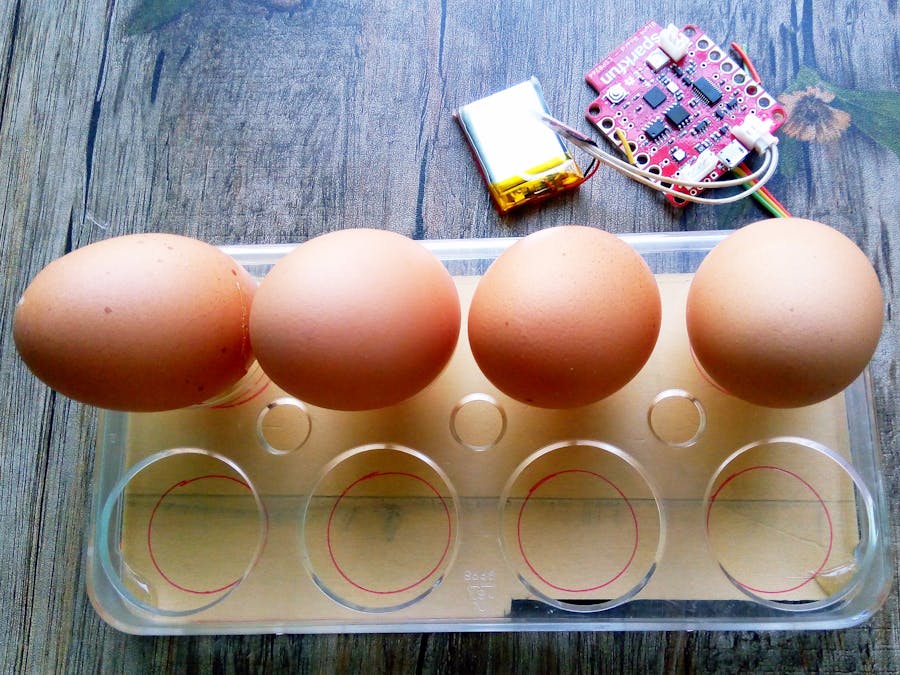
I like eggs but bad thing is that I always forget to buy new eggs when consumed previous and sometimes I buy new eggs unconsciously when there are enough eggs to my tray. So, to solve the problem I made an IoT egg tray using Sparkfun Blynk Board and Blynk App. The egg tray get connected to the Blynk cloud on power up. The eggs contain in the egg tray and the humidity & temperature of the egg tray can be monitored remotely by using Blunk app. It can also sends a push notification to the smart phone when no egg left in the tray. You can set it to the refrigerator's egg tray to make the refrigerator smart.
Preparing HardwareIf you are new in Blynk Board you may follow Blynk Board Arduino Development Guide from Sparkfun.
The design and construction of my IoT Egg Tray is very simple. You just need a Blynk board, some micro switches and some 10k resistors. Number of switches and resistors are equal to the number of eggs.
Collect a PVC board or a cardboard to make the base for the circuit as well as for the tray. Identify the center of each hole of the tray and mark accordingly into the board.
Put the micro switches into the board as shown in the image below. Try to keep the top head of switches at the center of the hole.
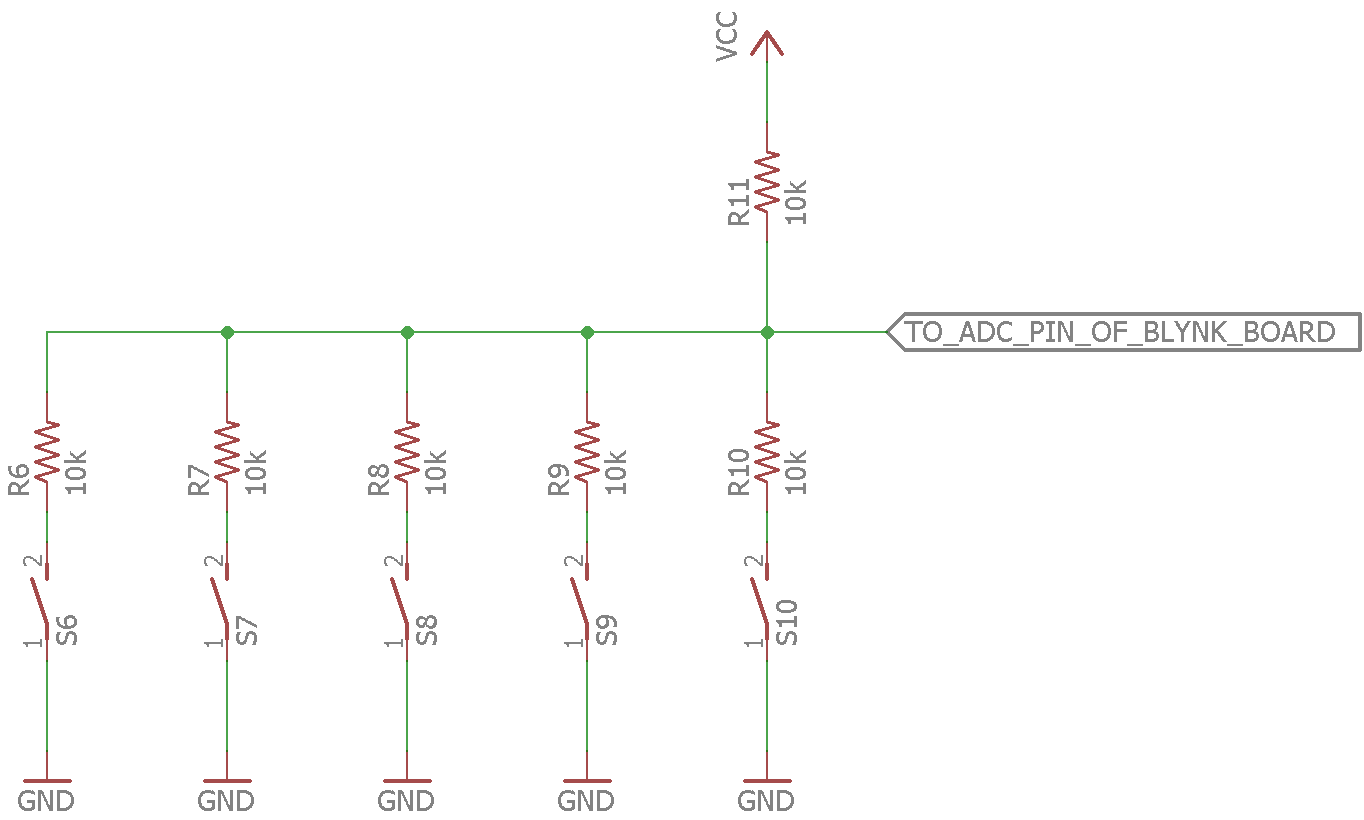
At the bottom, solder 10k resistor to N/O pin of every switch. Connect common pin of all switches together using a wire. You have to connect it to the ground of the Blynk board. The N/C pin of the switch should left unconnected for our case.
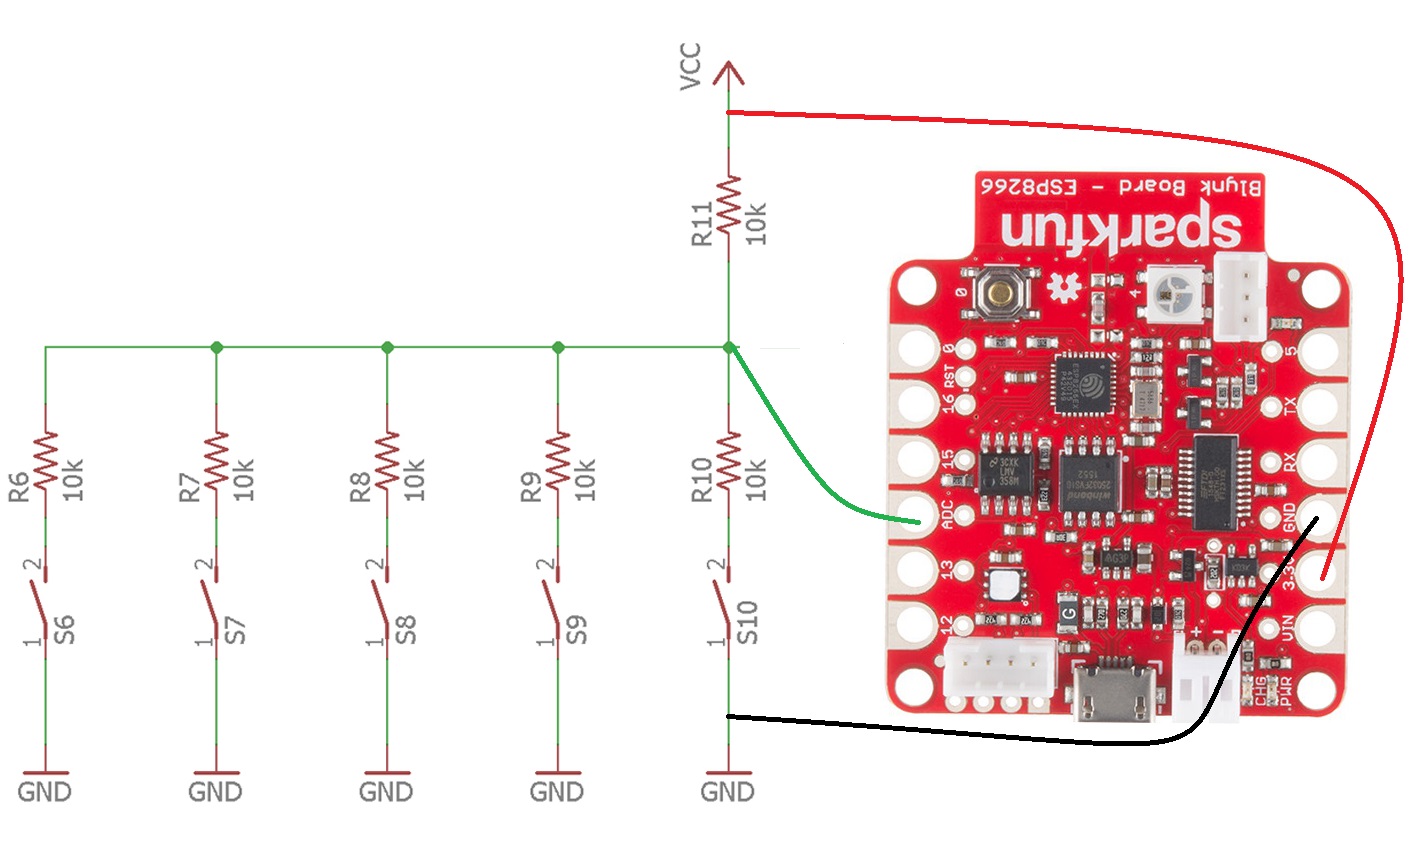
Connect open terminal of all resistors together using a wire. It should be connected to the ADC pin of Blynk board. Connect another 10k resistor to the wire which should be connected to the VCC. Follow the schematic for farther clarification.
Now, connect the Blynk board to the switch and resistor according to the schematic. Then connect common point of the resistor to the ADC pin of Blynk board. Upload the source code attached in the code section to Blunk board using Arduino IDE. After successfully uploading the sketch connect a Li-ion battery to the blink board to power up the board.
Add some scotch tape or hot glue to tightly fixed all the components.
Your egg tray is almost ready to use. Just few moment to prepare the Blynk app.
Configure 4 value widget named as EGG LEFT, TEMPERATURE in C, TEMPERATURE in F, HUMIDITY and assigned the INPUT as V8, V5, V6 & V7 respectively.
Modify label and select virtual pin number. V6 for the temperature in degree celsius.
Add a notify widget at the bottom of the app view. Congratulation! your Blynk app is ready to use.


_3u05Tpwasz.png?auto=compress%2Cformat&w=40&h=40&fit=fillmax&bg=fff&dpr=2)
Comments
Please log in or sign up to comment.