If you want to communicate with a serial device then possibly maximum cable length is the main barrier. The maximum cable length for standard baud rate can be 50 ft. You can increase the cable length further by sacrificing the data rate. Moreover now a days most of the PC come without the serial port. An Ethernet to Serial converter may be an ideal solution of the above problems. You can transfer data to a serial device in a high speed through Ethernet port. Cable length can be 100 meters or more.
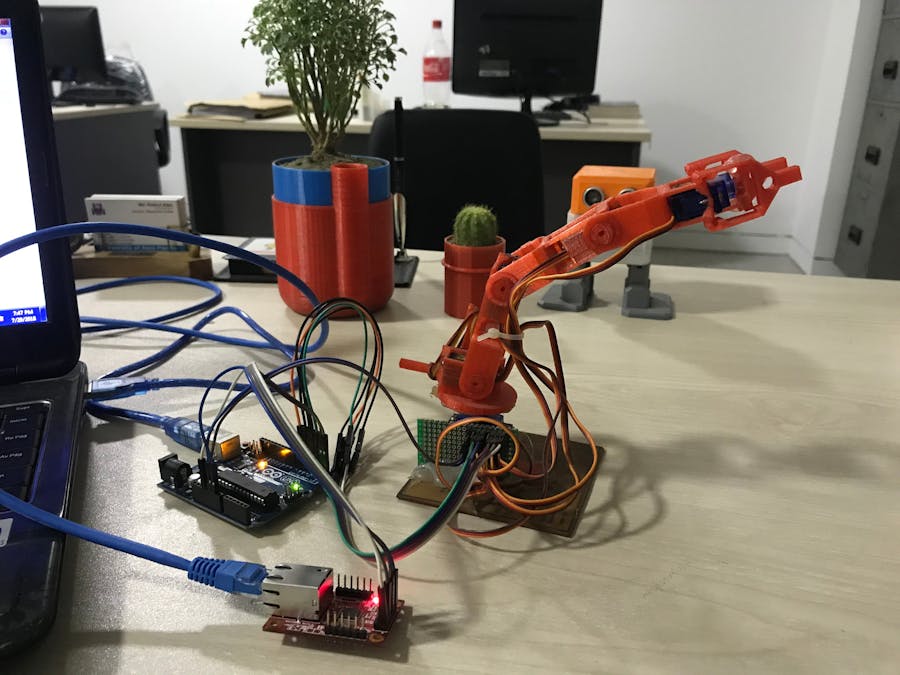
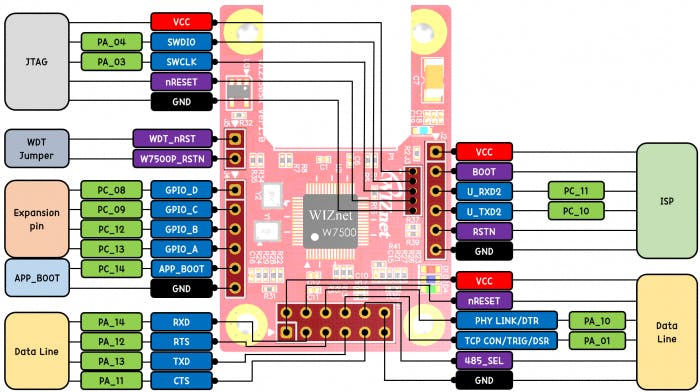
In this projec, I used WIZnet's Serial to Ethernet (S2E) device (WIZ750SR) for controlling a 3D-printed robotic arm. This is a prof of concept project and the capacity of the arm is very much limited. I developed a Windows application using open source Processing environment for controlling the arm from my desktop PC.
Before going further, please watch the demo video.
First, I configured the WIZnet device using S2E configuration tool from WIZnet as follows (note the IP address and the port number). WIZnet device is configured as TCP server. The Baud rate of serial communication should be 115200 (ignore the rate on the image).
Then I connected a 3.3V USB FTDI converter to the WIZ750SR to check the serial communication. I used PuTTY to test the communication.
I open two PuTTY windows one as Telnet client and another as Serial client.
After successfully checking the serial communication I connected an Arduino board to the WIZ750SR using TX and RX pin.
For connecting WIZ750SR with Arduino board it is safe to use a level converter because WIZ750SR works at 3.3V where Arduino works at 5V. Here I connected a level shifter between WIZ750SR an Arduino board. High voltage side of the level shifter must be connected with Arduino and low voltage side of the level shifter must be connected with WIZ750SR.
I tested the WIZ750SR device with both Arduino NANO and Arduino UNO.
For controlling the robotic arm from my PC through Ethernet I developed an desktop application using Processing. Processing is sending data to Arduino using a virtual COM port.
A virtual COM port or a virtual serial port is an ideal solution for when a legacy software application expects a connection to a serial device port (COM port) but cannot connect, due to a physical lack of available serial ports. Instead, we reconfigure the computer to send serial port data over a local area network or the Internet as if over a true serial port. When the legacy application sends data to a serial COM port, it is actually transmitted over a TCP/IP network and back from the network to your legacy application -- and presto! -- we have a virtual serial or virtual COM port.
To set up a virtual COM port to your PC you will be required a third party tool. You may use WIZ VSP for this purpose.
After configuring the virtual COM port as COM20 I developed a Processing program to interact graphically to Arduino robotic arm using WIZ750SR. To run the processing code you need to add the ControlP5 GUI library for Processing. Download the library from here: http://www.sojamo.de/libraries/controlP5/. Please note the COM port number which must be the number of the virtual COM port you created.
The graphical output of the Processing program is as follows:
From five slider I can control the rotation of the five servo motors of the robotic arm very smoothly and easily.
The complete source code for the application is attached to the code section.
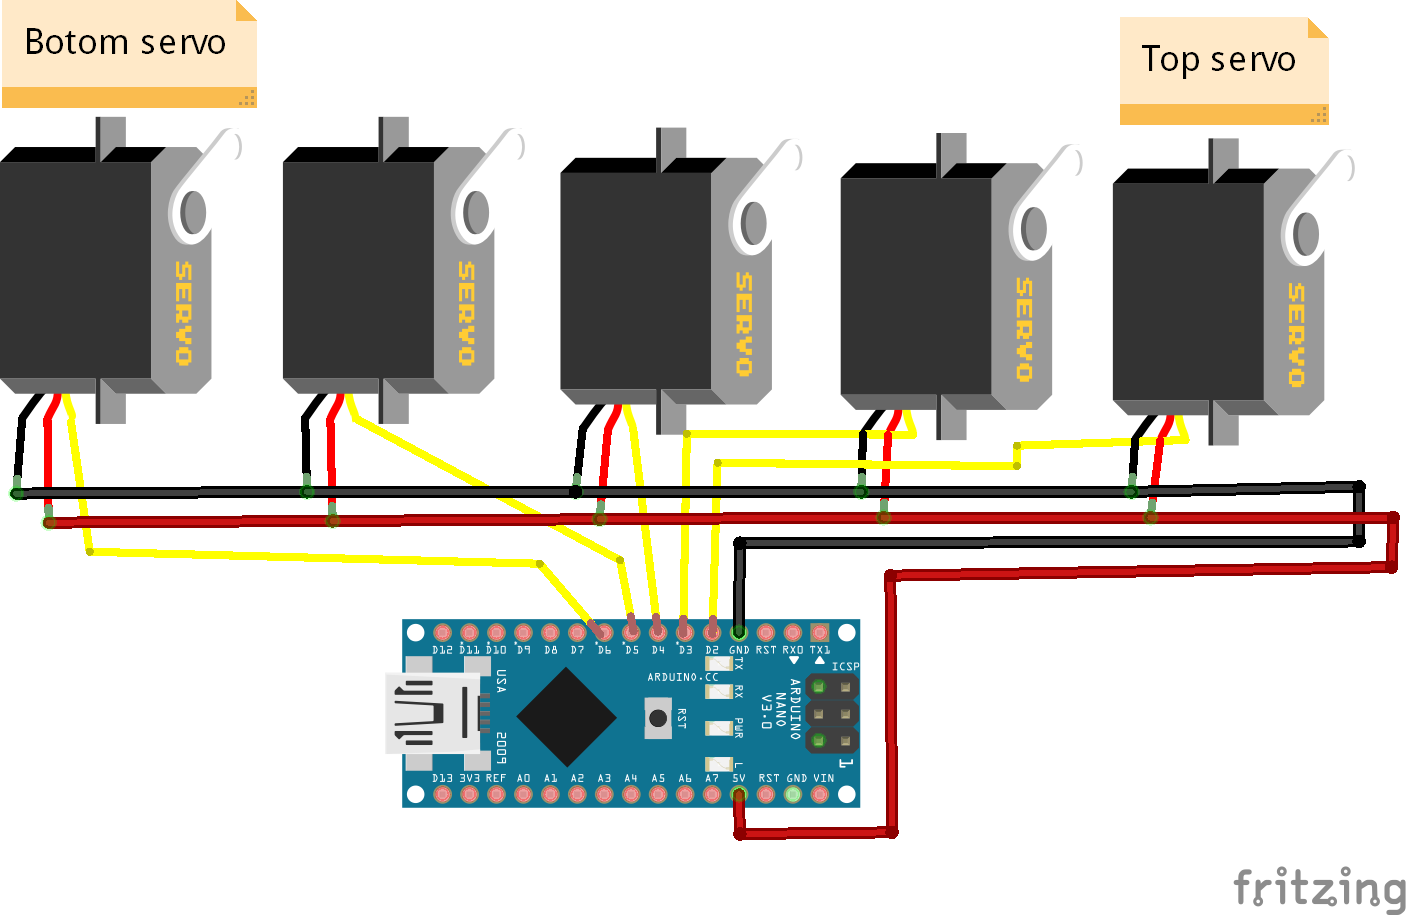
The following figure shows the connection among PC, WIZ750SR and Arduino.
The tiny robotic arm is 3D-printed and design files are available in Thingiverse. I used five servo motor to control the arm. The servo motors are connected to Arduino digital pins.
The arm is controllable from a long distance using Ethernet. No need to have a serial port in your PC. The complete Arduino sketch of for the arm is also attached to the code section. So make and enjoy!


_ztBMuBhMHo.jpg?auto=compress%2Cformat&w=48&h=48&fit=fill&bg=ffffff)


Comments
Please log in or sign up to comment.