


Hardware components | ||||||
 |
| × | 1 | |||
Software apps and online services | ||||||
 |
| |||||
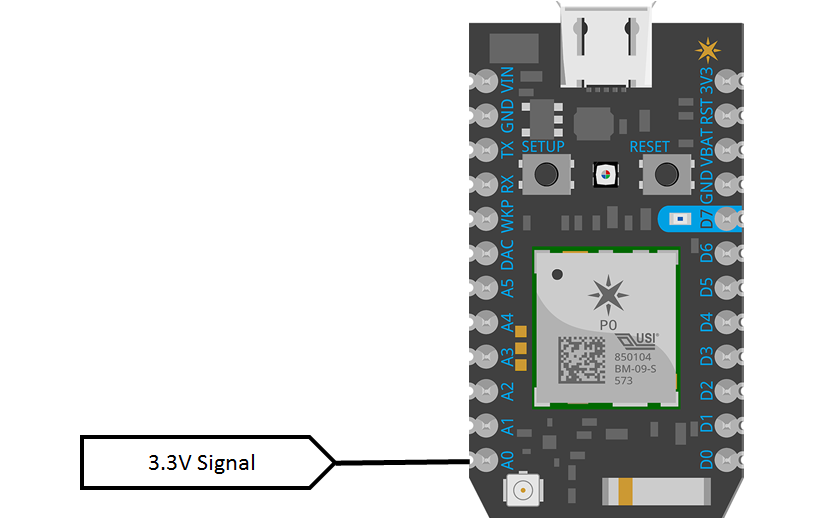
I previously turned my Windows IoT Core-based Raspberry Pi 2 into an oscilloscope, but I didn’t stop there. The next gadget in my target is the Particle Photon. This is an amazing little device. However ,unlike the Raspberry Pi 2, it doesn’t have an HDMI output (it’s only about the size of an HDMI connector). I wasn’t sure how best to display the signal data. I took inspiration from a post from Hackster.io – Sending sound over the Internet. They used the TCP capabilities of the Photon to stream audio data to a client. That’s all I needed to bring out the oscilloscope from the Photon.
Although my previous oscilloscope had an HDMI display, it was pretty much limited to the millisecond range, had temporal consistency issues, and had to have an external ADC IC. The oscilloscope firmware I wrote for the Photon was able to capture samples at 89 microsecond resolution with none of the temporal consistency issues. The Photon also sports eight 12bit ADC converters, so no external circuitry is needed.
Software
There are two parts to this software package, both of which can be downloaded in the Code section below. Get your Photon online by following this guide. Open the Particle Apps site, create a new app, and copy/paste the Photon code (found in the Photon directory of the repository). Hit verify to compile.
Open your dashboard in another browser window. Back in your Particle Apps window, select flash to upload the app to your Photon. After your Photon reboots, on your dashboard you will see an event from your Photon called IP. This is the Photon reporting its local IP address; you’ll need this for the client.
The second part of this software package is the Windows Universal app, which you can find in the code section below.
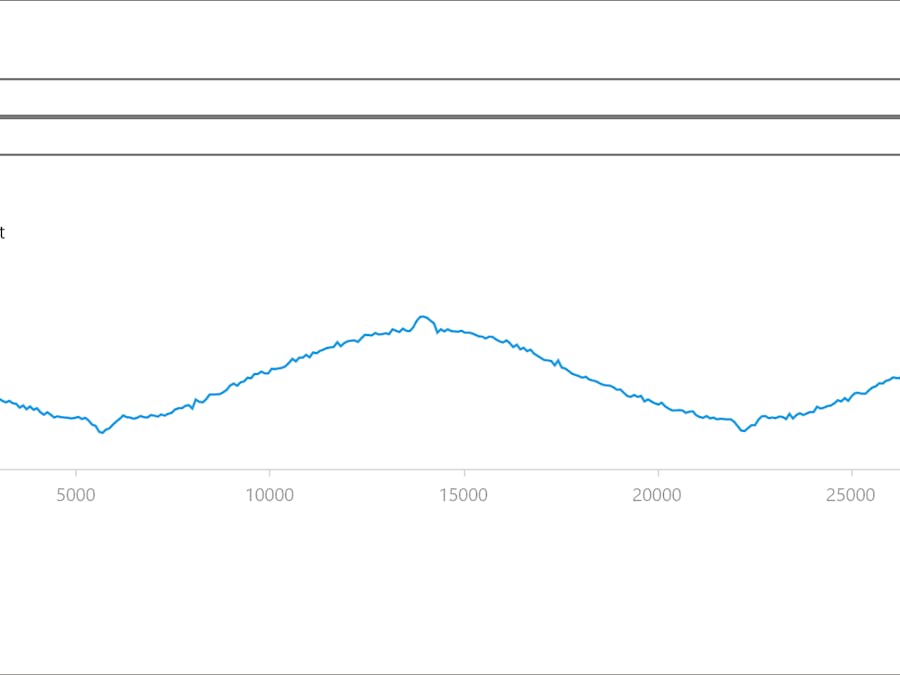
Open the solution in Visual Studio and run it. In the first textbox, enter the IP address that the Photon reported after you flashed it. The second textbox is the port number. This needs to be the same as what is defined in the Photon app. Right now, both apps default to port 8007. Now you can hit the Connect button, and the signal that the Photon is capturing will be displayed. The refresh rate will be 0.5 seconds. It will display how many data points are being received with each refresh and what the trigger index offset is. It also displays the microseconds per sample.
This project provides just the basics you need to get started with the ability to do some serious signal processing with the Photon. It’s a great device with huge potential.


Comments
Please log in or sign up to comment.