Stop dreaming!
It’s so easy: just tell Cortana at what time you want to wake up and she will gently start lighting up your room 30 minutes before. You can even choose whatever lightbulb you want to use.
Why is this so great?
Just imagine: at work, you are noticed about an important meeting tomorrow morning? Or with friends, you plan a great journey starting early in the morning?
Now, you don’t have to wait no more. Remotely set your bedroom wake-up light immediately!
Just tell Cortana from wherever you are at what time you want to wake up and she’ll activate your Raspberry Piselected lightbulb to slowly start glowing until full capacity at the moment you have to get up.
You’ll never forget to set your wake-up light and will enjoy the daily benefits of your light-activated endorphins.
Easy to implement
Your Windows-phone now has Cortana, your own personal assistent. We heard she has a niece named Siri, but that could be just a rumor. We wrote a universal app and the code for Cortana to set up your wake-up light. You can also use Cortana to turn on/off the alarm command. So you only have to build the tangible part of the infrastructure.
How it works
Cortana recognizes your spoken command and thus activates the universal app. The app then connects to the Azure-cloud. The Azure cloud uses the SignalR-library to send the required command to the Raspberry Pi. If you want to check our written codes, check it out below.
The Raspberry Pi is programmed so it sends out a continuous low output, except for the 30 minutes before your given wake-up moment in which it changes to a PWM (Pulse Width Modulation) output. We changed the duty cycle of the PWM-signal so it goes from 0 to 100% in 30 minutes. This ensures the dimming module to gently start operating the light bulb.
How to build
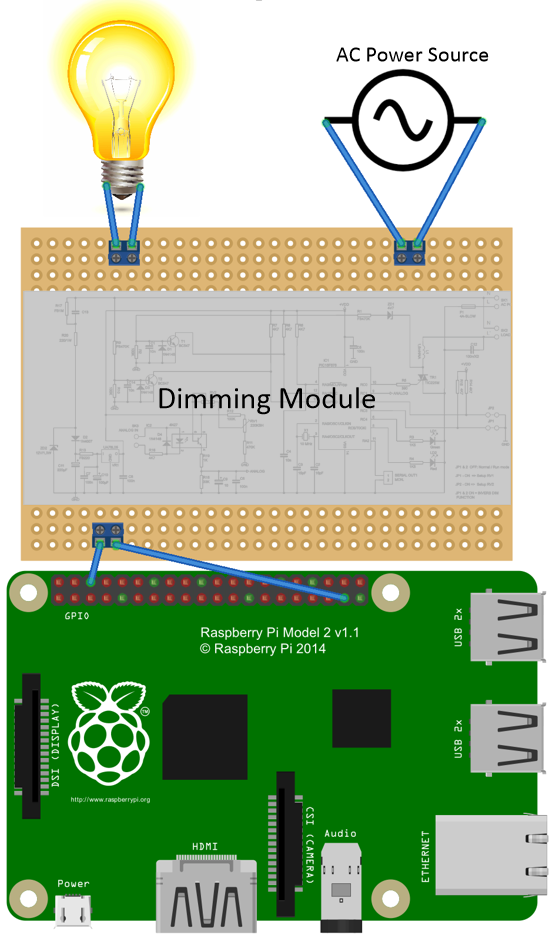
Review our schematic building instructions and you will notice the dimming module is the heart of the system. This module communicates with the Raspberry Pi by connecting pin #6 (ground) with the ground of the dimmer and pin #37 (GPIO-pin) to the input of the dimming module.
Then wire up your selected dimmable light bulb to the load of your dimming module. Finally, you can connect the AC power source to your dimming module.
For the real enthusiasts
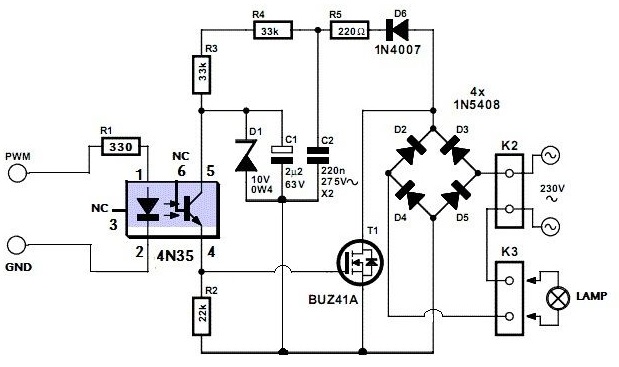
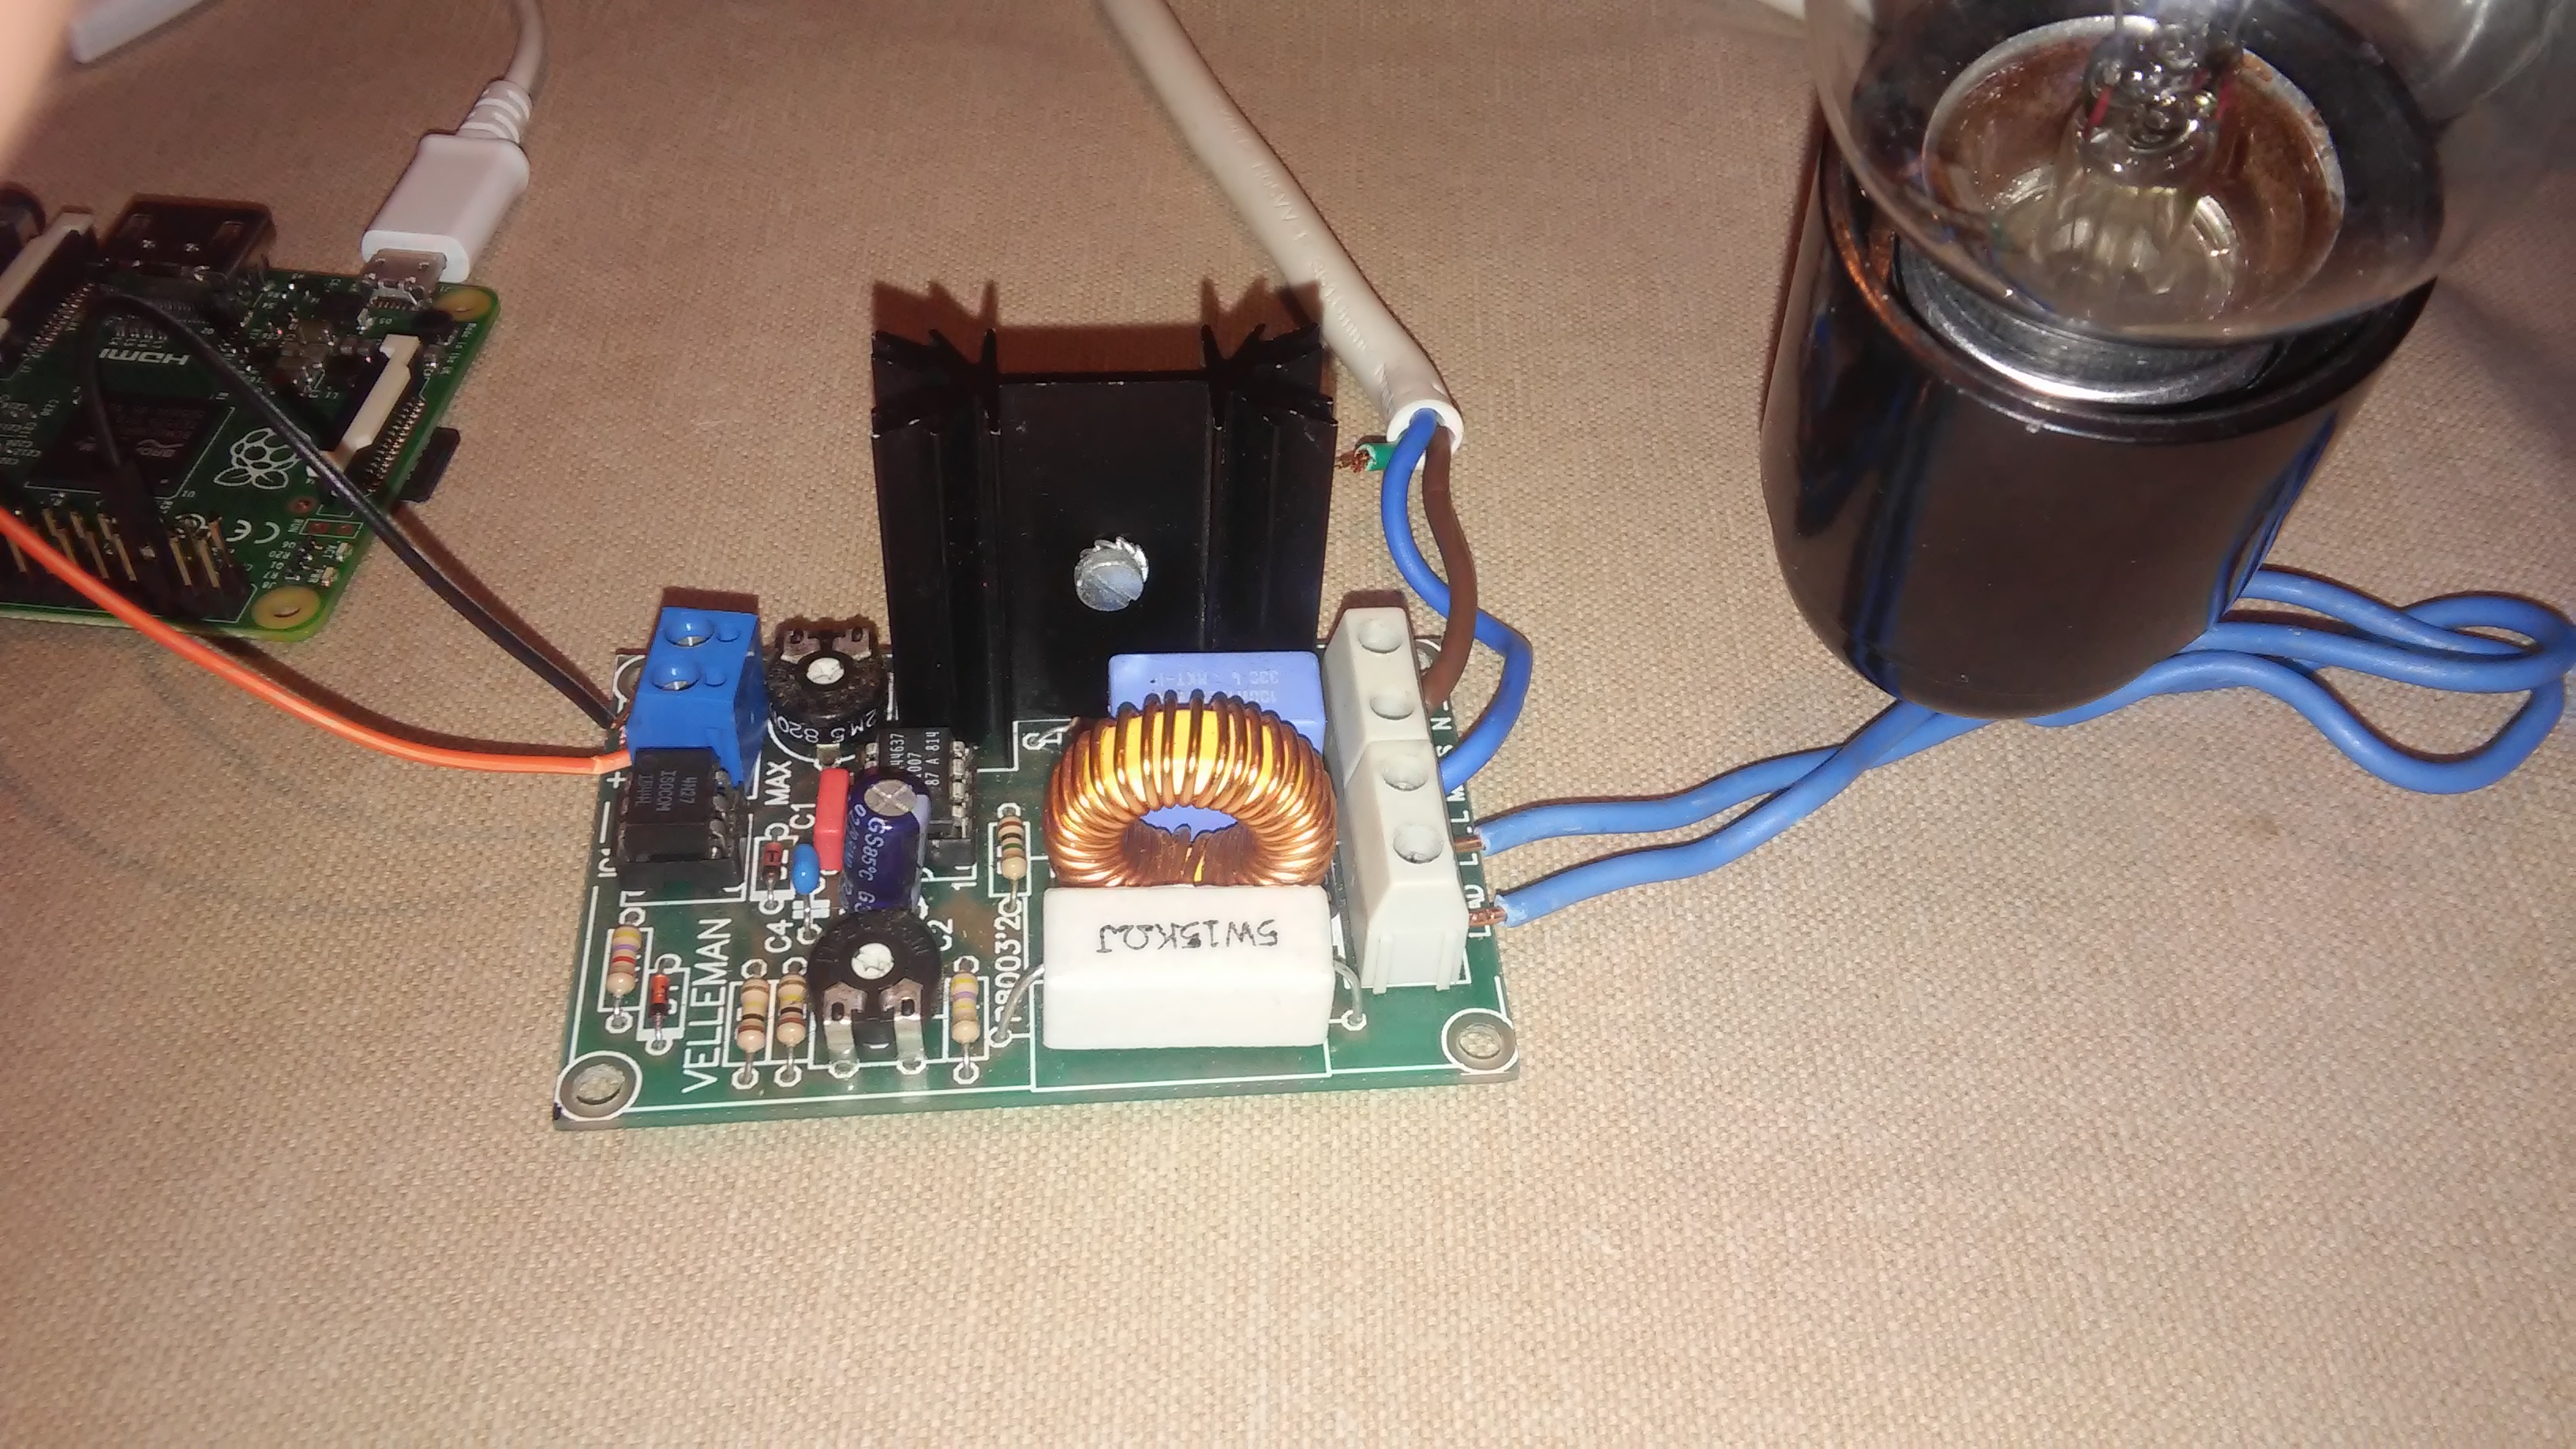
Of course you can buy a dimmer. Sure, it looks good. But what’s the fun with that? Or you can build one yourself (see schematics if you are brave enough). We chose something in between and bought a kit that still needed assembly (but wouldn't take up all of our time). If you too choose to get the kit, notice that these kits are made for a 0 to 10V input where the PWM signal switches between 0 and 3.3V. You can solve this by lowering the resistor at the PWM-connection (1K did the trick for us).
Thinking inside of the box
Who wants a Raspberry Pi and dimmer module next to his nightstand? We do! But maybe your partner isn’t as freaky and prefers a nice case taking the purity of fine electronics out of sight?
We used an old tissue dispenser and replaced the wooden top with a piece of perspex. This way the components are protected but we could still admire the Pi inside the case. We drilled some holes in the wooden box and placed a standard wall outlet on the box. On the opposite side, electric current goes in and is connected to the dimmer module. Don't forget to make sure your Raspberry Pi also receives power. We did this with a simple usb-connector.
Is this the end?
You can extend and improve this concept in various ways. You can add a speaker and blast your favorite MP3-sound when the light goes on. You could (and you probably should) add a manual switch to override the circuit and make sure you can turn on your light manually as well. We also used a Wi-Fi dongle on the Raspberry Pi so we didn't have to connect an Ethernet wire to the box.
Show us your ideas and we hope you are as excited about this project as we are.


Comments