


Hardware components | ||||||
| × | 1 | ||||
Software apps and online services | ||||||
 |
| |||||
Need to get started with the Security Camera base project? Check out the post here!
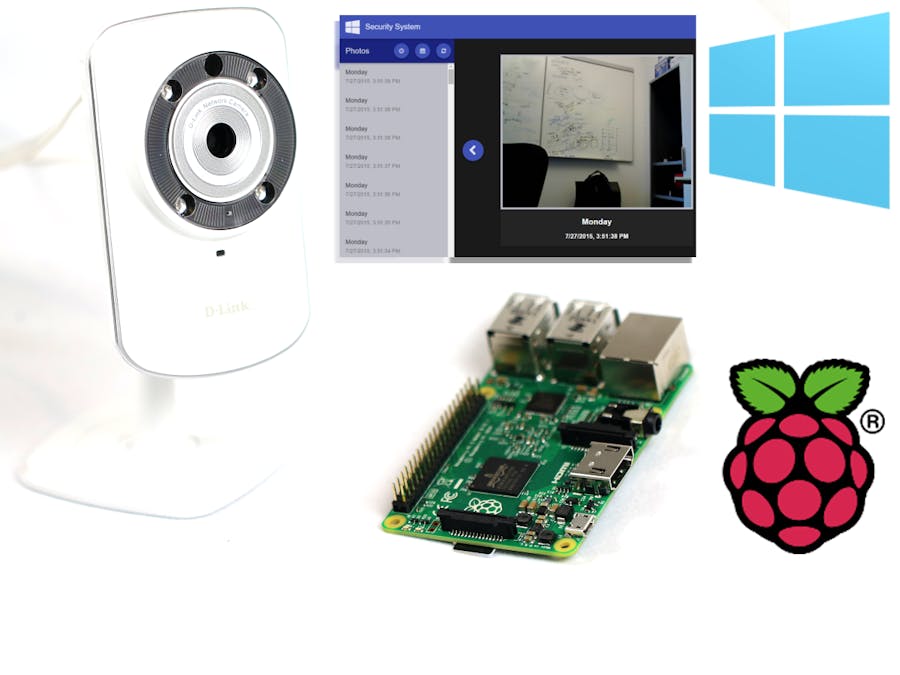
Building on the initial camera setup, the project uses a D-Link IP camera to do motion detection and image capture. Have a spare D-link camera laying around, and want to avoid purchasing extra parts? This setup is for you!
Initial Setup- Follow the first five steps in the "Initial Setup" section of the base project to set up your Raspberry Pi or MinnowBoard Maxi>
- Connect the power supply to the camera then factory reset your camera by pressing the reset button under the power light. Use a paper clip to press and hold the button for 10 seconds.
- Connect the camera to the same network as your PC and Pi.
- Set up the camera by following this link. Follow the instructions according to the pictures below.a. Choose the camera that you are using for the project, (DCS-932L/930L).b. Download and run the Windows Setup Wizard(exe). Note: If you are using the DCS-930L you need to select the setup based on the H/W Rev. of the camera. This information can be found at the bottom of the box the camera came in or at the back of the camera itself.c. Follow the steps mentioned in the setup.d. Find the camera that matches the MAC address on your camera.e. Make a note of the IP address of your camera and set a new password.Note: You don't need to complete the setup once you have the IP address. If you want to avoid creating an extra account, abandon the setup after noting down the IP address and the new password.
1 / 5 • Choose the camera that you are using for the project
- Enter the camera IP address in your browser and sign in (as admin) to the camera portal with the password you just created.
- Navigate to Setup->FTP and configure the FTP transfer of pictures. Use the following information:FTP SERVERHost Name: The IP address of your Raspberry Pi 2 (You can find this on the screen connected to the Pi)Port: 21 Username: administratorPassword: The password set for you Pi (default: p@ssw0rd)Path: \Data\Users\DefaultAccount\Pictures\securitysystem-cameradrop Passive Mode: YesTIME SCHEDULECheck "Enable uploading of images to an FTP server"Check "Motion/Sound Detection"Choose the Image Frequency of your choiceSelect "Date/Time Suffix" and check Create sub folder by 0.5hrs.Save Settingsi>
- To test that the FTP connection is set up properly, click "Test" on the FTP setup page. You will get the message "Please check STATUS > Device Info menu to view success or failure of FTP upload." Please ignore this. Dlink will report that it can not connect to the FTP server which is inaccurate. Instead, navigate to ftp://<Your_Pi_IP_Address>/Data/Users/DefaultAccount/Pictures/securitysystem-cameradrop/ from your browser. You should see the test file here.
- Next, change the motion detection setting of the camera.MOTION DETECTION SETTINGSMotion Detection: Select "Enable"Time: Select "Always"Sensitivity: 90%Detection Areas: You have to select all areasNote: You'll need Java installed on your browser for this step. Otherwise you will not be able to set the detection areas and motion detection will not work for the camera.Save Settingsi>
- Follow the "Software Setup" steps in the base project post to get the code and set up Visual Studio.i>
- Use your web browser to navigate to http://<Your_Pi_IP_Address>:8000
- Select Settings from the left panel.
- Set CameraType to Ip then hit save and apply.i>
The Security System app will now process the pictures as they come in from the IP camera.
Have the app working with other IP cameras? Have an interesting setup of this project? Make any cool modifications when working on it? Let us know in the comments section below!

38 projects • 2541 followers
We want to transform lives by connecting people, processes and objects. Build what matters most to you. Create the Internet of Your Things.


Comments
Please log in or sign up to comment.