Hackster is hosting Hackster Holidays, Ep. 7: Livestream & Giveaway Drawing. Watch previous episodes or stream live on Friday!Stream Hackster Holidays, Ep. 7 on Friday!
techvaler
Published © GPL3+

Basic Setup for Ultrasonic Sensor and Arduino

In this project we will use the Ultrasonic Sensor to measure distance, to detect objects and provide the O/P in common measurement units.

BeginnerProtip1,482
Basic Setup for Ultrasonic Sensor and Arduino

Things used in this project

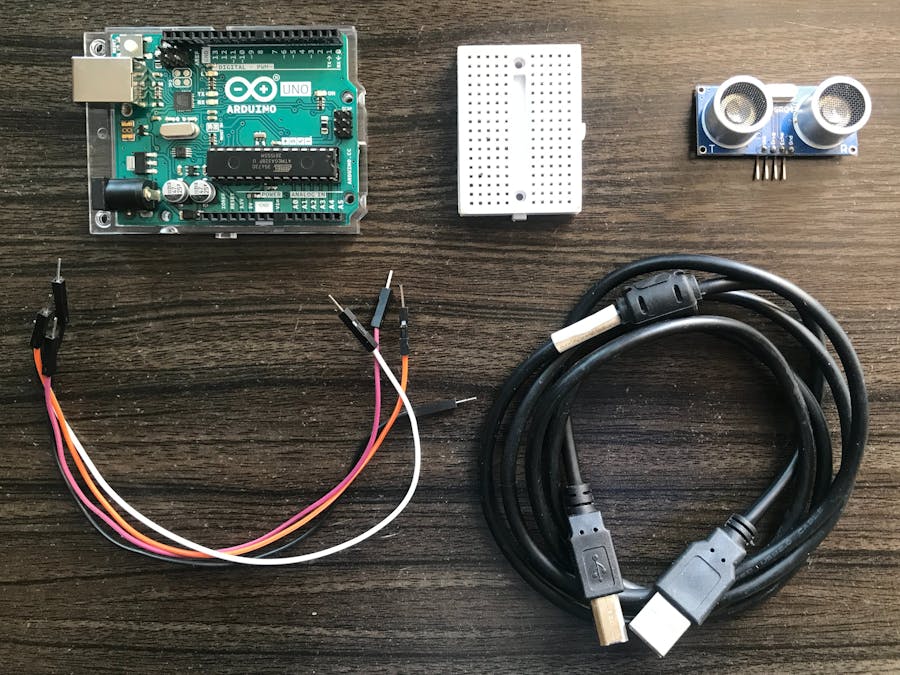
Hardware components

Arduino UNO
Arduino UNO
Any type of Arduino can be used
×1
Ultrasonic Sensor - HC-SR04 (Generic)
×1
Breadboard (generic)
Optional
×1
Jumper wires (generic)
×1
USB-A to B Cable
USB-A to B Cable
×1

Software apps and online services

Arduino IDE
Arduino IDE

Story

Read more

Schematics

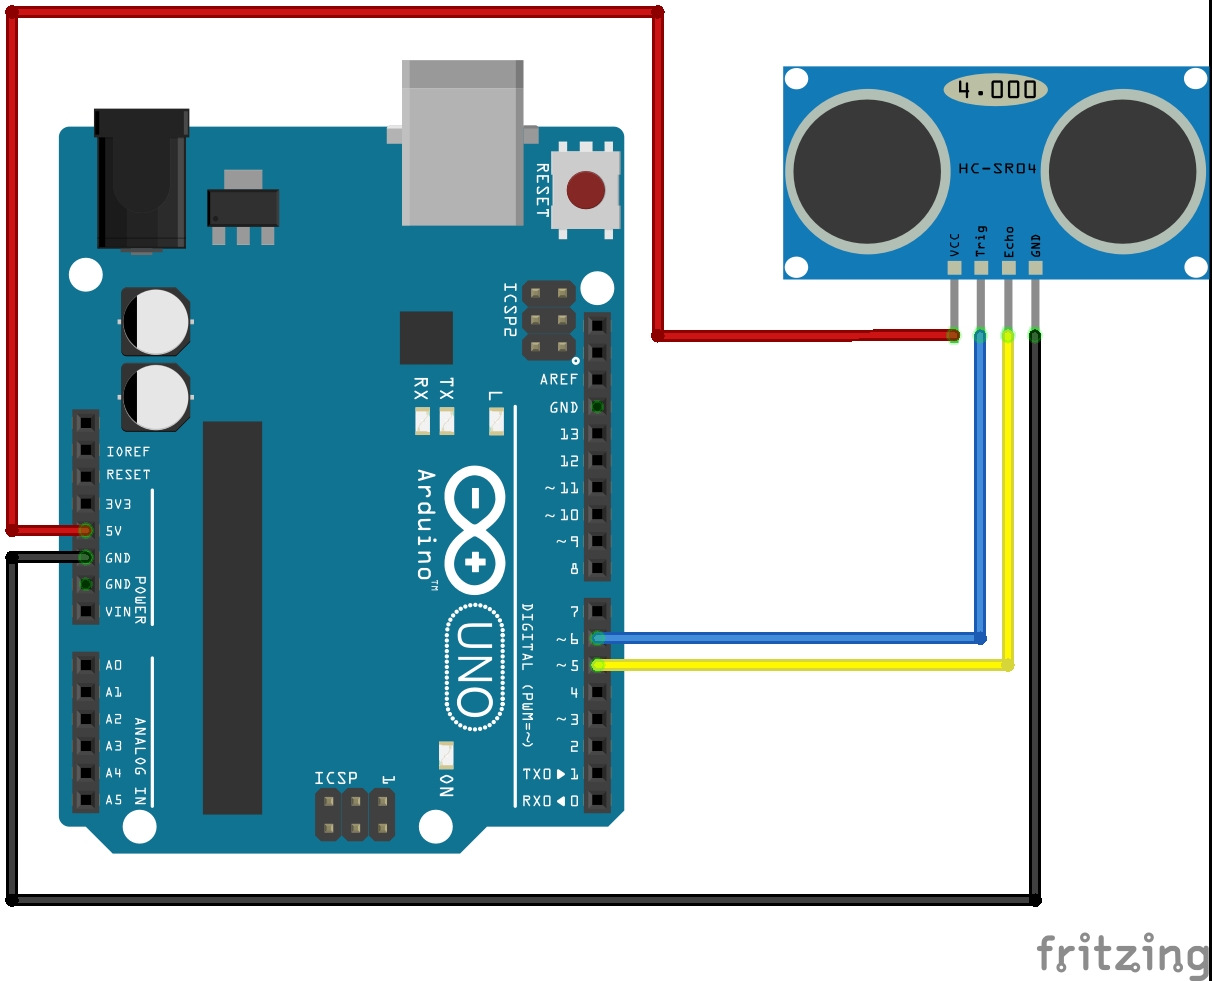
Ultrasonic Sensor with Arduino Circuit Diagram

Code

Optimised Code for Arduino with Ultrasonic sensor

C/C++
/* 
 * Credits to all sources on Google, acting as reference to this code below. This code is not 
 * TechValer's own creation. TechValer has referred to different projects and websites to 
 * find an easy code for beginners to get started with Ultrasonic Sensor HC-SR04 and Arduino.
 * TechValer does not claim this code to be its own. TechValer is greatly thankful for original 
 * creaters of this code and also all others who acted as reference. 
 */

/* 
 *  About TechValer
 *  
 *  What comes to mind when you think of tech...hmm, we're sure you're thinking of iPhone, 
 *  Alexa, Boston Dynamics robotic dog etc., at least that's what we would have thought of. 
 *  Our point here is, when you look inside this tech...you'll find weird boards with 
 *  components attached to it. This stuff is electronics and we at Techvaler deeply appreciate 
 *  this piece of tech. As the name suggests, we are Tech Enthusiasts who know the Worth and 
 *  Potential of these amazing tech stuff! So, check out our website techvaler.com
 *  and Youtube channel: "Techcafe" to find out more.
 */

/* 
 *  Note: Any model of Arduino can be used for this project. Just keep in mind the digital pins.
 *  The readings available in the serial monitor are almost accurate.
 *  Refer to the documentation for better understanding of this particular code and project.
 */

/*
 * Thanks to Drona Automations Pvt.Ltd for Sponsoring this project!
 */
 
#define trigPin 6 // Connect trigpin to D6 on Arduino
#define echoPin 5 // Connect echopin to D5 on Arduino

// defines variables

long duration; // It's a variable for the duration of sound wave travel
int inchdistance; // It's a variable for measurement of distance in inches
int cmdistance; // It's a variable for measurement of distance in centimeters

void setup() {
  pinMode(trigPin, OUTPUT); // Sets the trigPin as an OUTPUT
  pinMode(echoPin, INPUT); // Sets the echoPin as an INPUT
  Serial.begin(9600); // // For Serial Communication
}

void loop() {
  
  digitalWrite(trigPin, LOW); // Clears the trigPin condition
  delayMicroseconds(2); 
  digitalWrite(trigPin, HIGH);
  delayMicroseconds(10);
  digitalWrite(trigPin, LOW);
  
  duration = pulseIn(echoPin, HIGH); // Reads the echoPin, returns the sound wave travel time in microseconds

  // Calculating the distance
  
  inchdistance = duration * 0.0133858 / 2; // To calculate the distance in inch
  cmdistance = duration * 0.034 / 2; // To calculate the distance in cm
  
  // Displays the distance on the Serial Monitor
  
  Serial.print("Distance: ");
  Serial.print(inchdistance);
  Serial.println(" inch");
  Serial.print(cmdistance);
  Serial.println(" cm");
} 

Credits

techvaler
0 projects • 1 follower

Comments