Our project is looking to bring Mariah Carey back into every home in the United States for the Christmas season. After all, what is Christmas without Mariah… Our project will utilize one of Mariah's biggest hits, “All I Want For Christmas Is You, ” to bring holiday cheer to any horrid office party or dreaded family gathering. The user will be able to remotely control our robot to deliver festive drinks and treats to party goers while Mariah belts her legendary notes. Once the robot runs out of refreshment a warning light will illuminate on the robot to indicate user needs to refill the holiday refreshments. To add to the festive feel of the project, there will be an arrangement of LEDs that will flash red and green to the beat of the song
Block DiagramPin Map for MSP #1
Pin Map for MSP #2
HM-10BluetoothModule
The DSD HM-10 Bluetooth Module uses UART communication to transmit and receive data from a cell phone or other HM-10 module. In this project the HM-10 received commands from an iPhone with the DSD Bluetooth App to move the robot forward, backwards, left, right, and stop. User relays single character commands to specify the direction of movement. The commands are specified below:
NeoPixel8x8LEDMatrix
The Neopixel line from Adafruit uses WS2812B chips (or equivalent) as an LED controller. The serial communication method used is NZR (non-return-to-zero) so in order to send our data we will be using a method called 'bit-banging'. Bit-banging differs from normal communication methods because the data pulses are processed via software rather than hardware.
CustomPCB
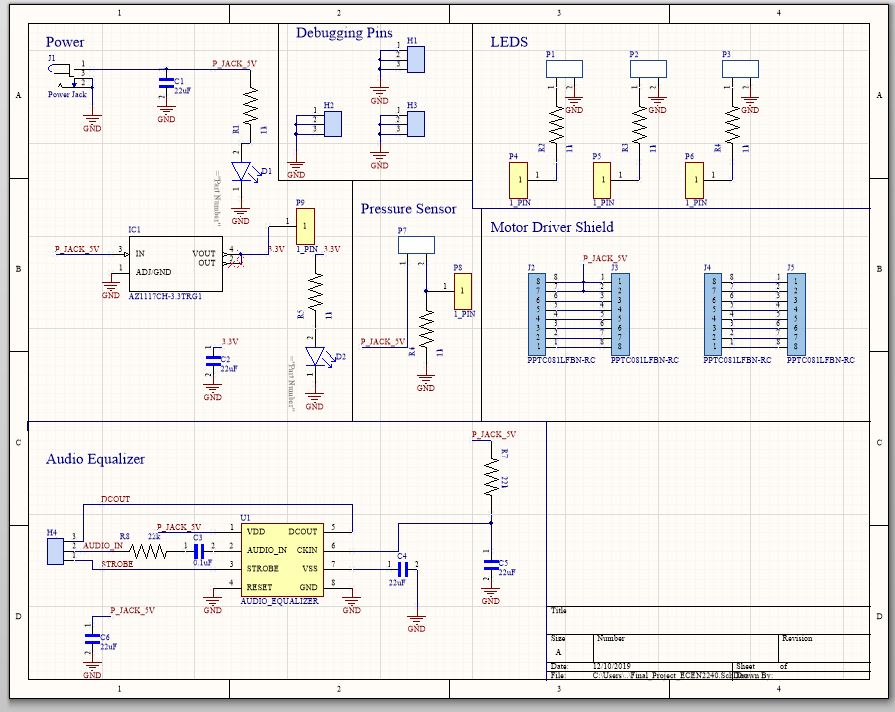
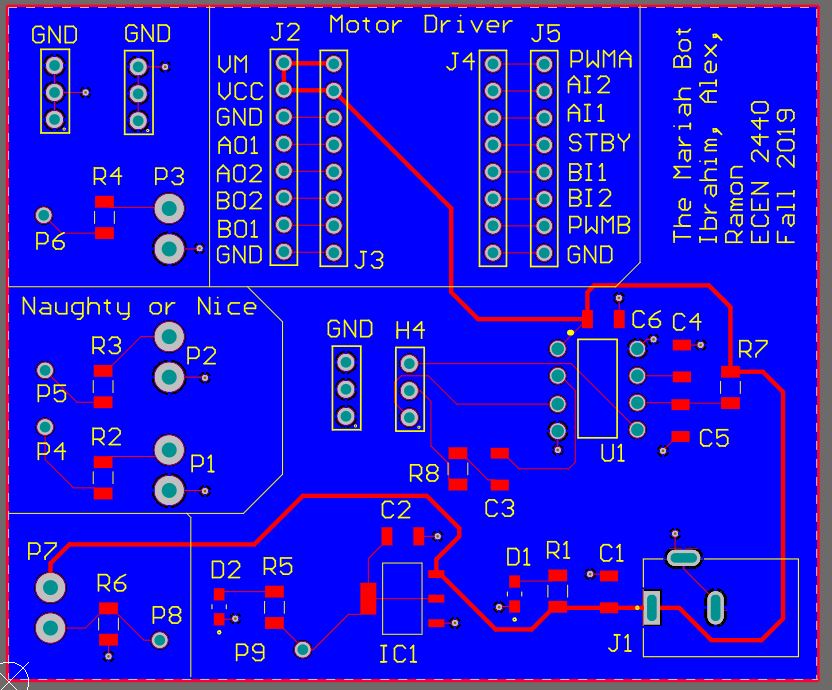
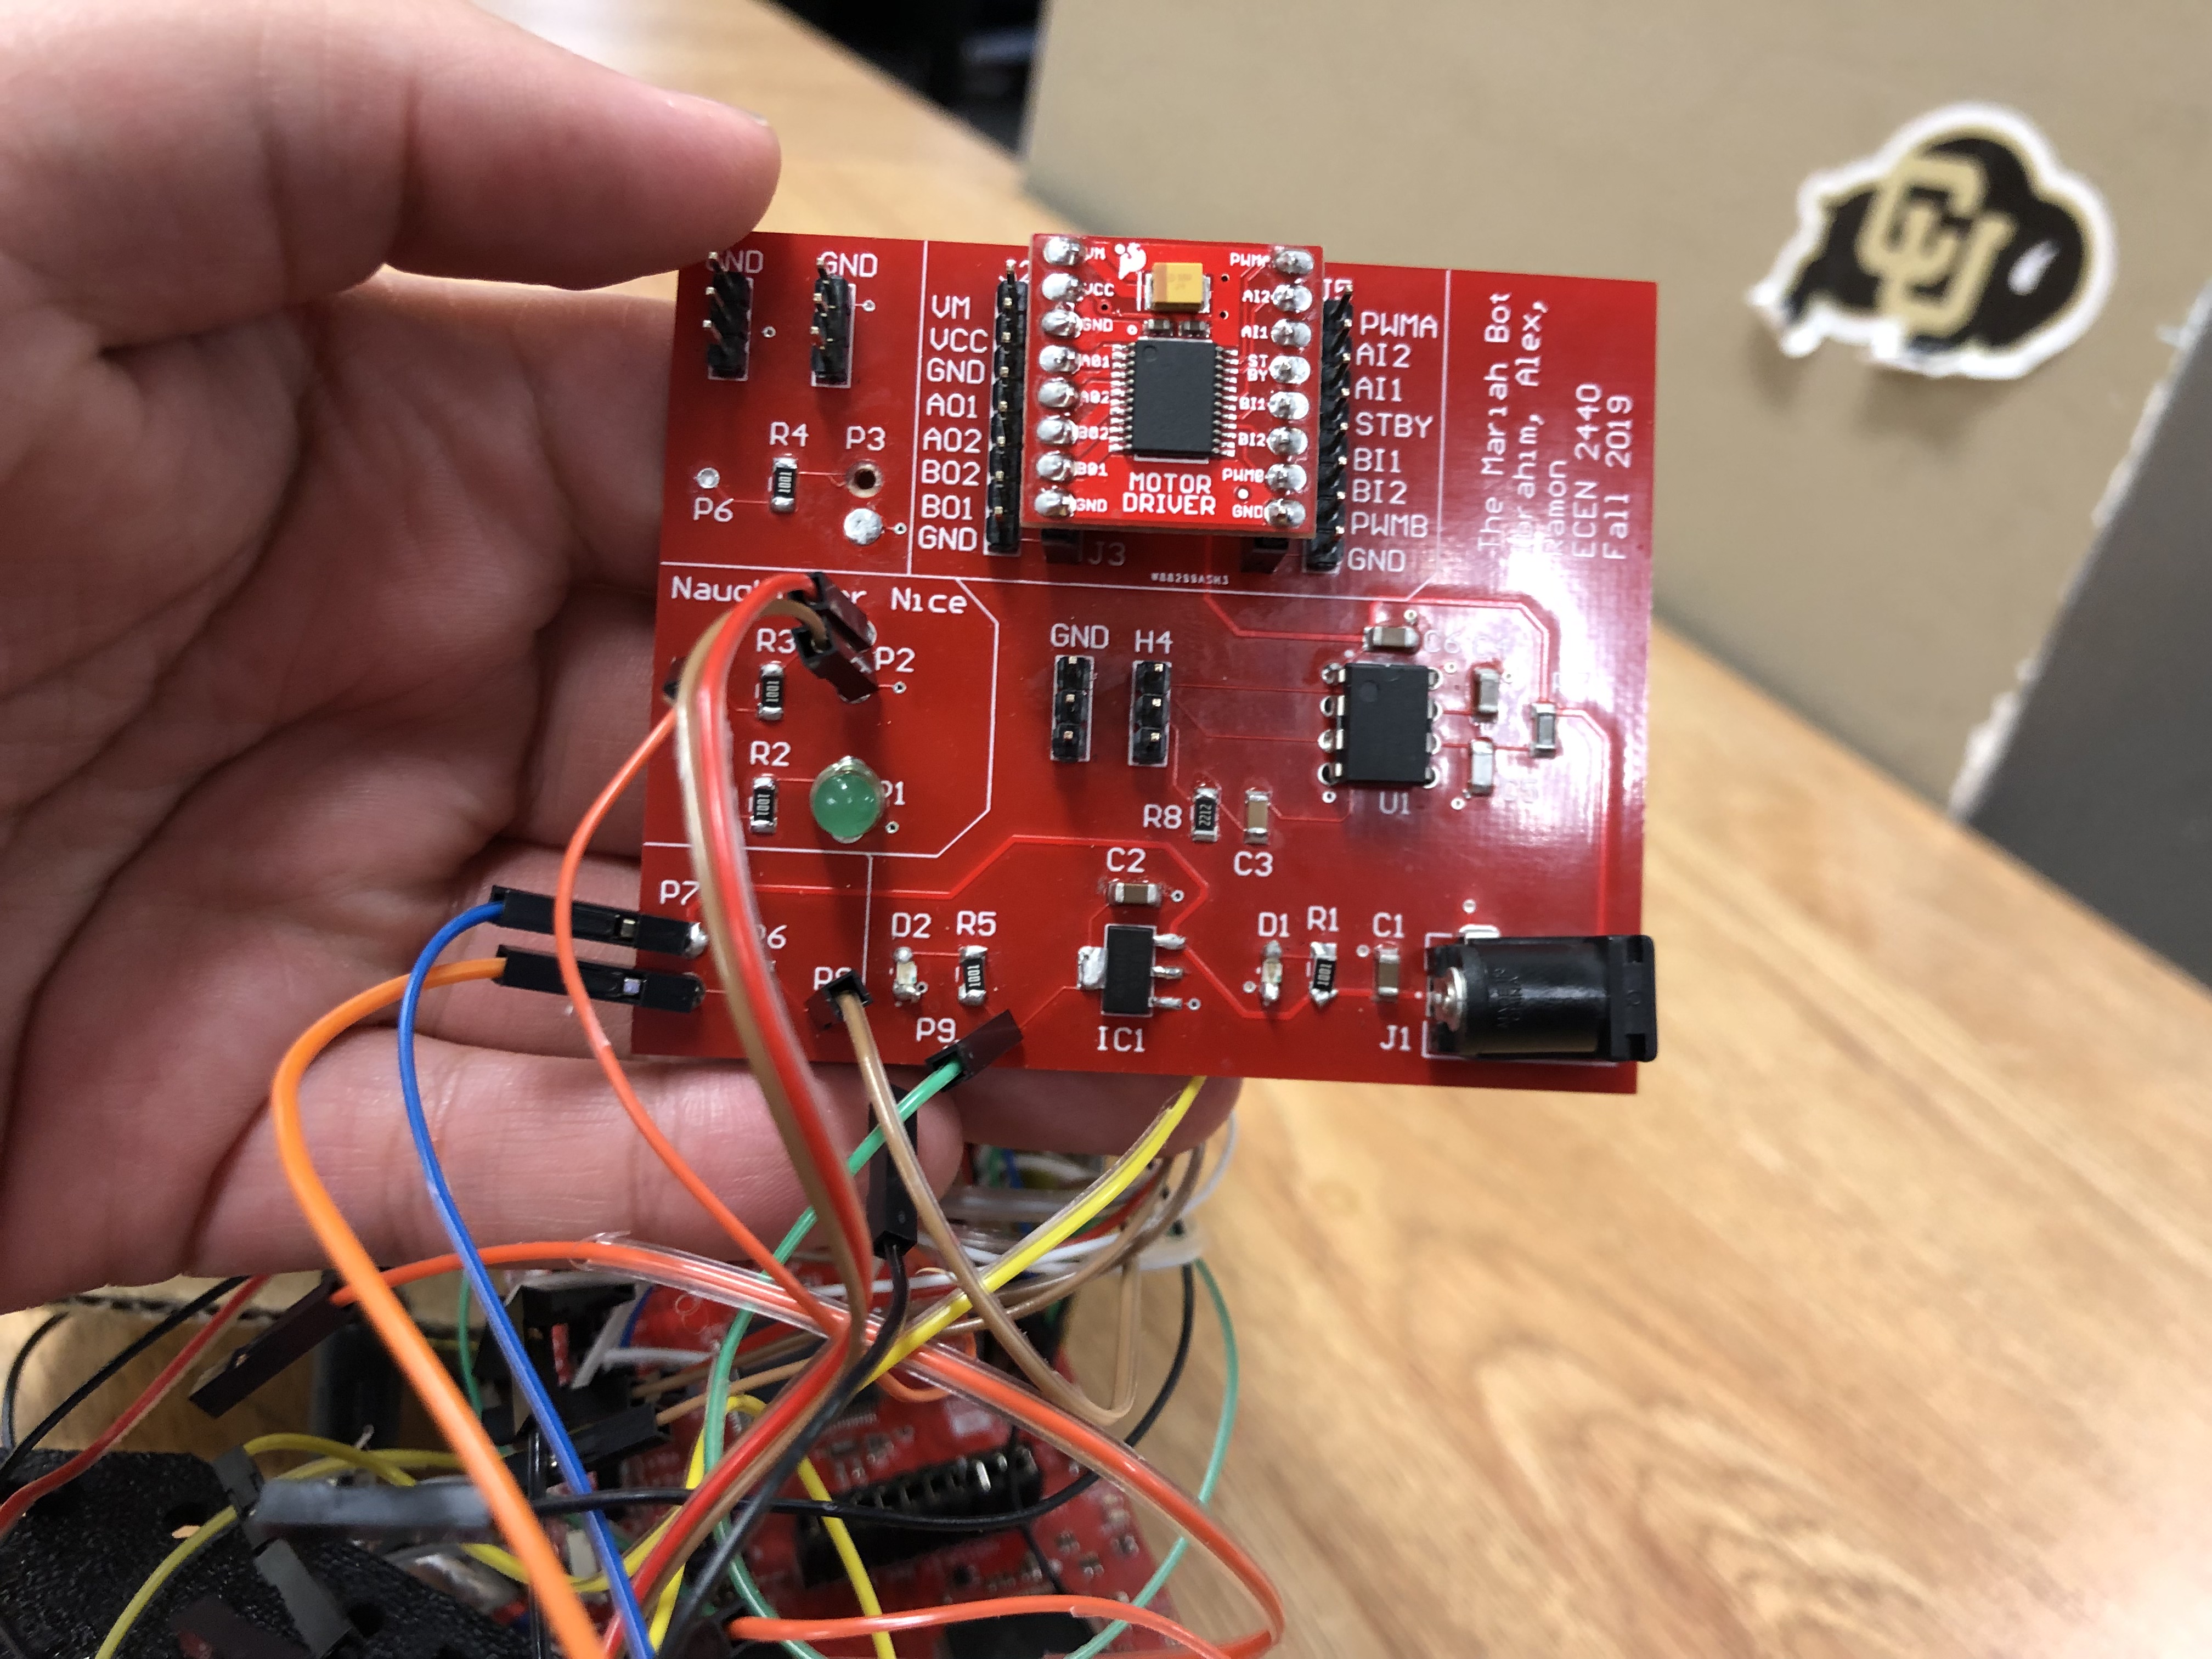
The custom PCB our team manufactured was intended to connected all the peripherals (LEDS, pressure sensor, MSPs, and power) in the project. The board was integrated into the project except for the equalizer circuit and the final populated board can be seen in the Attachments section.
MSP432
The project utilizes two different MSP432 development boards, one board is used to retrieve data from Bluetooth and move motors accordingly with commands received. The other MSP is used to control the Neopixel array that is on the front of the robot.
Motor Driver - TB6612FNG
The motor driver used in this project is the TB6612FNG breakout board from sparkfun electronics. We used this board as the motor driver IC is able to drive two DC motors at once. To integrate this IC with our MSP we needed to create PWM signal for each motor as well as 3 gpio signals to specify direction of wheel rotation and an enable pin. To control the direction of rotation there are two gpio pins on the MSP are toggled low and high to control voltage polarity on the motors. The table below shows the different combinations we can have for the two pins.
To move forward and backwards we had both wheels rotate clockwise and counterclockwise respectively. To turn right we had the right wheel rotate counterclockwise and the left wheel rotate clockwise. For a left turn we had the left wheel rotate counterclockwise and the right wheel rotate clockwise.
Force Sensitive Resistor
This component was used with our custom 3D printed drink holder to indicate the presence of holiday refreshment. To get this to work we used the on-board ADC of the MSP to constantly read the output from the pressure sensor. If the reading fell below a threshold voltage, indicating a glass isn't present, a warning light is turned on so user can get a visual warning. Once user puts a new glass in the light will turn off.
Debugging and Scope ChangesScopeChanges:
One slight deviation is instead of using the LED matrix to display an audio visualizer, we instead used it to flash the colors of festivity close to the beat of the song we used.
Debugging:
Most of the debugging for our project revolved around the UART and Bluetooth communication protocols we were using. To debug the UART driver we first just had the device and app echo a single character to one another. Once we were able to achieve this we changed the code so that eh user could send a command via there smart phone. We checked to make sure we got the right command by using a logic analyzer to see what was on the RX line of the Bluetooth module.A picture of this can be seen in the section were we talk about our Bluetooth module.
Finished Product:Below you will find pictures and videos of the final product.


_3u05Tpwasz.png?auto=compress%2Cformat&w=40&h=40&fit=fillmax&bg=fff&dpr=2)

Comments
Please log in or sign up to comment.